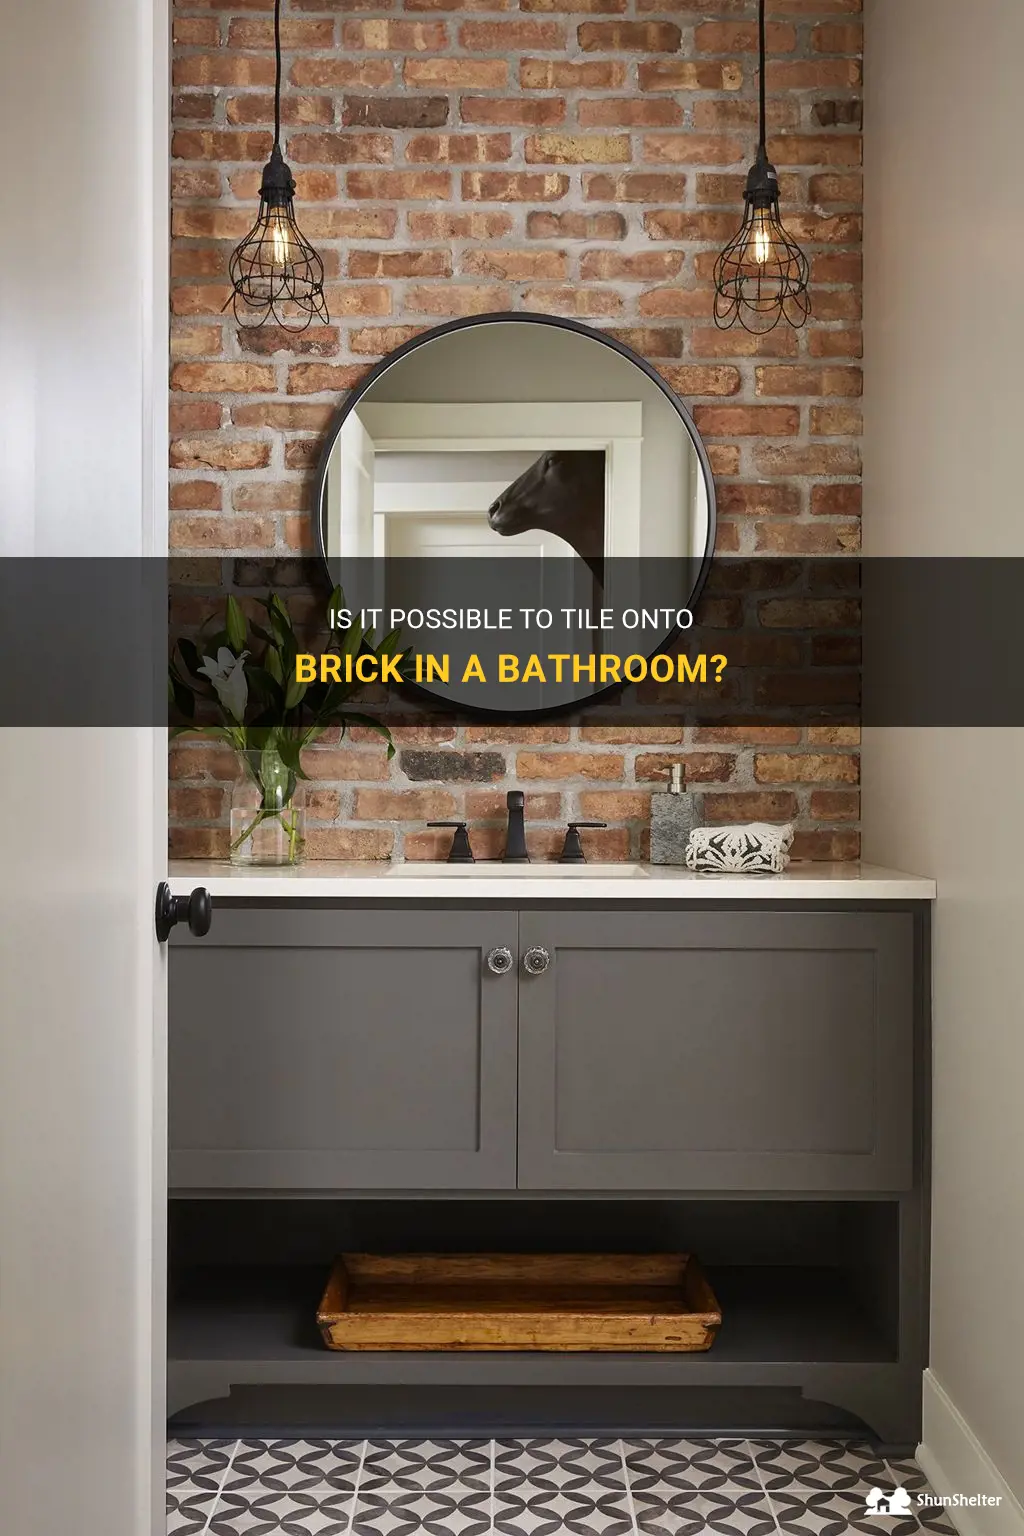
Are you tired of the plain and boring look of your bathroom? And are you wondering if it's possible to give it a much-needed facelift by tiling over the existing brick surface? Well, you're in luck! In this article, we will explore whether tiling onto brick in the bathroom is a viable option, and if so, how to go about doing it. So, get ready to transform your bathroom into a stylish and modern oasis with the help of some tiles!
| Characteristics | Values |
|---|---|
| Material Compatibility | Brick |
| Surface Compatibility | Smooth, Clean Brick Surface |
| Waterproof | Yes |
| Durability | High |
| Installation Difficulty | Moderate |
| Grout Options | Various options available |
| Design Flexibility | Limited |
| Maintenance | Low |
| Cost | Moderate to High |
| Time Required for Installation | Moderate to High |
| Special Tools/Equipment Required | Tile saw, Trowel, Grout Float, Tile Spacers |
What You'll Learn
- Is it possible to tile onto brick in a bathroom without removing the bricks?
- What steps are required to successfully tile onto brick in a bathroom?
- Can you use any type of tiles to cover brick in a bathroom?
- Are there any specific challenges or considerations when tiling onto brick in a bathroom?
- Are there any specific tools or materials needed for tiling onto brick in a bathroom?
![]()
Is it possible to tile onto brick in a bathroom without removing the bricks?

When it comes to renovating a bathroom, one of the most common questions homeowners have is whether they can tile directly onto brick without removing the existing bricks. While it is possible to tile onto brick, there are several factors to consider before undertaking such a project.
First and foremost, it is important to assess the condition of the existing brick. If the bricks are damaged, have crumbling mortar, or are not level, it is recommended to remove them before tiling. Tiling onto a compromised brick surface can lead to problems down the line, such as cracked tiles or uneven surfaces.
However, if the bricks are in good condition and provide a solid base, it is possible to tile directly onto them. Here is a step-by-step guide on how to tile onto brick in a bathroom without removing the bricks:
- Prepare the surface: Start by cleaning the brick surface thoroughly. Remove any dirt, dust, or loose debris from the bricks. Use a stiff brush or a pressure washer to ensure a clean surface.
- Apply a bonding agent: Before tiling, it is essential to apply a bonding agent to the brick surface. This will help the tile adhesive adhere properly to the bricks. Follow the manufacturer's instructions for applying the bonding agent and allow it to dry completely.
- Choose the appropriate tile adhesive: When tiling onto brick, it is crucial to use a tile adhesive that is suitable for both brick and the type of tile you will be using. Consult with a professional or the manufacturer to ensure you choose the right adhesive for your specific project.
- Apply the tile adhesive: Using a notched trowel, spread the tile adhesive onto the brick surface. Work in small sections to ensure the adhesive does not dry before you can place the tiles. Use the notched edge of the trowel to create ridges in the adhesive, which will help the tiles adhere properly.
- Place the tiles: Carefully place the tiles onto the adhesive, pressing them firmly into place. Use spacers between the tiles to ensure even spacing. Continue this process until all the tiles are in place.
- Grout the tiles: Once the tile adhesive has dried and the tiles are firmly in place, it is time to grout. Apply the grout using a grout float, making sure to fill in all the gaps between the tiles. Remove any excess grout with a damp sponge. Allow the grout to dry according to the manufacturer's instructions.
- Seal the grout: To protect the grout from moisture and stains, it is recommended to apply a grout sealer. This will help prolong the life of the grout and keep it looking clean and fresh.
It is important to keep in mind that tiling onto brick in a bathroom without removing the bricks may result in a thicker wall than before. This may affect the installation of fixtures and accessories, such as towel bars or shelves. Therefore, it is crucial to plan accordingly and make any necessary adjustments.
In conclusion, it is possible to tile onto brick in a bathroom without removing the bricks if the existing bricks are in good condition. However, it is crucial to assess the condition of the bricks and take appropriate steps to ensure a successful tiling project. Following the steps outlined above will help you achieve a beautiful and functional tiled bathroom while maintaining the integrity of the brick surface.
Transform Your Bathroom with a Freshly Painted Shower Floor
You may want to see also
![]()
What steps are required to successfully tile onto brick in a bathroom?
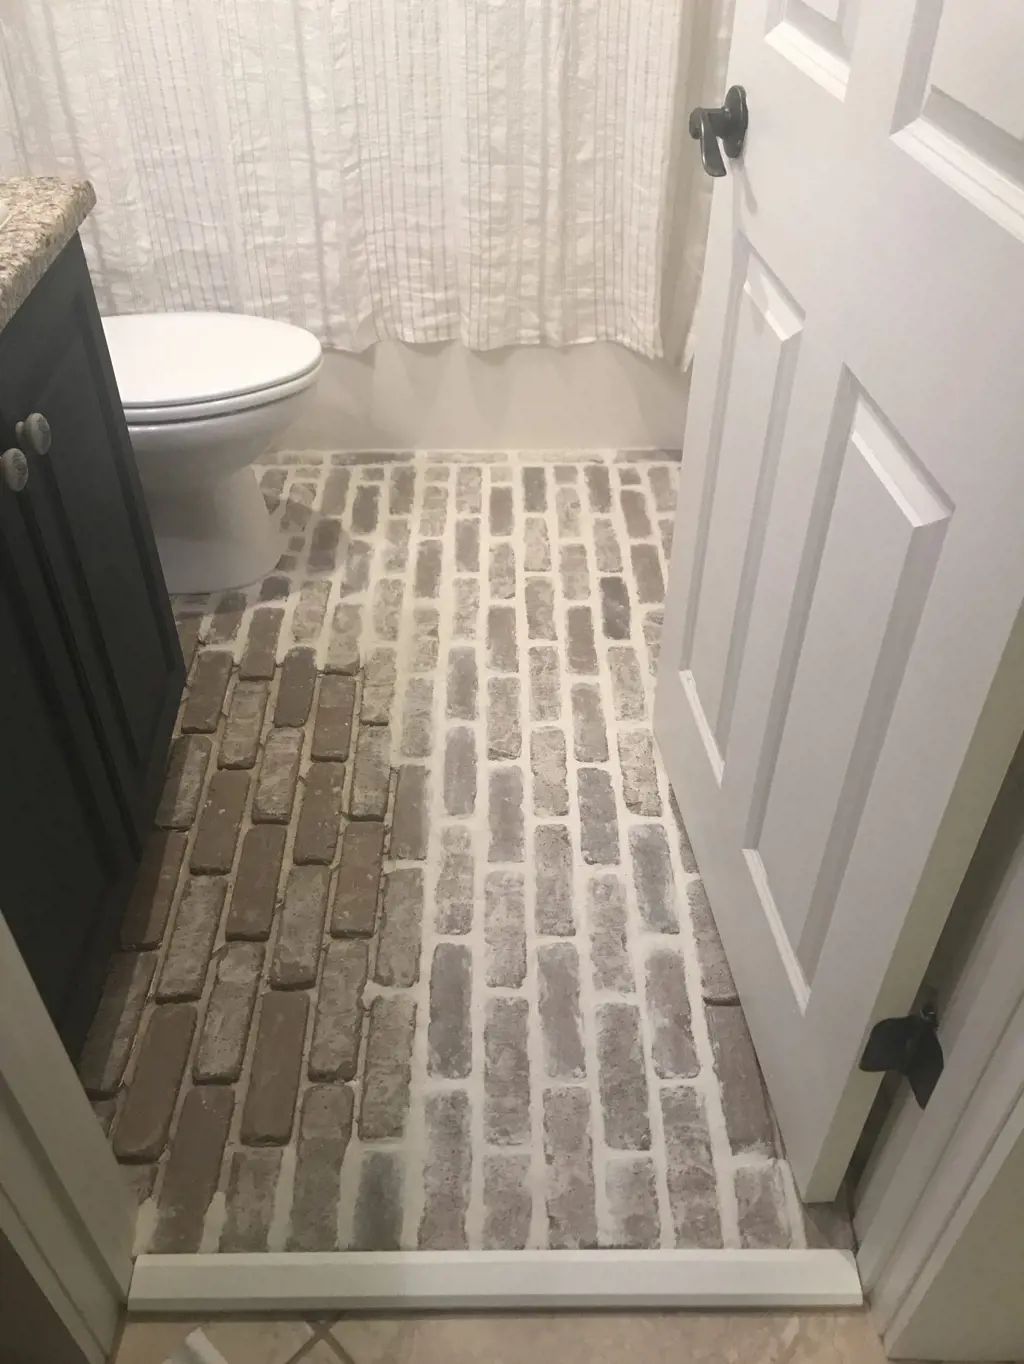
When it comes to tiling a bathroom, many homeowners opt for the classic and timeless look of brick tiles. Brick tiles can add a rustic and industrial charm to the space, while also being durable and easy to clean. However, tiling onto brick in a bathroom requires careful planning and preparation to ensure a successful installation. In this article, we will discuss the steps required to successfully tile onto brick in a bathroom.
Step 1: Prepare the surface
Before starting the tiling process, it is essential to prepare the brick surface. Start by cleaning the bricks thoroughly to remove any dirt, grease, or grime. You can use a brush, warm soapy water, and a sponge to scrub the bricks clean. If there are any loose or damaged bricks, it is recommended to replace them before tiling. Additionally, if the bricks have a rough or uneven texture, you may need to use a grinder or sander to smooth them out.
Step 2: Apply a primer
After preparing the brick surface, apply a primer to ensure proper adhesion between the bricks and the tile adhesive. Use a paintbrush or roller to apply the primer in a thin and even coat. Make sure to cover the entire surface of the bricks, including the grout lines. Allow the primer to dry completely before proceeding to the next step.
Step 3: Select the right adhesive
Choosing the right adhesive is crucial for a successful tiling job. For tiling onto brick, it is recommended to use a flexible and waterproof adhesive that is specifically designed for outdoor or heavy-duty applications. This type of adhesive will ensure proper adhesion and prevent any moisture-related issues in your bathroom.
Step 4: Lay out the tiles
Before applying the adhesive, it is important to lay out the tiles to determine the best placement and ensure a consistent pattern. Start by dry-fitting the tiles on the wall or floor without adhesive to see how they align with the existing structures and fixtures. Make any necessary adjustments to ensure a balanced and visually pleasing layout.
Step 5: Apply the adhesive
Once you have determined the layout of the tiles, it is time to apply the adhesive. Start by spreading a layer of adhesive onto a small section of the brick surface using a notched trowel. The size of the notches on the trowel will depend on the size and thickness of the tiles. Press the tiles firmly into the adhesive, making sure to leave a small gap between each tile for grout.
Step 6: Grout the tiles
After the adhesive has cured, it is time to grout the tiles. Mix the grout according to the package instructions and apply it to the gaps between the tiles using a grout float or a grout bag. Make sure to wipe off any excess grout with a damp sponge before it dries. This step will ensure a clean and polished look for your tiled brick wall or floor.
Step 7: Seal the tiles
To protect your newly tiled brick surface from moisture and stains, it is recommended to apply a sealant. A good quality tile sealer will create an invisible barrier that prevents water, dirt, and grime from penetrating the tiles. Apply the sealant according to the manufacturer's instructions and allow it to dry completely before using the bathroom.
In conclusion, tiling onto brick in a bathroom requires careful preparation and attention to detail. By following the steps outlined above, you can ensure a successful installation that will transform the look of your bathroom and provide long-lasting durability. Remember to always use proper safety precautions and consult with a professional if you are unsure about any aspect of the tiling process.
Exploring the Timeless Appeal of 4x4 Square Bathroom Tiles: Where to Find and Buy Them Today
You may want to see also
![]()
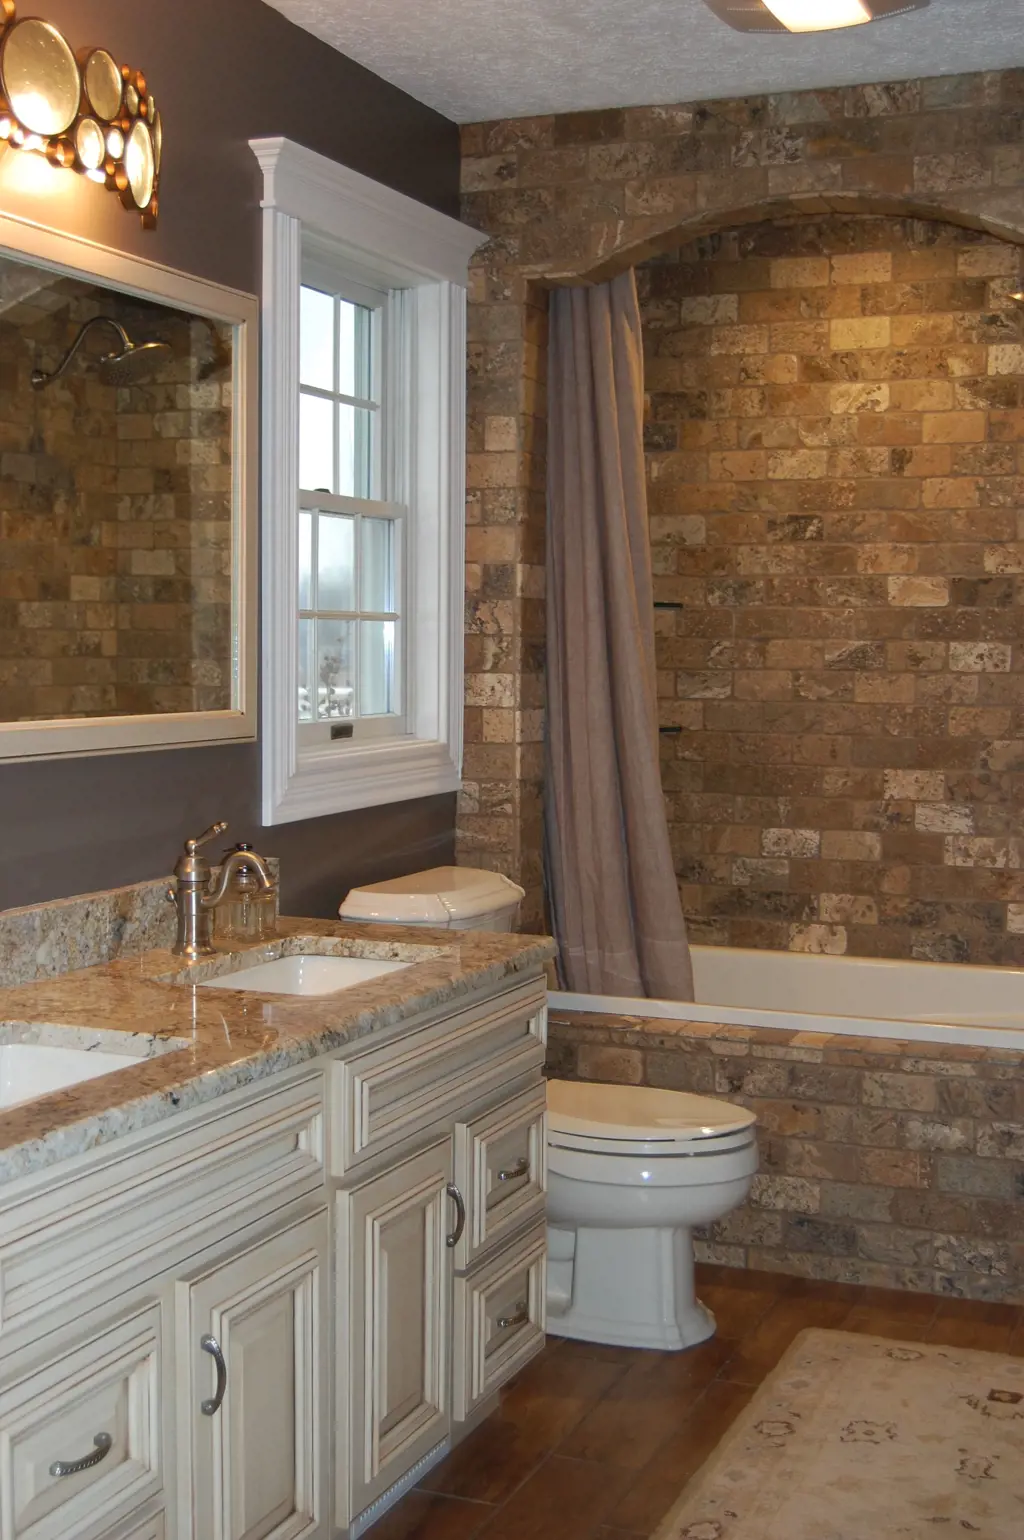
Can you use any type of tiles to cover brick in a bathroom?

When it comes to remodeling a bathroom, one of the common dilemmas homeowners face is how to deal with existing brick walls. While some embrace the rustic charm of exposed brick, others prefer a more polished and modern look. Fortunately, there are several options available for covering brick in a bathroom, including using different types of tiles.
Before we delve into the types of tiles that can be used to cover brick, it's important to understand the steps involved in the process. Here is a step-by-step guide to help you transform your brick walls:
- Prepare the surface: Before installing tiles, it's crucial to prepare the brick surface. Start by cleaning the walls thoroughly to remove any dirt, dust, or grease. If there are any loose or crumbling bricks, repair them using a suitable mortar or filler. Additionally, it's recommended to apply a layer of primer to ensure proper adhesion of the tile adhesive.
- Choose the right tiles: Not all tiles are suitable for covering brick walls in a bathroom. It's important to opt for tiles that are designed for wet areas, such as porcelain or ceramic tiles. These types of tiles are moisture-resistant and can withstand the humid conditions in a bathroom. Additionally, they are available in a wide range of colors, patterns, and textures, allowing you to achieve the desired aesthetic.
- Measure and cut the tiles: Measure the dimensions of the walls to determine the number of tiles required. It's advisable to purchase a few extra tiles to account for any breakage or mistakes during installation. Once you have the tiles, use a tile cutter or wet saw to cut them to the desired size and shape. Make sure to wear safety goggles and gloves when cutting tiles.
- Apply tile adhesive: Using a notched trowel, apply a layer of tile adhesive to the back of each tile. Make sure to spread the adhesive evenly to ensure proper bonding. Press the tiles firmly onto the wall, starting from one corner and working your way across. Use spacers to maintain even gaps between the tiles for grouting later.
- Grout the tiles: Once the adhesive has dried, it's time to grout the tiles. Mix the grout according to the manufacturer's instructions and use a grout float to spread it evenly between the tiles. Wipe off any excess grout using a damp sponge or cloth. Allow the grout to cure for the recommended time before applying a grout sealer for added protection.
Now that we have discussed the steps involved, let's explore the different types of tiles that can be used to cover brick in a bathroom:
- Porcelain tiles: Porcelain tiles are a popular choice for covering brick walls in a bathroom due to their durability and water resistance. They come in various finishes, such as matte, glossy, or textured, allowing you to achieve different looks. Additionally, porcelain tiles are easy to clean and maintain, making them ideal for a bathroom setting.
- Ceramic tiles: Similar to porcelain tiles, ceramic tiles are another suitable option for covering brick in a bathroom. They are available in a wide range of colors and designs, allowing you to customize the look of your bathroom. Ceramic tiles are also resistant to water, stains, and scratches, making them a practical choice.
- Glass tiles: If you're looking to add a touch of elegance to your bathroom, consider using glass tiles. Glass tiles can create a stunning visual effect, especially when used as an accent or feature wall. They reflect light, making the bathroom appear brighter and more spacious. However, it's important to note that glass tiles may require more maintenance to keep them clean and free of water spots.
In conclusion, when it comes to covering brick walls in a bathroom, it's essential to choose tiles that are suitable for wet areas. Porcelain, ceramic, and glass tiles are all viable options that offer durability, water resistance, and a variety of design options. With proper surface preparation and installation techniques, you can transform your brick walls into a stylish and functional part of your bathroom.
Exploring the Pros and Cons of Removing Medication Cabinets in Bathrooms
You may want to see also
![]()
Are there any specific challenges or considerations when tiling onto brick in a bathroom?
Tiling onto brick in a bathroom can be a unique and challenging task. While it can provide a rustic and charming look, there are some specific challenges and considerations that need to be taken into account. In this article, we will discuss the potential issues that may arise and provide step-by-step instructions on how to successfully tile onto brick in a bathroom.
One of the main challenges when tiling onto brick in a bathroom is the uneven surface. Unlike a smooth and flat wall, brick has an irregular texture that can make it difficult to achieve a level and even finish. This can cause issues with the waterproofing of the bathroom and may lead to water damage if not properly addressed.
Another consideration is the porosity of brick. Brick is a highly porous material, meaning it will absorb water easily. When tiling onto brick, it is essential to use a waterproof membrane to create a barrier between the brick and the tile adhesive. This will prevent water from seeping into the brick and causing damage.
Here is a step-by-step guide on how to tile onto brick in a bathroom:
- Prepare the surface: Start by cleaning the brick surface thoroughly to remove any dirt, dust, or loose debris. Use a wire brush to remove any loose or crumbling mortar between the bricks.
- Seal the brick: Apply a brick sealant to the surface to reduce the porosity of the brick. This will help prevent the absorption of water and create a surface that is more suitable for tiling.
- Apply a waterproof membrane: Use a waterproof membrane, such as a liquid or sheet membrane, to create a waterproof barrier between the brick and the tile adhesive. Follow the manufacturer's instructions for application.
- Choose the right adhesive: Select a high-quality tile adhesive that is suitable for the specific conditions in your bathroom. Make sure the adhesive is compatible with the waterproof membrane and brick surface.
- Apply the adhesive: Use a notched trowel to spread the tile adhesive onto the brick surface. Work in small sections to ensure the adhesive does not dry out before you can lay the tiles. Press the adhesive firmly onto the brick surface to create a strong bond.
- Lay the tiles: Place the tiles onto the adhesive, starting from the bottom and working your way up. Use tile spacers to ensure even spacing between the tiles. Press the tiles firmly into the adhesive to ensure a strong bond.
- Grout the tiles: Once the adhesive has dried, remove the tile spacers and apply grout between the tiles using a grout float. Wipe away any excess grout with a damp sponge, being careful not to remove too much grout from the joints.
- Seal the grout: After the grout has dried, apply a grout sealer to protect it from stains and water damage. Follow the manufacturer's instructions for application and allow the sealer to dry completely before using the shower or bath.
By following these steps and taking the necessary precautions, you can successfully tile onto brick in a bathroom and create a unique and visually appealing space. Remember to address the uneven surface of the brick, use a waterproof membrane, and choose the right adhesive and grout for the job. With proper installation and maintenance, your tiled brick wall will be a beautiful and functional addition to your bathroom.
How to Lighten Bathroom Tiles: Tips and Tricks
You may want to see also
![]()
Are there any specific tools or materials needed for tiling onto brick in a bathroom?

Tiling is a popular option for bathroom renovations, as it can completely transform the look and feel of the space. While many people choose to tile onto smooth surfaces like drywall or cement backer board, some may want to tile directly onto brick for a unique and rustic look. Tiling onto brick in a bathroom can be a bit more challenging than tiling onto other surfaces, but with the right tools and materials, it can be done effectively.
Before beginning the tiling process, it is important to gather all the necessary tools and materials:
- Safety equipment: Safety goggles, gloves, and a dust mask should be worn to protect yourself from any debris or dust that may be generated during the tiling process.
- Tile adhesive: A high-quality tile adhesive is essential for bonding the tiles to the brick surface. Choose a tile adhesive that is suitable for use on both walls and floors.
- Notched trowel: A notched trowel is used to spread the tile adhesive evenly onto the brick surface. The size of the notches on the trowel is usually determined by the size of the tiles being used.
- Tile spacers: Tile spacers are small plastic or rubber wedges that are used to create an even space between the tiles. They ensure that the tiles are properly aligned and provide a uniform grout line.
- Tile cutter or wet saw: Depending on the type of tiles being used, a tile cutter or wet saw may be necessary to cut the tiles to the desired size and shape. A wet saw is recommended for cutting through tougher materials like porcelain or natural stone.
- Grout: Grout is used to fill the gaps between the tiles and create a finished look. Choose a grout color that complements the tiles and the overall design of the bathroom.
- Grout float: A grout float is used to apply the grout to the tiled surface. It helps to push the grout into the gaps and remove any excess grout.
- Sponge and bucket of water: A sponge and bucket of water are used to clean off any excess grout from the tile surface. It is important to clean the tiles thoroughly before the grout dries to avoid staining or discoloration.
Once all the necessary tools and materials are gathered, the process of tiling onto brick can begin. Here is a step-by-step guide to help you through the process:
- Prepare the surface: Clean the brick surface thoroughly to remove any dirt, dust, or debris. If there are any loose or damaged bricks, repair or replace them before tiling.
- Apply the tile adhesive: Use a notched trowel to spread a layer of tile adhesive onto the brick surface. Work in small sections, as the adhesive tends to dry quickly.
- Place the tiles: Press the tiles firmly into the adhesive, using the tile spacers to create an even gap between each tile. Continue this process until all the tiles are in place.
- Cut the tiles: Using a tile cutter or wet saw, cut the tiles to fit around obstacles like pipes or corners. Take accurate measurements and make precise cuts to ensure a professional finish.
- Apply the grout: Once the adhesive has dried, remove the tile spacers and use a grout float to apply the grout to the tiled surface. Work the grout into the gaps, making sure to fill them completely.
- Clean the tiles: Using a damp sponge, clean off any excess grout from the tile surface. Rinse the sponge frequently to avoid spreading grout residue onto the tiles.
- Let it dry: Allow the grout to dry completely before using the bathroom or applying any sealant. Follow the manufacturer's instructions for drying time.
Tiling onto brick in a bathroom can create a stunning and unique look. While it may require some additional tools and materials compared to tiling onto other surfaces, the end result can be well worth the extra effort. By following the proper steps and using the right tools, you can achieve a professional finish that will last for years to come.
Is It Appropriate to Read the Quran in the Bathroom?
You may want to see also
Frequently asked questions
Yes, it is possible to tile onto brick in a bathroom. However, there are a few things to consider before doing so. First, make sure the brick surface is clean and free of any loose debris. It may be necessary to clean the brick with a mild detergent and water before tiling. Additionally, brick is a porous material, so it is important to use a suitable adhesive and grout that is designed for use on brick. This will ensure that the tiles adhere properly and that the grout does not crack or separate over time.
Yes, it is essential to prepare the brick surface before tiling. This involves thoroughly cleaning the brick to remove any dirt, dust, or loose mortar. It may also be necessary to sand down any rough or uneven areas of the brick to create a smooth and even surface for the tiles to adhere to. Additionally, if the brick is an exterior brick or is prone to moisture, it is recommended to apply a moisture barrier or sealant to prevent any water damage to the tiles or the underlying brick.
While it is possible to tile directly onto brick, using a backer board is generally recommended. A backer board, such as cement board or a waterproof membrane, provides a stable and flat surface for the tiles to adhere to. It also helps to prevent moisture from seeping into the brick and causing damage over time. Additionally, a backer board can help to strengthen the overall tile installation and prevent any cracking or shifting of the tiles. Be sure to follow the manufacturer's instructions for the backer board and use the appropriate adhesive and grout for the specific type of tiles you are using.