Are you tired of poor Wi-Fi signal and slow internet speeds in your basement? Do you want to set up a reliable ethernet connection for better connectivity and faster downloads? Look no further! In this guide, we'll explore various methods and techniques to help you get a solid ethernet connection in your basement, ensuring your online experience is seamless and efficient. Say goodbye to buffering videos and intermittent connection issues – let's dive into the world of basement ethernet!
| Characteristics | Values |
|---|---|
| Internet Service | Cable or DSL |
| Modem | Required |
| Ethernet Cable | CAT5e or CAT6 |
| Ethernet Jack | Required |
| Ethernet Switch | Optional |
| Ethernet Wall Plate | Optional |
| Ethernet Coupler | Optional |
| Ethernet Extender | Optional |
| Power Outlet | Required |
| Ethernet Surge Protector | Optional |
What You'll Learn
![]()
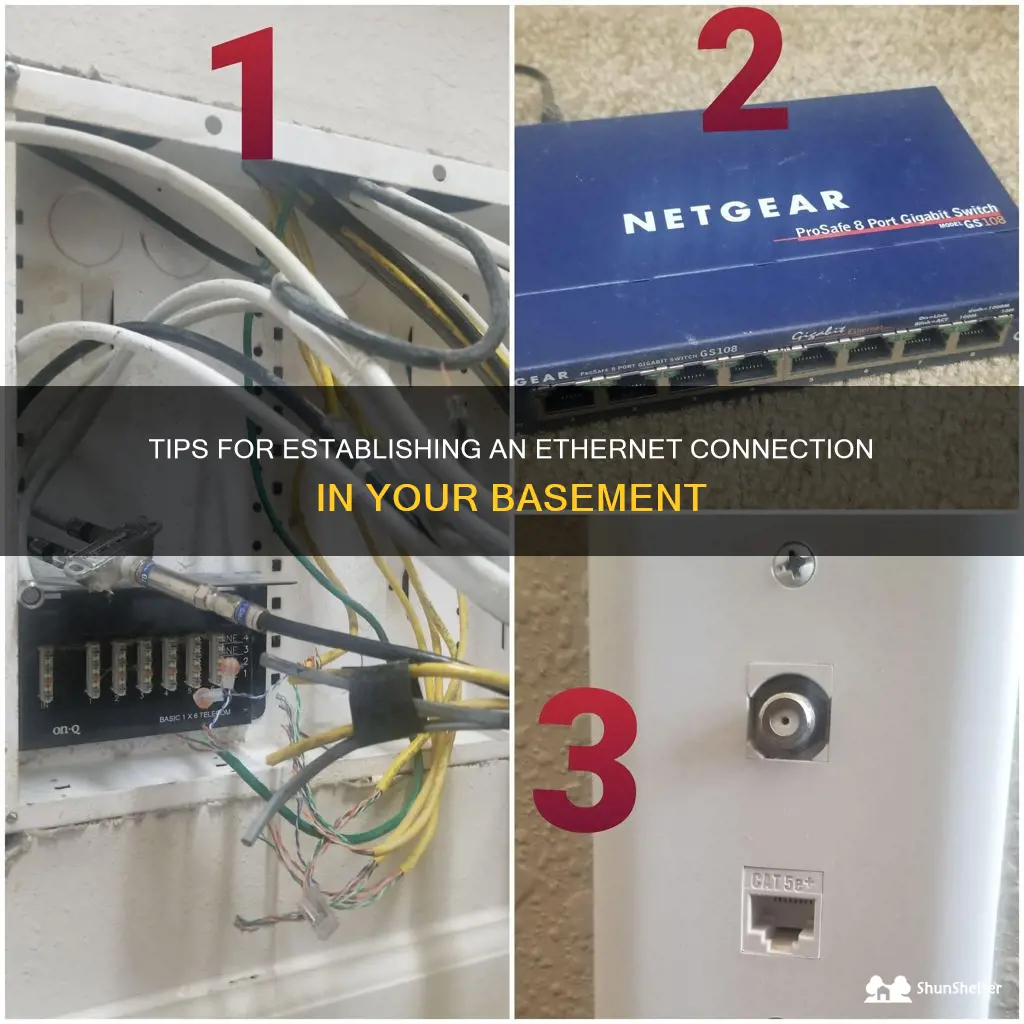
Introduction to Ethernet Connections in Basements
If you have an office or living space in your basement, having a reliable Ethernet connection is essential for a fast and stable internet connection. While Wi-Fi is convenient, it may not always provide the same level of speed and reliability as a direct Ethernet connection. In this article, we will guide you on how to get an Ethernet connection in your basement.
- Assess the existing infrastructure: Start by evaluating the current setup of your home network. Identify where your modem and router are located. Typically, these devices are placed near the main living areas of a home. If your router is located on the ground or upper floor, it may be challenging to get a direct connection in the basement.
- Check for existing Ethernet connections: Look for Ethernet ports or jacks in your basement. Some homes may already have pre-installed Ethernet wiring in place, especially if it is a newer construction. If you find Ethernet ports, you can simply connect your computer or other devices to these ports using Ethernet cables. Ensure the Ethernet jacks are active and connected to your router.
- Run Ethernet cables through existing conduits: If you don't have Ethernet ports in your basement, you may need to run new cables. Check if there are any existing conduits, cable runs, or pipes that connect your basement to the main living area. Some examples might be utility chases, ventilation ducts, or unfinished areas. You can use these existing pathways to run Ethernet cables. Be careful to avoid electrical wires or other potential hazards.
- Use powerline adapters: Powerline adapters are devices that allow you to use your home's existing electrical wiring to transmit Ethernet signals. They work by plugging one adapter into an electrical outlet near your router and connecting it to the router using an Ethernet cable. Then, you can plug another adapter into an outlet in the basement and connect your device to it via an Ethernet cable. This solution is ideal if running Ethernet cables through conduits is not feasible or practical.
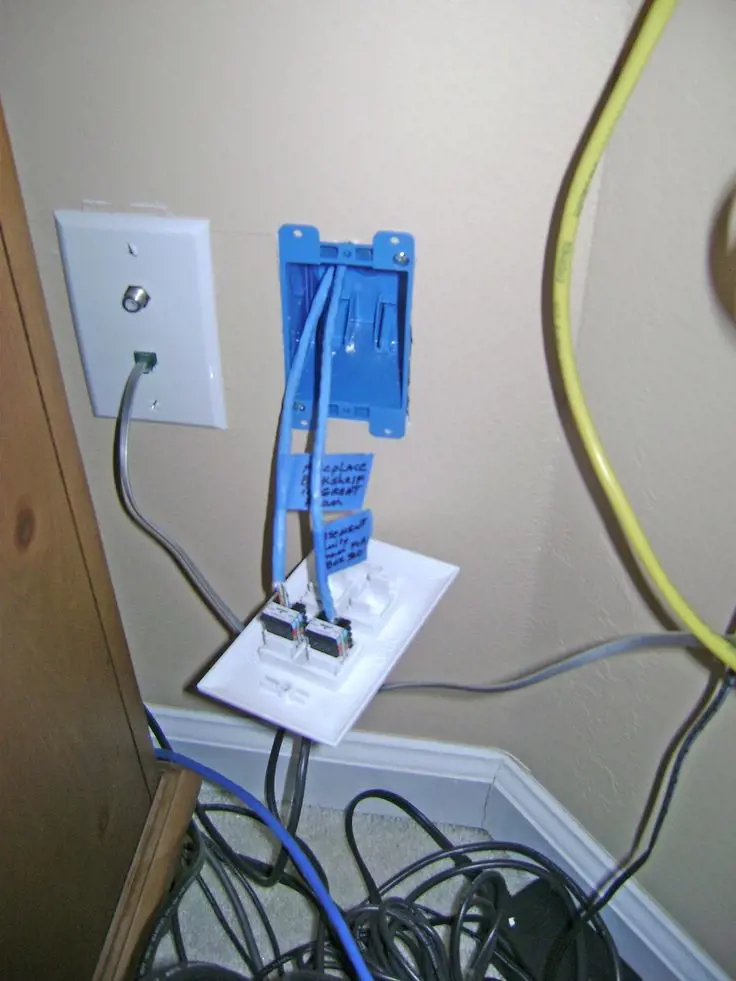
- Install Ethernet jacks in the basement: If you are comfortable with basic DIY tasks and have access to the necessary tools, you can install Ethernet jacks in the basement yourself. This involves running Ethernet cables along the baseboards or through the walls and terminating them with RJ45 jacks. You can then connect your devices directly to these jacks. When doing this, make sure to plan the cable routes carefully and use appropriate tools to cut holes for the jacks.
- Consider a professional installation: If you are not comfortable with DIY tasks or if your basement layout is complex, you may want to hire a professional installer. A professional will have the expertise and tools to run Ethernet cables seamlessly, ensuring a clean and reliable connection. They can also help with cable management, ensuring cables are neatly arranged and hidden for a cleaner look.
In conclusion, getting an Ethernet connection in your basement may require some planning and work, but it is certainly possible. Assess your existing infrastructure, explore existing conduits or powerline adapters, install Ethernet jacks, or seek professional help when needed. With a direct Ethernet connection, you can enjoy a faster and more stable internet connection in your basement.
The Benefits of Using Fiberglass Insulation on Basement Walls
You may want to see also
![]()
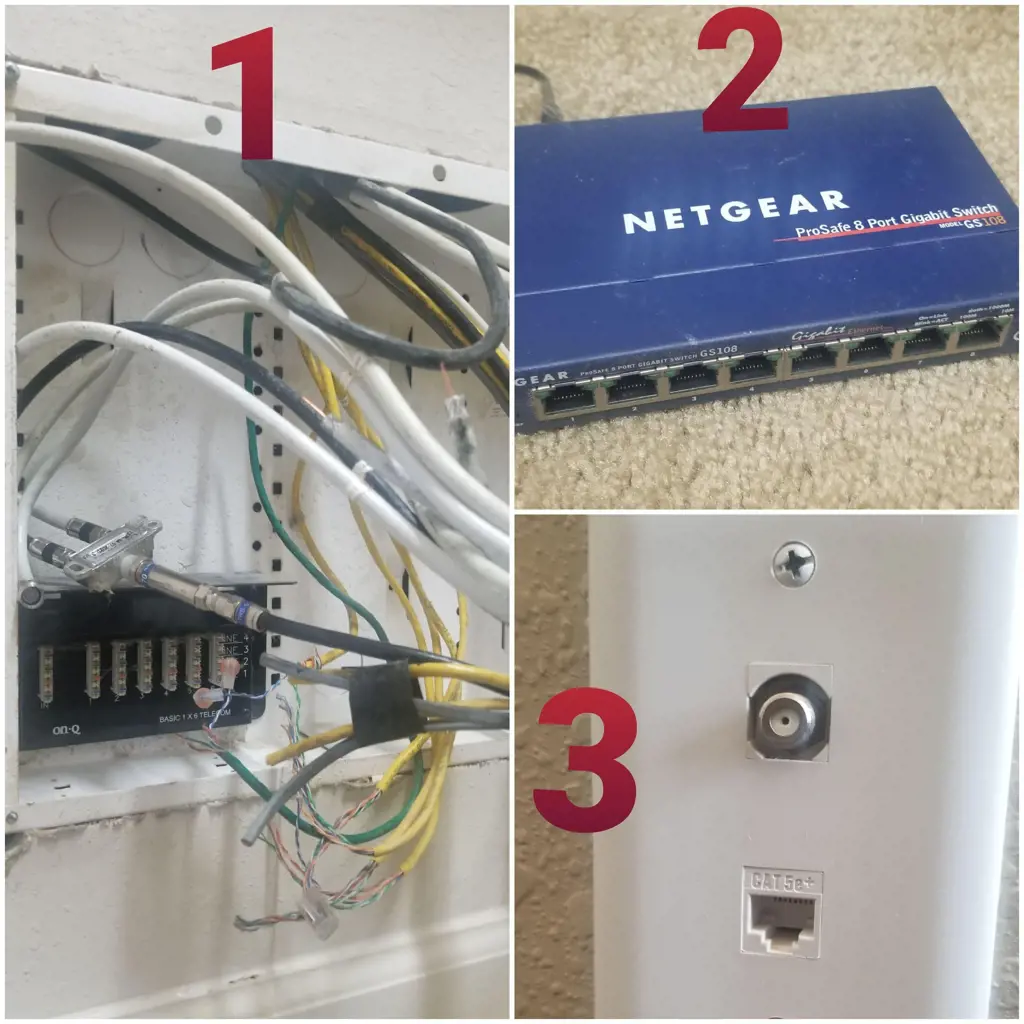
Tools and Materials Needed for Setting Up Ethernet Connection
Setting up an Ethernet connection in your basement can greatly improve your internet speed and reliability, especially if you use your basement as a home office or entertainment area. To set up an Ethernet connection in your basement, you will need a few tools and materials. Here's a list of what you'll need:
- Ethernet Cable: The most important item you'll need is an Ethernet cable. Ethernet cables come in different categories, such as Cat5e, Cat6, and Cat7. Each category has its own speed and performance capabilities, so choose one that suits your needs. Measure the length required to connect your basement device to the modem/router and buy a cable of appropriate length.
- Ethernet Switch: If you have multiple devices in your basement that require an Ethernet connection, you'll need an Ethernet switch. An Ethernet switch acts as a hub, allowing you to connect multiple Ethernet cables to it and distribute the internet connection to all the connected devices. Make sure the switch has enough ports for all your devices.
- Cable Clips or Cable Trays: To keep your Ethernet cable organized and prevent it from becoming a tripping hazard, you'll need cable clips or cable trays. Cable clips can be attached to the walls or baseboards to secure and route the Ethernet cable, while cable trays can be mounted on the ceiling or walls to hold the cable.
- Tools: You'll need a few basic tools to set up the Ethernet connection. These include a wire cutter/stripper to cut and strip the Ethernet cable, a punch-down tool to terminate the cables into the Ethernet jacks or keystones, and a screwdriver to mount the cable clips, switch, and other hardware.
- Ethernet Jacks or Keystones: If you want to terminate the Ethernet cables in a wall or baseboard, you'll need Ethernet jacks or keystones. The Ethernet cables can be terminated into the jacks or keystones using the punch-down tool. Once terminated, the jacks or keystones can be mounted on the wall or baseboard for easy access.
- Router or Modem: You'll need a router or modem with an available Ethernet port to connect the Ethernet cable. The router or modem should be placed near the Ethernet switch if you're using one.
- Power Outlet(s): Ensure that there is a power outlet available near the router, switch, and any other devices that require power. This will allow you to power up and connect all the necessary equipment.
Now that you have all the necessary tools and materials, you can start setting up your Ethernet connection in the basement. Begin by connecting one end of the Ethernet cable to the Ethernet port on the router or modem and the other end to the Ethernet switch. If you're using Ethernet jacks or keystones, terminate the cables into the jacks or keystones using the punch-down tool and mount them on the wall or baseboard.
Next, connect your devices to the Ethernet switch using additional Ethernet cables. If you're using cable clips or trays, route the Ethernet cables along the designated path and secure them in place using the clips or trays.
Finally, power up all the connected devices, including the router, switch, and the devices in the basement. Test the connection to ensure that all the devices are properly connected and you have a stable Ethernet connection in your basement.
By following these steps and using the right tools and materials, you can easily set up an Ethernet connection in your basement and enjoy faster and more reliable internet connectivity.
How Centipedes Find Their Way into Basements
You may want to see also
![]()
Step-by-Step Guide for Running Ethernet Cable to the Basement
If you're looking to get an Ethernet connection in your basement, you're in the right place. Running an Ethernet cable to your basement is a relatively straightforward process that can provide you with a reliable and fast network connection. In this step-by-step guide, we'll walk you through the process of running an Ethernet cable to your basement.
Step 1: Check your existing network setup
Before running an Ethernet cable to your basement, it's essential to understand your existing network setup. Identify the location of your modem and router, as well as any existing Ethernet cables in your home. This information will help you plan the most efficient route for your new Ethernet cable.
Step 2: Determine the best route for the Ethernet cable
Carefully consider the route you will take to run the Ethernet cable to your basement. Ideally, you'll want to take the most direct path while avoiding any potential obstacles such as walls, floors, or furniture. If possible, try to route the cable through existing conduits or along the same path as your existing cable or telephone lines.
Step 3: Gather the necessary tools and materials
To run an Ethernet cable to your basement, you'll need a few tools and materials, including:
- Ethernet cable (preferably Cat6 or Cat6a for optimal performance)
- Cable staples or clips to secure the cable along the walls or baseboards
- A cable tester to ensure proper connectivity and signal strength
- A cable stripper or cutter to prepare the cable ends
- A drill with a long drill bit (if drilling through walls or floors)
- A fish tape or wire coat hanger to help guide the cable through tight spaces
Step 4: Prepare your basement for the Ethernet cable
Before running the Ethernet cable, it's essential to prepare your basement for the installation. Clear any obstacles or debris that might hinder the installation process. Also, make sure to plan the location for where the cable will enter the basement, such as through a hole in the wall or floor near your modem or router.
Step 5: Run the Ethernet cable to your basement
Using your chosen route, carefully run the Ethernet cable from the location of your modem or router to your basement. If you need to drill holes through walls or floors, make sure to do so safely and without damaging any existing electrical wires or pipes. Use cable staples or clips to secure the cable along the walls or baseboards, ensuring a clean and tidy installation. If necessary, use a fish tape or wire coat hanger to guide the cable through tight spaces or conduits.
Step 6: Terminate the Ethernet cable
Once you have run the Ethernet cable to your basement, it's time to terminate the cable. Use a cable stripper or cutter to remove the outer jacket of the cable, and then carefully separate and strip the individual wire pairs. Follow the wiring scheme for the Ethernet connection you are using (T568A or T568B) to properly terminate the cable ends. Use a cable tester to verify that the connectivity and signal strength of the terminated Ethernet cable are within the acceptable range.
Step 7: Connect the Ethernet cable to your network
With the Ethernet cable properly terminated, it's time to connect it to your network. Plug one end of the Ethernet cable into an available Ethernet port on your modem or router and the other end into an Ethernet port on your computer or other network device. Ensure that the connection is secure and snug.
Step 8: Test the Ethernet connection
After connecting the Ethernet cable, it's essential to test the connection to ensure it is working correctly. Check the network status on your computer or device to verify that it has successfully connected to your network. Additionally, you can perform a speed test to confirm that you are getting the expected network speed and performance.
By following this step-by-step guide, you can successfully run an Ethernet cable to your basement and enjoy a reliable and fast network connection. Remember to plan your route, gather the necessary tools and materials, and properly terminate the cable for optimal performance.
Effective Ways to Eliminate Basement Centipedes
You may want to see also
![]()
Tips and Considerations for Optimal Basement Ethernet Connection

Having a reliable and fast internet connection is crucial in today's digital age. If you have a basement and want to establish an Ethernet connection in that area, there are a few tips and considerations to keep in mind.
- Assess the Existing Infrastructure: Before you begin, it's important to assess the existing infrastructure in your basement. Check for existing Ethernet ports or cables that may already be installed. If there are none, you may need to consider other options such as running new cables or using powerline adapters.
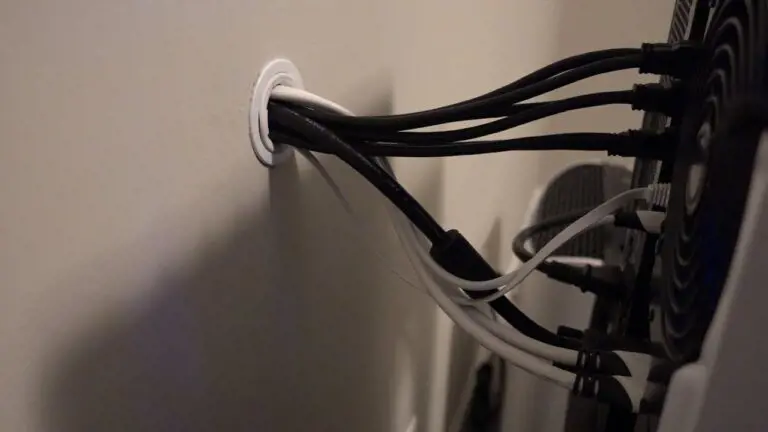
- Run Ethernet Cables: Running Ethernet cables is the most reliable and direct way to establish a basement Ethernet connection. If your basement is unfinished, you can easily run cables along the walls or through the ceiling. However, if your basement is finished, running cables may require drilling holes or going through conduits. Make sure to plan the cable routes beforehand and properly conceal the cables for a clean installation.
- Consider Powerline Adapters: Powerline adapters are an alternative option to running cables. These adapters utilize your home's electrical wiring to transmit Ethernet signals from one room to another. They are easy to set up and can provide a stable and fast connection. However, the performance of powerline adapters can be influenced by various factors such as the quality of your electrical wiring and the distance between the adapters. It's recommended to do some research and choose powerline adapters from reputable brands for optimal results.
- Use a Wireless Extender: If running cables or using powerline adapters is not feasible, you can consider using a wireless extender or repeater to extend your Wi-Fi signal to the basement. These devices receive your existing Wi-Fi signal and amplify it to reach areas with weak coverage. While wireless extenders can work well in some cases, they can also introduce some latency or reduced signal strength compared to a direct Ethernet connection.
- Upgrade Your Router: If you're experiencing slow or unreliable internet in the basement, upgrading your router may be a solution. Newer routers often have better range and performance, allowing you to achieve a more stable connection in the basement. Additionally, routers with multiple external antennas can improve signal strength and coverage. Consider purchasing a router that supports the latest Wi-Fi standards, such as Wi-Fi 6, for the best performance.
- Consider a Mesh Wi-Fi System: A mesh Wi-Fi system is another option to consider for achieving a reliable basement connection. These systems consist of multiple nodes that work together to create a seamless Wi-Fi network throughout your home. By strategically placing the nodes, you can ensure that your basement receives a strong and stable Wi-Fi signal. Mesh Wi-Fi systems are particularly useful for larger homes or areas with multiple floors.
- Test and Optimize Signal Strength: Once you have set up your basement Ethernet connection using any of the methods mentioned above, it's important to test and optimize the signal strength. Use speed testing tools or perform file transfers to ensure that you are getting the expected speed and performance. If the signal strength is not satisfactory, you may need to adjust the placement of your router, wireless extender, or mesh Wi-Fi nodes to improve coverage.
In conclusion, establishing a reliable Ethernet connection in your basement can greatly enhance your internet experience. Assess the existing infrastructure, run Ethernet cables if possible, or consider alternatives such as powerline adapters or wireless extenders. Upgrading your router or using a mesh Wi-Fi system can also improve the signal strength and coverage. By following these tips and considerations, you can ensure an optimal basement Ethernet connection.
Exploring the Secrets of the Repconn Basement: A Guide to Gaining Access
You may want to see also
Frequently asked questions
To get an Ethernet connection in your basement, you can either run an Ethernet cable from your router to the basement or use a powerline Ethernet adapter to extend your network through your electrical wiring.
Running an Ethernet cable to your basement can be a bit challenging, especially if you don't have any existing network wiring. You may need to drill holes and run cables through walls or ceilings, which can require some DIY skills or the help of a professional.
A powerline Ethernet adapter is a device that allows you to extend your network using your home's electrical wiring. It consists of two adapters: one connects to your router and plugs into a wall outlet, while the other adapter plugs into an outlet in your basement, providing an Ethernet port for your devices. The data is transmitted through the electrical wiring and allows for a wired connection in areas where running Ethernet cables is not feasible.