
Are you looking to give your bathroom a stylish and modern upgrade? Installing a porcelain undermount bathroom sink is a great way to achieve that sleek, seamless look. Not only does it give your bathroom an elegant touch, but it also provides a functional and space-saving solution. If you're ready to take on a DIY project and enhance the aesthetics of your bathroom, follow this guide on how to install a porcelain undermount bathroom sink. Get ready to transform your space into a luxurious oasis!
| Characteristics | Values |
|---|---|
| Sink Material | Porcelain |
| Sink Type | Undermount |
| Installation | Professional installation required |
| Cutout Size | Varies depending on the sink |
| Mounting Method | Clamps or adhesive |
| Faucet Holes | None or predrilled |
| Overflow | Some sinks have overflow, others do not |
| Drain Size | Standard 1.25 or 1.5 inches |
| Sink Shape | Rectangular or oval |
| Sink Depth | Varies depending on the model |
| Sink Dimensions | Varies depending on the model |
| Compatibility | Compatible with most bathroom countertops |
| Maintenance | Easy to clean and maintain |
| Durability | Resistant to chips, cracks, and stains |
| Style Options | Various styles and designs available |
| Cost | Varies depending on the brand and model |
What You'll Learn
- What tools do I need to install a porcelain undermount bathroom sink?
- Are there any specific steps I should follow when installing a porcelain undermount bathroom sink?
- How do I properly measure the cutout for the sink in my bathroom countertop?
- What type of adhesive or caulk should I use to secure the porcelain undermount sink to the countertop?
- Are there any maintenance tips or precautions I should be aware of after installing a porcelain undermount bathroom sink?
![]()
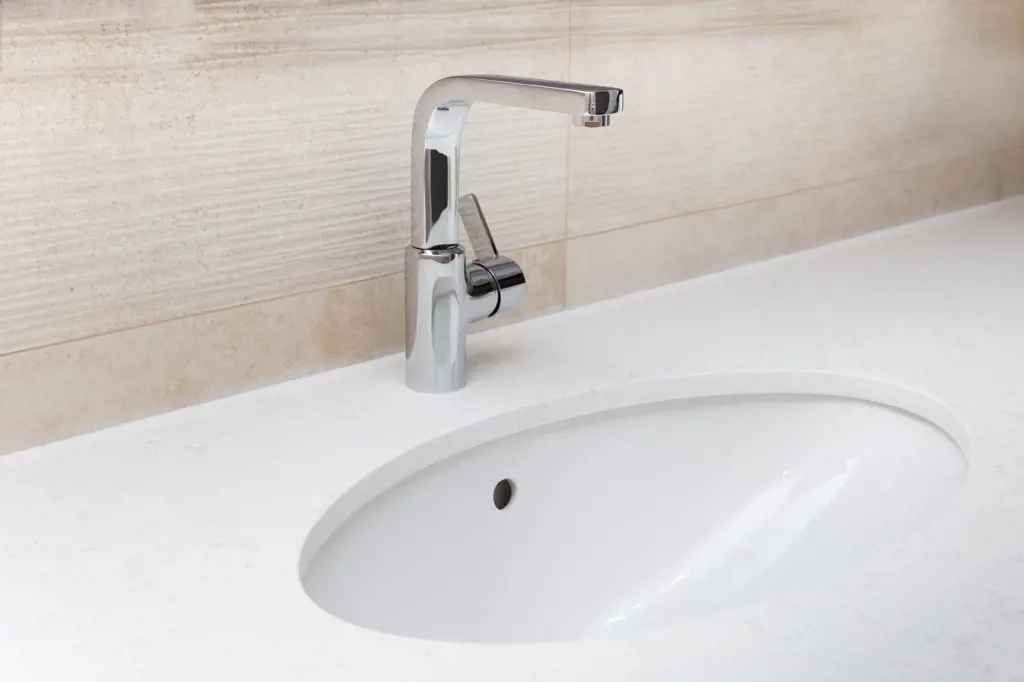
What tools do I need to install a porcelain undermount bathroom sink?

Installing a porcelain undermount bathroom sink can be a great way to give your bathroom a modern and streamlined look. However, before diving into the installation process, it's important to have the right tools on hand. Here are the tools you'll need to install a porcelain undermount bathroom sink:
- Safety goggles and gloves - Safety should always be the top priority when working with tools. Wearing goggles and gloves will protect your eyes and hands from any potential accidents.
- Adjustable wrench or pliers - A wrench or pliers will be needed to disconnect the old plumbing connections and connect the new ones. Choose an adjustable tool that will fit different sizes.
- Screwdriver - You'll need a screwdriver to remove any screws that are holding the old sink in place. It may also be needed to tighten or adjust screws during the installation process.
- Putty knife - A putty knife will come in handy when removing any old caulk or adhesive from the countertop. It can also be used to spread new caulk during the installation.
- Caulk gun - A caulk gun is needed to apply a bead of caulk around the edges of the sink. This will help create a watertight seal between the sink and the countertop.
- Level - A level is crucial to ensure that the sink is installed properly and remains level. This will prevent any issues with draining and water pooling.
- Measuring tape - You'll need a measuring tape to accurately measure the size of the sink and ensure it will fit in the countertop opening.
- Pipe wrench - A pipe wrench will be necessary to tighten or loosen any plumbing connections. It provides a better grip and more torque than pliers.
- Bucket or container - It's always a good idea to have a container nearby to catch any water that may spill during the installation process. This will help minimize mess and prevent damage to your bathroom floor.
Now that you have all the necessary tools, it's time to start the installation process. Here is a step-by-step guide to help you install a porcelain undermount bathroom sink:
Step 1: Turn off the water supply - Before starting any plumbing work, make sure to turn off the water supply to the bathroom. This will prevent any water from flowing while you work.
Step 2: Disconnect the old sink - Use the adjustable wrench or pliers to disconnect the plumbing connections from the old sink. This may include the water supply lines and the drain pipes.
Step 3: Remove the old sink - Use a screwdriver to remove any screws or clips that are holding the old sink in place. Be careful not to damage the countertop while doing this.
Step 4: Clean the countertop - Use a putty knife to remove any old caulk or adhesive from the countertop. This will provide a clean surface for the new sink to be installed.
Step 5: Measure the new sink - Use a measuring tape to measure the size of the new sink. This will ensure that it will fit properly in the countertop opening.
Step 6: Apply caulk - Use a caulk gun to apply a bead of caulk around the edges of the sink opening. This will create a watertight seal between the sink and the countertop.
Step 7: Install the sink - Carefully place the new sink into the countertop opening. Make sure it is centered and level. Secure the sink in place by tightening any clips or screws provided with the sink.
Step 8: Reconnect the plumbing - Use the adjustable wrench or pipe wrench to reconnect the plumbing connections to the new sink. This may include the water supply lines and the drain pipes.
Step 9: Check for leaks - Turn on the water supply and check for any leaks around the plumbing connections. If you notice any leaks, tighten the connections further or apply plumber's tape.
Step 10: Clean up - Once you're satisfied with the installation and there are no leaks, clean up any mess and discard any old sink components.
Installing a porcelain undermount bathroom sink may seem like a daunting task, but with the right tools and following the steps outlined above, you can achieve a professional and stylish installation. Remember to take your time and double-check your work to ensure a successful outcome.
The Importance of Waiting to Shower After Painting Your Bathroom
You may want to see also
![]()
Are there any specific steps I should follow when installing a porcelain undermount bathroom sink?
Installing a porcelain undermount bathroom sink can be a relatively straightforward process if you follow certain steps. By following a few simple guidelines, you can ensure a successful installation that will have your sink looking beautiful and functioning properly. Here are some specific steps you should follow when installing a porcelain undermount bathroom sink:
- Gather the necessary tools and materials: Before beginning the installation process, make sure you have all the tools and materials you will need. This may include a screwdriver, plumber's putty, silicone adhesive, a tape measure, a level, and a wrench. It is also important to have the sink itself, along with any mounting hardware that may be included.
- Prepare the countertop and sink: Start by measuring the opening in your countertop to ensure that it is the correct size for your undermount sink. If necessary, use a jigsaw or other appropriate tool to enlarge the opening. Next, apply plumber's putty around the edges of the sink opening on the underside of the countertop. This will act as a sealant and help prevent leaks.
- Install the mounting hardware: If your undermount sink comes with mounting brackets, now is the time to install them. These brackets will help support the weight of the sink and keep it securely in place. Follow the manufacturer's instructions to attach the mounting brackets to the underside of the countertop.
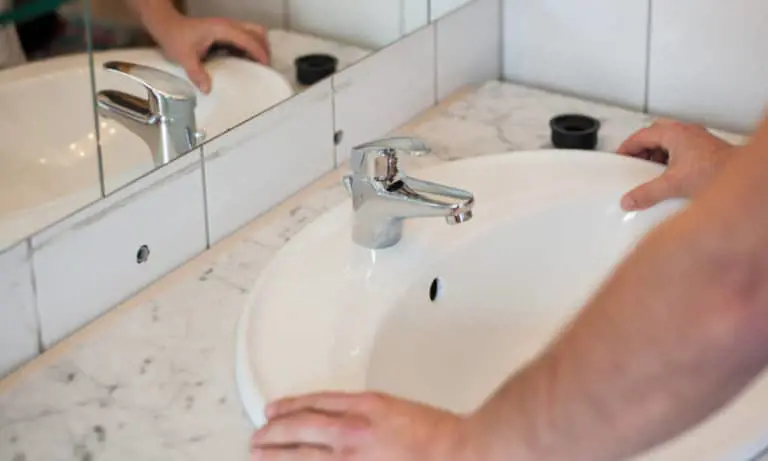
- Apply silicone adhesive: Once the mounting hardware is in place, apply a bead of silicone adhesive to the top edge of the sink opening. This will help hold the sink in place and create a waterproof seal. Be sure to use a high-quality silicone adhesive that is formulated for use in bathrooms.
- Lower the sink into place: Carefully lower the sink into the opening, making sure that it is centered and level. Use a level to double-check the sink's position and make any necessary adjustments. Once the sink is in place, press it down firmly to ensure good adhesion with the silicone adhesive.
- Secure the sink: Depending on the specific design of your undermount sink, there may be additional steps required to secure it in place. This could include tightening screws or bolts, or using a wrench to tighten mounting nuts. Follow the manufacturer's instructions to ensure that the sink is properly secured.
- Clean up and test for leaks: Once the sink is securely in place, clean up any excess silicone adhesive that may have oozed out during installation. Next, turn on the water supply and check for any leaks. It is important to address any leaks promptly to avoid water damage to your countertop or cabinets.
By following these specific steps, you can ensure a successful and professional-looking installation of your porcelain undermount bathroom sink. Remember to always consult the manufacturer's instructions for your specific sink model, as there may be additional steps or considerations that are unique to your sink. With the right tools and a little patience, you can enjoy a beautiful and functional bathroom sink for years to come.
Why Does My Bathroom Sink Gurgle? Common Causes and Solutions
You may want to see also
![]()
How do I properly measure the cutout for the sink in my bathroom countertop?
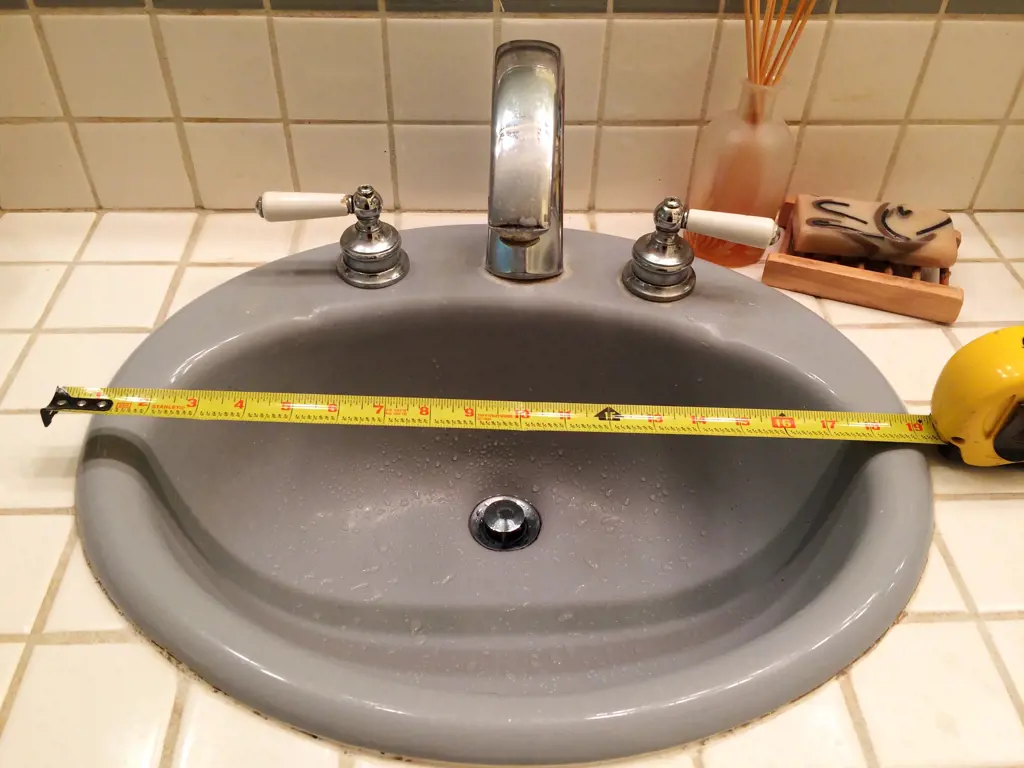
Having the right measurements is crucial when it comes to cutting a hole in your bathroom countertop to accommodate a sink. A proper fit ensures that your sink will sit securely and look aesthetically pleasing. Here is a step-by-step guide on how to measure the cutout for the sink in your bathroom countertop.
Step 1: Gather the necessary tools and materials
Before you begin measuring, make sure you have all the necessary tools and materials on hand. You will need a measuring tape, a pencil, a straight edge, and a level. Additionally, you may need a jigsaw or a hole saw, depending on the type of sink you have.
Step 2: Determine the size and shape of your sink
Before measuring the cutout, determine the size and shape of your sink. Sinks come in various shapes such as oval, square, and rectangular, and they can vary in size. Knowing the exact dimensions of your sink will help you determine the size of the cutout accurately.
Step 3: Measure the dimensions of the sink
Using a measuring tape, measure the length, width, and depth of your sink. Be sure to measure the widest points of the sink, including any overhanging edges. Write down these measurements as they will be used to determine the size of the cutout.
Step 4: Determine the size of the cutout
To determine the size of the cutout, subtract a small amount (around 1/4 inch) from the length and width measurements of your sink. This will allow for a small gap between the sink and the countertop, ensuring a secure fit. Additionally, consider any overhangs on the sink that may require additional space.
Step 5: Mark the cutout on your countertop
Using a pencil, mark the dimensions of the cutout on your countertop. Use a straight edge to ensure straight lines and a level to ensure the markings are even. This step is crucial as it will guide you when cutting the hole in the countertop.
Step 6: Cut the hole
If you have a jigsaw, carefully follow the marked lines to cut out the hole in your countertop. If you are using a hole saw, attach it to a drill and drill a starter hole within the marked area. Then, insert the hole saw into the starter hole and slowly cut along the marked lines. Take your time and make smooth, even cuts to avoid any damage to the countertop.
Step 7: Test the fit
Once the hole is cut, test the fit of your sink by placing it into the cutout. Ensure that the sink sits flush with the countertop and that it is level. If adjustments are needed, carefully trim the hole using the jigsaw or hole saw until the desired fit is achieved.
In conclusion, measuring the cutout for a sink in your bathroom countertop requires careful attention to detail. By following these step-by-step instructions and using the right tools, you can ensure a perfect fit for your sink and a beautiful finished look for your bathroom.
Transform Your Bathroom: How to Paint Brass Fixtures for a Modern Look
You may want to see also
![]()
What type of adhesive or caulk should I use to secure the porcelain undermount sink to the countertop?
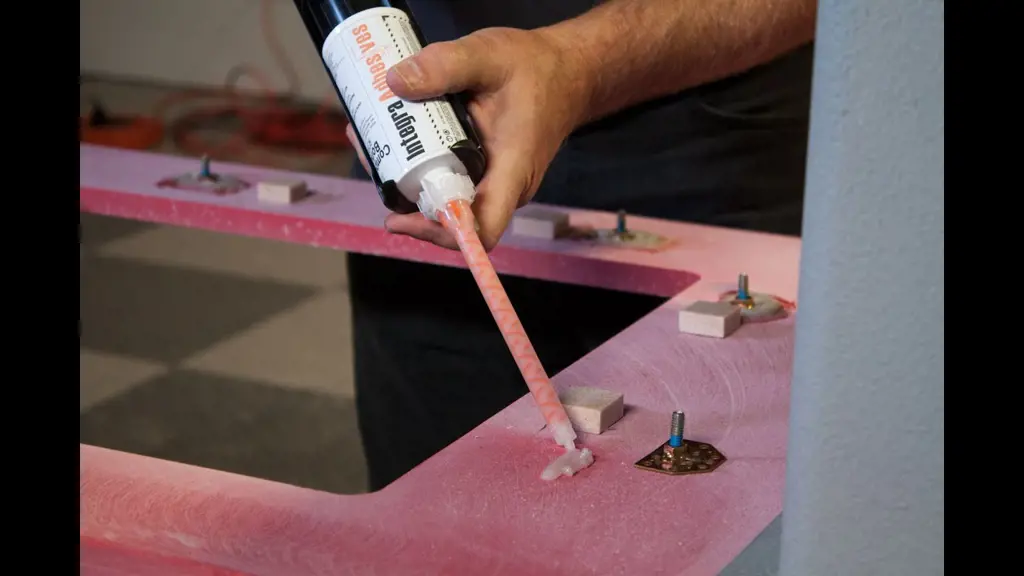
When installing a porcelain undermount sink, it is crucial to choose the right type of adhesive or caulk to securely attach it to the countertop. The correct adhesive will ensure that the sink remains in place and prevents any water leakage or damage to the surrounding area. In this article, we will discuss the different types of adhesives and caulks that are suitable for securing a porcelain undermount sink, along with the installation process.
Epoxy Adhesive:
Epoxy adhesive is an excellent choice for securing a porcelain undermount sink due to its superior bonding strength and water-resistant properties. It consists of two components - resin and hardener - that must be mixed together before application. Epoxy adhesive provides a durable and strong bond that can withstand the weight and movement of the sink. Make sure to follow the manufacturer's instructions for mixing and applying the epoxy adhesive.
Silicone Caulk:
Silicone caulk is another popular option for securing porcelain undermount sinks. It is known for its flexibility and ability to create a watertight seal. Silicone caulk is typically applied around the edges of the sink where it meets the countertop. This creates a barrier against water and prevents any leakage. When applying silicone caulk, ensure that you use a caulk gun for proper application and smooth the bead with a caulk smoothing tool for a professional finish.
Construction Adhesive:
Construction adhesive, such as liquid nails, is commonly used for various bonding applications, and it can also be used to secure a porcelain undermount sink. This adhesive is available in different formulas and strengths, so it's crucial to choose one specifically designed for bonding to non-porous surfaces like porcelain. Follow the manufacturer's instructions for application and curing time.
Installation Steps:
Before beginning the installation, ensure that the countertop is clean, dry, and free of any debris or grease. Follow these steps to secure the porcelain undermount sink:
- Measure and mark the position of the sink on the countertop. Ensure that it is centered and aligned with the cutout.
- Apply the chosen adhesive or caulk around the edge of the sink's rim or lip.
- Carefully lower the sink into the cutout, making sure it aligns with the marked position. Apply gentle pressure to secure it in place.
- Wipe off any excess adhesive or caulk that may have squeezed out from the edges.
- Allow the adhesive or caulk to cure according to the manufacturer's instructions before using the sink. This may take several hours or up to a day, depending on the product used.
Examples and Tips:
- Always read and follow the manufacturer's instructions for the chosen adhesive or caulk.
- Test the adhesive or caulk on a small surface area before applying it to the entire sink to ensure compatibility and adhesion.
- Use additional support like brackets or clips to secure the sink during the curing process.
- Avoid using water or applying pressure on the sink until the adhesive or caulk has fully cured.
- Regularly inspect the sink and the bond to ensure there are no signs of movement or leakage.
In conclusion, when it comes to securing a porcelain undermount sink to the countertop, the choice of adhesive or caulk is crucial. Epoxy adhesive, silicone caulk, and construction adhesive are all suitable options depending on your specific preferences and requirements. Follow the installation steps carefully, and remember to allow sufficient curing time for the adhesive or caulk to ensure a secure and durable bond.
Best Practices for Cleaning Bronze-colored Bathroom Sink Drain Etoppers
You may want to see also
![]()
Are there any maintenance tips or precautions I should be aware of after installing a porcelain undermount bathroom sink?
After installing a porcelain undermount bathroom sink, there are a few maintenance tips and precautions that you should be aware of in order to keep your sink looking beautiful and functioning properly for years to come. Follow these guidelines to ensure the longevity of your porcelain undermount bathroom sink.
- Regular Cleaning: To keep your porcelain undermount bathroom sink looking its best, it is important to clean it regularly. Use a non-abrasive cleaner or dish soap and water to clean the surface. Avoid using harsh chemicals or scrub brushes that can damage the porcelain finish.
- Avoid Heavy Impact: Porcelain is a durable material, but it can chip or crack under heavy impact. Be sure to handle heavy objects with care and avoid dropping them into the sink. It is also a good idea to place a rubber mat or dish rack in the sink when washing heavy pots or pans to provide extra protection.
- Prevent Staining: Porcelain sinks can become stained over time if not properly cared for. Avoid leaving substances like hair dye, nail polish, or harsh chemicals in contact with the sink for extended periods. If stains do occur, you can use a solution of equal parts hydrogen peroxide and water to gently remove them. Be sure to rinse the sink thoroughly after using any cleaning products.
- Avoid Extreme Temperatures: Porcelain is sensitive to extreme temperatures, so avoid exposing your sink to sudden changes in temperature. Do not pour boiling water directly into the sink, as this can cause cracks or damage. Use caution when rinsing with hot water and always allow the sink to cool down before pouring cold water into it.
- Care for the Drain: The drain of your porcelain undermount bathroom sink should be regularly cleaned as well. This will help prevent clogs and keep your sink functioning properly. Use a drain cleaner or a mixture of baking soda and vinegar to keep the drain clear and odor-free.
- Use Soft Materials: When cleaning your porcelain sink, use soft materials such as microfiber cloths, sponges, or non-abrasive cleaning pads. Avoid using scrub brushes or abrasive cleaners, as these can scratch or dull the porcelain finish.
- Caulk Maintenance: The caulk around the edges of your porcelain undermount bathroom sink should be inspected regularly and replaced as needed. This will help prevent water damage and mold growth. If you notice any cracks or gaps in the caulk, remove the old caulk and reapply a fresh bead.
By following these maintenance tips and precautions, you can ensure that your porcelain undermount bathroom sink remains in pristine condition. With proper care, your sink will continue to be a beautiful and functional addition to your bathroom for many years to come.
Exploring the Use of Blue Board in Bathroom Remodels: Pros and Cons
You may want to see also
Frequently asked questions
Before installing a porcelain undermount bathroom sink, you need to ensure that the countertop is properly prepared. This includes measuring and marking the location of the sink on the underside of the countertop, cutting out the hole for the sink using a jigsaw or a hole saw, and smoothing any rough edges or uneven surfaces around the opening.
To secure the porcelain undermount sink to the countertop, you will need to use a silicone adhesive specifically designed for use with porcelain sinks. This adhesive is waterproof and flexible, allowing for a strong bond that can withstand the moisture and vibrations commonly found in a bathroom environment.
The recommended method for attaching a porcelain undermount bathroom sink to the countertop is to apply a thin layer of silicone adhesive to the rim of the sink, then carefully lower the sink into the opening. Once the sink is in place, press down firmly to ensure a tight seal. Wipe away any excess adhesive that squeezes out around the edges of the sink.
While it is possible to install a porcelain undermount bathroom sink by yourself, it is recommended to seek professional help if you are not experienced or comfortable with DIY projects. Installing a sink requires precise measurements, proper tools, and attention to detail to ensure a secure and aesthetically pleasing installation.
When installing a porcelain undermount sink, it is important to handle the sink with care to avoid damaging or cracking the fragile material. Additionally, ensure that the sink is properly supported from below with brackets or a mounting system designed for undermount sinks. Finally, be mindful of the plumbing connections and make sure they are properly aligned and tightened to avoid any leaks or water damage.