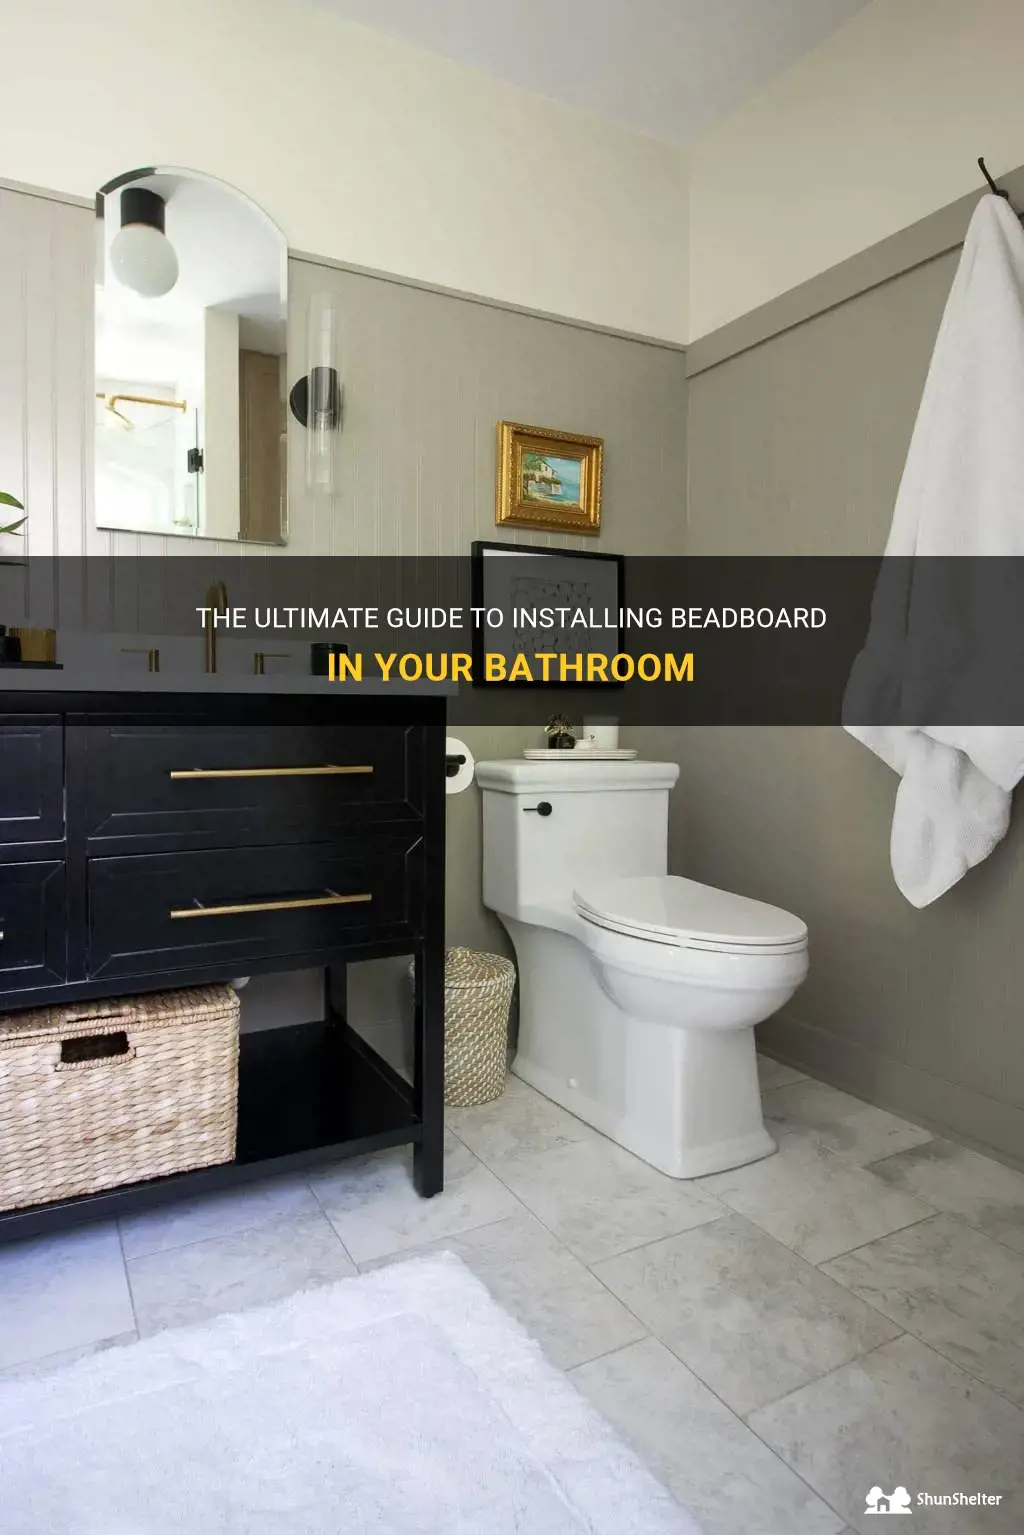
Are you looking for a simple and affordable way to elevate the look of your bathroom? Look no further than beadboard! Installing beadboard in your bathroom is a relatively easy DIY project that can instantly add charm and character to any space. In this guide, we will walk you through the step-by-step process of installing beadboard in your bathroom, so you can create a beautiful and timeless look that will last for years to come.
| Characteristics | Values |
|---|---|
| Material | Wood |
| Thickness | 1/4" |
| Panel Size | 4'x8' |
| Bead Size | 1.5" |
| Installation Method | Nailing to wall studs |
| Seams | Tongue and groove |
| Paintable/Stainable | Yes |
| Moisture Resistance | High |
| Cost | Moderate |
| Recommended Tools | Finish nailer, level, measuring tape |
What You'll Learn
- What materials and tools are needed to install beadboard in a bathroom?
- What preparation needs to be done before installing beadboard in a bathroom?
- What are the steps involved in installing beadboard in a bathroom?
- Are there any specific techniques or tips for cutting and fitting beadboard in a bathroom?
- How do you finish and seal beadboard in a bathroom to protect it from moisture and damage?
![]()
What materials and tools are needed to install beadboard in a bathroom?
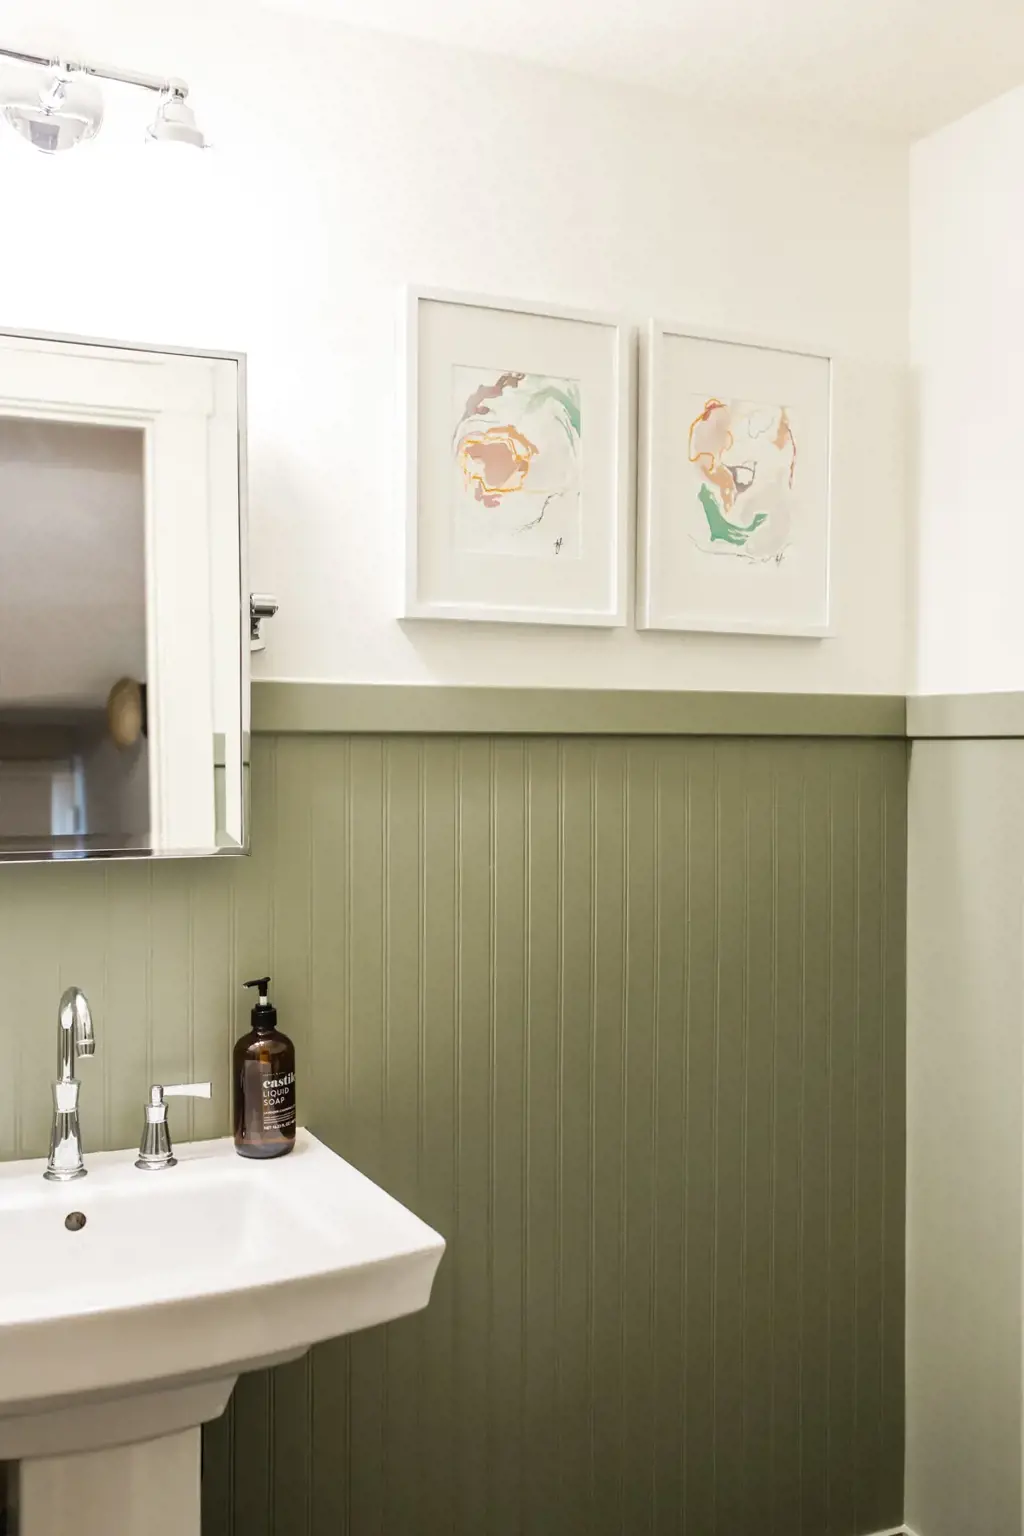
Installing beadboard in a bathroom is a great way to add a touch of elegance and timeless charm to the space. Beadboard is a type of wainscoting made up of narrow, vertical wood panels with a bead-like groove between each panel. It not only enhances the aesthetics of the space but also provides durability and protection to the lower portion of the walls.
Before starting the installation process, it is important to gather all the necessary materials and tools. Here's a comprehensive list of what you will need:
- Beadboard panels: Choose high-quality beadboard panels that are suitable for bathroom conditions. They should be moisture-resistant and easy to clean. Measure the height and width of the walls to determine the number and size of panels required.
- Baseboard molding: Baseboard molding is installed at the bottom of the beadboard to cover any gaps between the panels and the floor. Select a molding that complements the style of your bathroom.
- Adhesive: Use an adhesive suitable for beadboard installation. It should provide a strong bond and withstand moisture.
- Nails or screws: You will need nails or screws to secure the beadboard panels to the wall. Make sure they are long enough to penetrate the wall studs for a secure installation.
- Level: A level is essential to ensure that the beadboard is installed straight and level.
- Tape measure: Use a tape measure to accurately measure the dimensions of the walls and the spacing between panels.
- Saw: A saw is necessary for cutting the beadboard panels and molding to the desired size.
- Sandpaper: Sandpaper is used to smooth any rough edges or imperfections on the cut edges of the beadboard.
- Caulk: Caulk is used to fill in any gaps or seams between the beadboard panels. Choose a caulk that is suitable for bathroom conditions and matches the color of the beadboard.
- Paint or stain: If you prefer a painted or stained finish, you will need paint or stain along with brushes or rollers to apply the finish to the beadboard and molding.
Now that you have all the necessary materials and tools, here is a step-by-step guide to installing beadboard in a bathroom:
- Measure the height and width of the walls and determine the number and size of beadboard panels required.
- Cut the beadboard panels to the desired size using a saw. Make sure to account for any electrical outlets or switches.
- Sand the cut edges of the beadboard panels to smooth any rough edges or imperfections.
- Apply adhesive to the back of the beadboard panels and press them firmly onto the wall, starting from the bottom and working your way up. Use a level to ensure that the panels are straight and level.
- Secure the beadboard panels to the wall with nails or screws. Place the nails or screws near the edges of the panels and into the wall studs for added support.
- Cut the baseboard molding to the desired size and attach it to the bottom of the beadboard panels using nails or screws.
- Fill in any gaps or seams between the beadboard panels and the molding using caulk. Smooth the caulk with a caulk smoother or your finger for a neat finish.
- If desired, paint or stain the beadboard and molding to the desired color. Apply multiple coats, allowing sufficient drying time between coats.
Installing beadboard in a bathroom is a relatively straightforward process with the right materials and tools. By following these steps and using the necessary materials, you can achieve a beautiful and durable beadboard installation in your bathroom.
Easy Tips to Fix a Single Lever Bathroom Faucet
You may want to see also
![]()
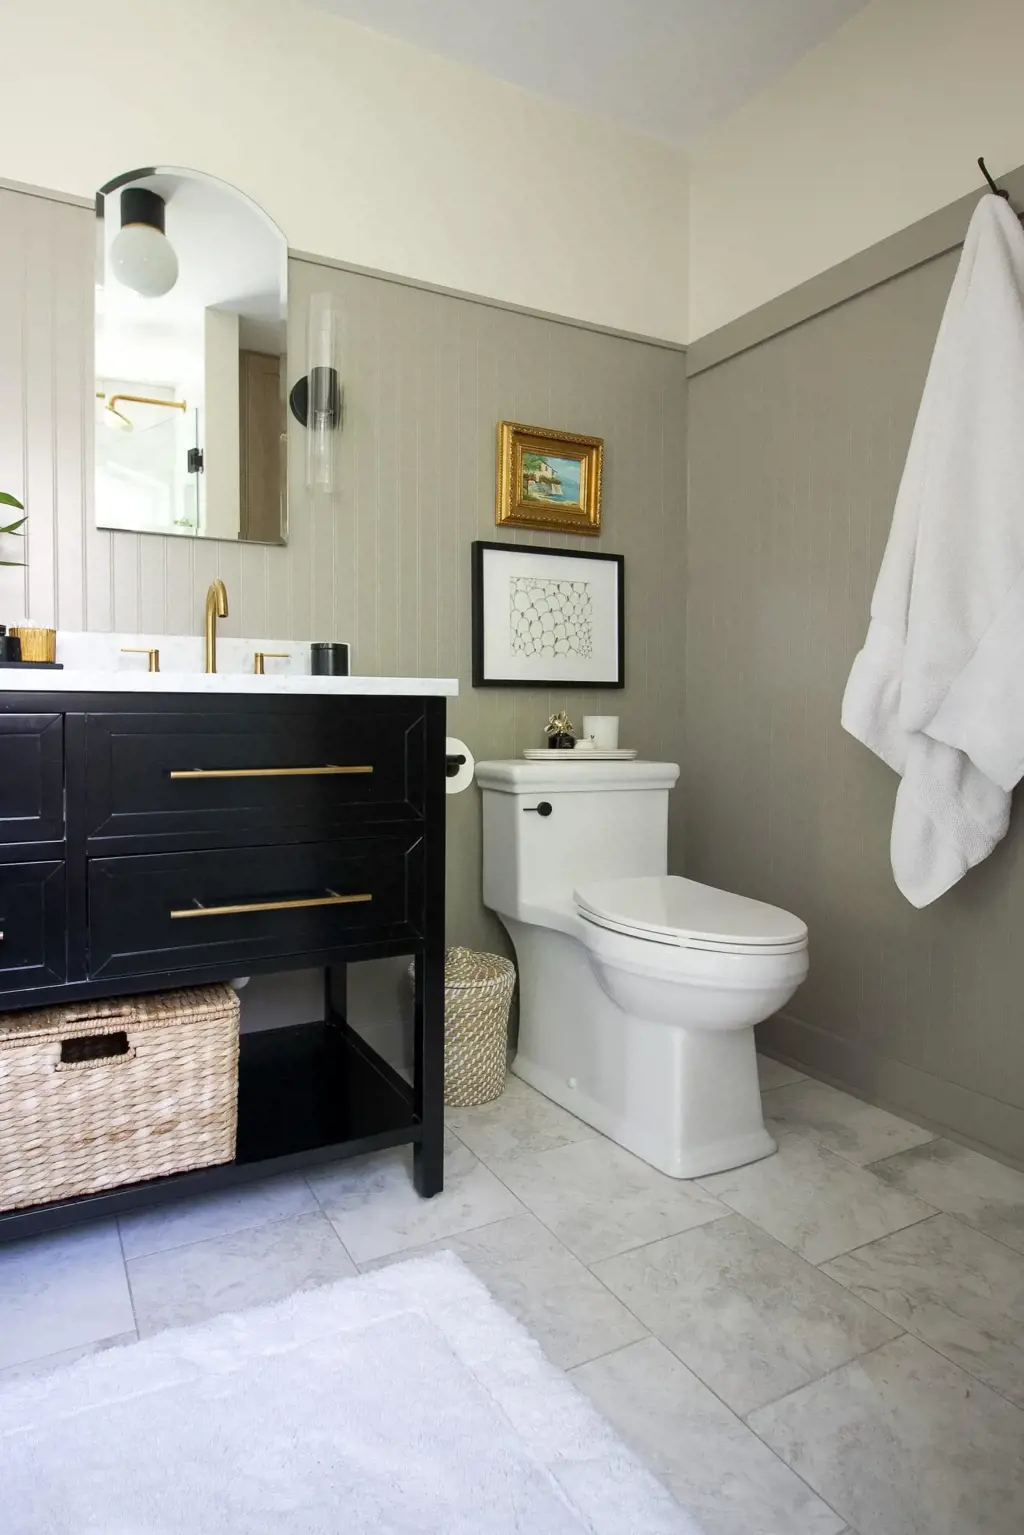
What preparation needs to be done before installing beadboard in a bathroom?
Installing beadboard in a bathroom is a great way to add texture and style to the space. However, before diving into the installation process, there are some important steps that need to be taken to ensure a successful result. From measuring and planning to preparing the walls and gathering the necessary materials, here is a step-by-step guide on how to prepare for installing beadboard in a bathroom.
- Measure and plan: Before purchasing any materials, it is essential to measure the walls where the beadboard will be installed. Measure both the height and width of each wall, taking into account any windows, doors, or other obstacles. With these measurements, create a detailed plan to determine how much beadboard and trim you will need.
- Choose the right beadboard: Beadboard comes in various materials, including PVC, wood, and MDF (medium-density fiberboard). Consider factors such as durability, moisture resistance, and maintenance when selecting the beadboard material that best suits your needs. PVC beadboard is often recommended for bathroom installations due to its moisture resistance.
- Gather the necessary tools and materials: In addition to the beadboard itself, you will need a range of tools and materials to complete the installation. Commonly required tools include a measuring tape, level, saw (circular or miter), caulk gun, nail gun, carpenter's glue, and sandpaper. Additionally, purchase the appropriate trim, paint or stain, and adhesive for your specific beadboard material.
- Prepare the walls: Before installing the beadboard, it is crucial to prep the walls to ensure a smooth and even installation. Start by removing any existing baseboards, trim, or fixtures that may obstruct the beadboard installation. Next, inspect the walls for any holes, cracks, or imperfections and repair them using the appropriate filler or patching compound. Sand the walls to create a smooth surface for better adherence of the beadboard.
- Install moisture barrier: Bathrooms are naturally high-moisture areas, so it is crucial to protect the walls from potential moisture damage. Install a moisture barrier, such as a plastic sheet or waterproof membrane, over the drywall to prevent moisture from seeping into the beadboard.
- Cut the beadboard and trim: Measure and mark the beadboard according to your plan, taking into account any openings for outlets or fixtures. Use a saw to cut the beadboard to the appropriate size. Repeat this step for the trim pieces as well.
- Dry fit the beadboard: Before attaching the beadboard to the walls, do a dry fit to ensure proper alignment and fit. This step allows you to make any necessary adjustments before permanently fastening the beadboard.
- Attach the beadboard: Apply adhesive, such as carpenter's glue or construction adhesive, to the back of the beadboard and press it firmly against the wall. For added support, use a nail gun to secure the beadboard in place. Repeat this step for each section of beadboard, making sure to leave a small gap at the top and bottom for expansion and contraction.
- Install the trim: Once the beadboard is securely attached, it's time to install the trim. Apply adhesive to the back of the trim and press it against the edges of the beadboard. Use a nail gun to secure the trim in place.
- Fill nail holes and caulk: After the beadboard and trim are in place, fill any nail holes with wood putty or caulk. Sand the filled areas once dry to create a smooth surface for painting or staining.
- Paint or stain the beadboard: Finally, finish the installation by applying a coat of paint or stain to the beadboard and trim. Choose a color that complements the overall bathroom decor.
By following these steps and properly preparing for the installation, you can ensure a successful and long-lasting beadboard installation in your bathroom. It's always recommended to consult the manufacturer's instructions and seek professional advice if needed to achieve the best results.
Top Options for Waterproof Flooring in a Bathroom
You may want to see also
![]()
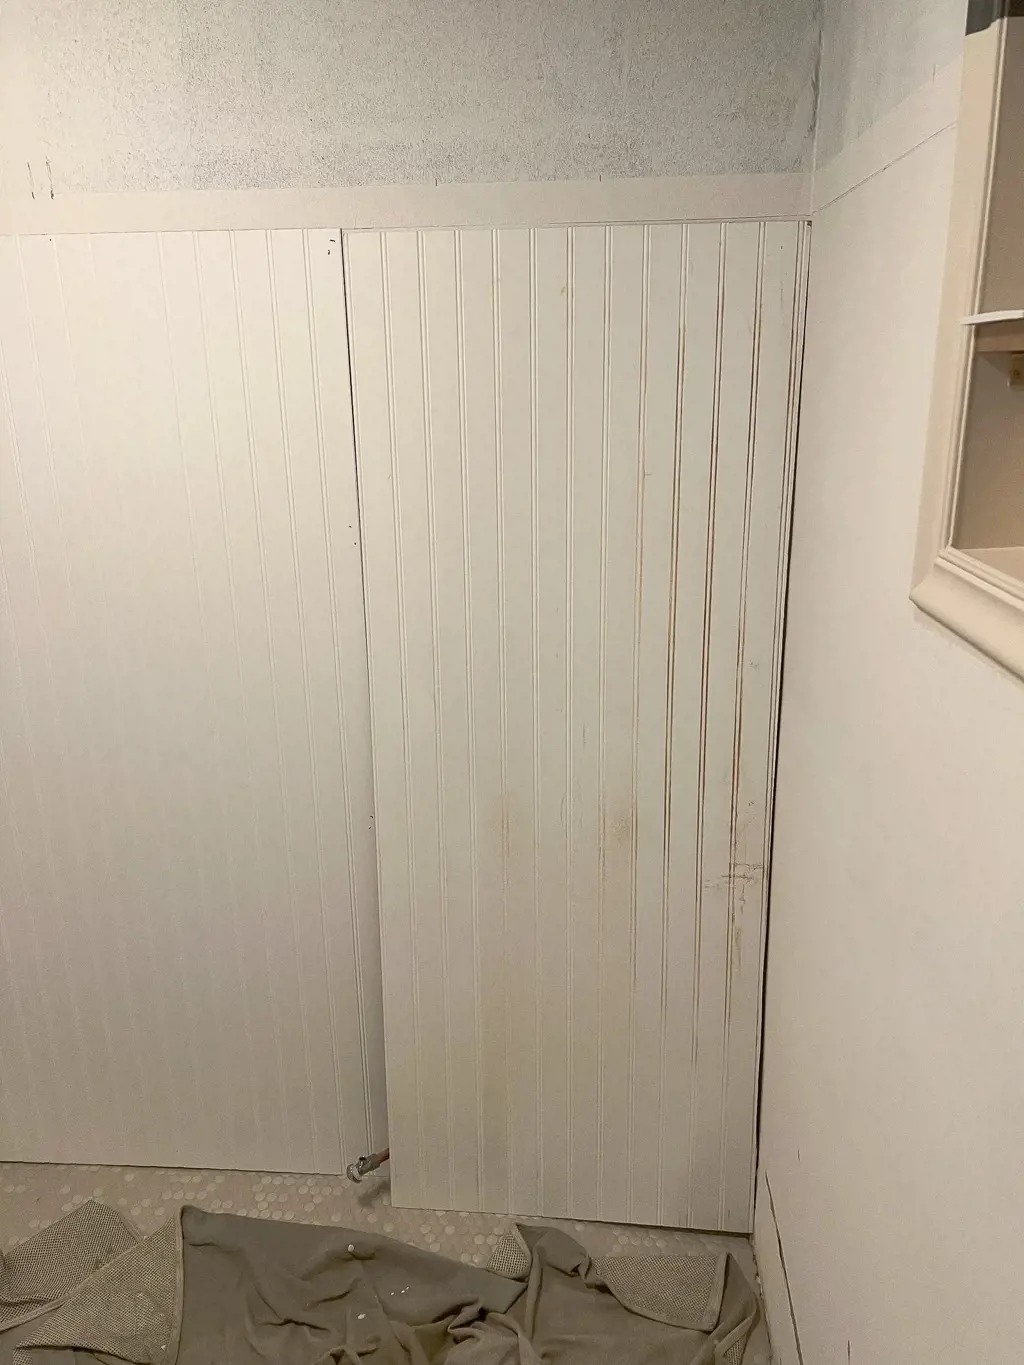
What are the steps involved in installing beadboard in a bathroom?
Beadboard is a decorative paneling material that adds a classic and refined look to any bathroom. It is a popular choice for homeowners who want to create a charming and timeless space. If you are planning to install beadboard in your bathroom, you will be happy to know that it is a relatively straightforward process. In this article, we will walk you through the step-by-step installation process for beadboard in a bathroom.
Step 1: Gather your materials
Before you begin the installation, make sure you have all the necessary materials. You will need beadboard panels, a tape measure, a level, a pencil, a saw, adhesive or nails, a caulking gun, a utility knife, and a paintbrush or roller. You will also need sandpaper and primer if you plan to paint the beadboard.
Step 2: Measure the walls
Measure the length and height of the walls where you plan to install the beadboard. Use a tape measure to ensure accuracy. Take note of any existing features like outlets or windows that might require special attention during the installation.
Step 3: Cut the beadboard panels
Using a saw, cut the beadboard panels to the desired height and length based on your measurements. Be sure to double-check your measurements and make precise cuts to ensure a clean and seamless installation.
Step 4: Prepare the walls
Before attaching the beadboard panels, it is important to prepare the walls. Remove any existing wallpaper or paint and ensure that the walls are smooth and free of debris. Sand down any uneven surfaces and fill in any holes or cracks with spackle. Once the walls are smooth and clean, apply primer if needed.
Step 5: Attach the beadboard panels
There are two common methods for attaching beadboard panels to the walls: adhesive or nails. If you choose to use adhesive, apply a thin layer to the back of each panel and press it firmly onto the wall. Use a level to ensure the panels are straight. If you prefer to use nails, pre-drill pilot holes in the panels and then attach them to the walls using finishing nails. Make sure the panels are evenly spaced and level.
Step 6: Cut holes for outlets and windows
If your walls have outlets or windows, you will need to cut holes in the beadboard panels to accommodate them. Measure the dimensions of the outlets or windows and mark them on the panels. Use a jigsaw or utility knife to carefully cut out the openings. Be sure to make clean and precise cuts to ensure a professional finish.
Step 7: Finish the installation
Once all the panels are attached and any necessary holes are cut, it is time to finish the installation. Use a caulking gun to apply caulk to the edges and corners of the panels to create a seamless look. Smooth the caulk with your finger or a caulk smoothing tool. Allow the caulk to dry completely before painting or staining the beadboard, if desired.
Step 8: Paint or stain the beadboard
If you want to change the color of the beadboard or enhance its natural beauty, you can paint or stain it. Apply your chosen paint or stain using a paintbrush or roller, following the manufacturer's instructions. Allow the paint or stain to dry completely before using the bathroom.
Installing beadboard in a bathroom can be a rewarding DIY project that instantly upgrades the look and feel of the space. By following these step-by-step instructions, you can achieve a professional and polished installation. Enjoy the timeless elegance that beadboard brings to your bathroom!
Creating a More Private Bathroom Space in Your Office
You may want to see also
![]()
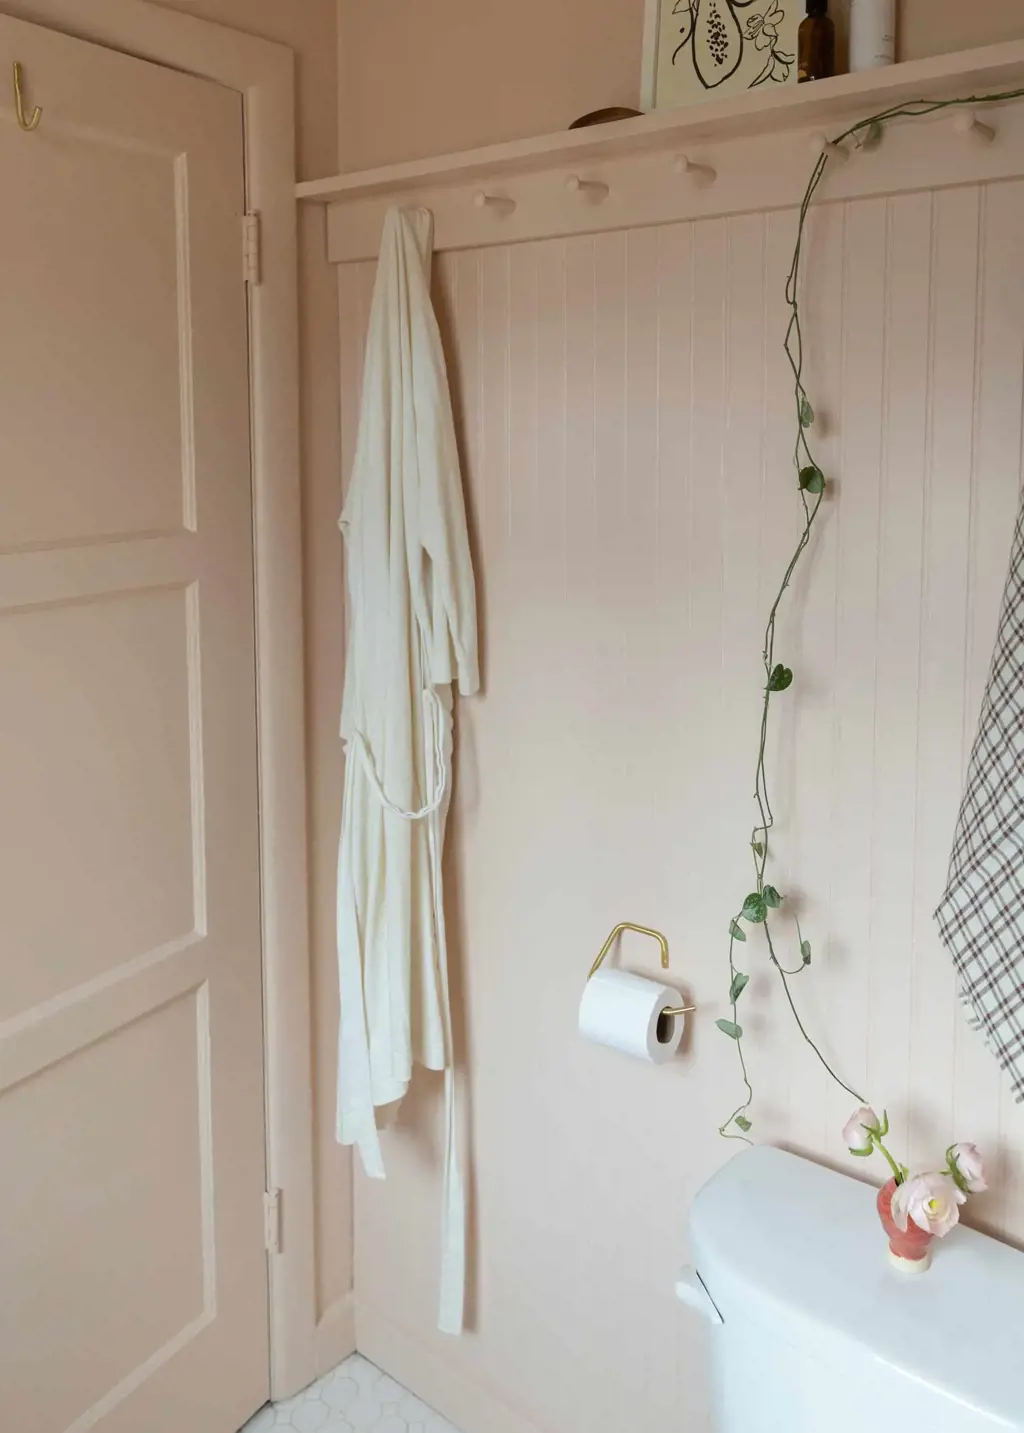
Are there any specific techniques or tips for cutting and fitting beadboard in a bathroom?
Beadboard is a popular choice for many homeowners looking to add a touch of elegance and texture to their bathroom walls. However, installing beadboard can be a bit tricky, especially when it comes to cutting and fitting the panels around fixtures and corners. In this article, we will discuss some techniques and tips to help you cut and fit beadboard in your bathroom more efficiently.
Measure and plan:
Before you start installing beadboard in your bathroom, it is crucial to measure the walls accurately. Take careful measurements of the length and height of each wall where you plan to install beadboard. Based on these measurements, you can determine the number of panels and their dimensions. Planning is essential to ensure that the panels fit perfectly and there are no unnecessary gaps.
Use the right tools:
To cut beadboard effectively, you will need the right tools. A miter saw or circular saw with a fine-toothed blade is ideal for straight cuts. For more intricate cuts, you can use a jigsaw or coping saw. A speed square and a tape measure will help you take accurate measurements and make precise cuts.
Cut the panels:
When cutting the panels, it is best to cut them slightly larger than the required size, leaving some extra material to trim later. This approach allows for adjustments and ensures a precise fit. Measure and mark the dimensions on the panel, then use a straight edge to guide your saw as you make the cuts. Take your time and cut slowly to minimize the risk of chipping or splintering the beadboard.
Fit around fixtures and corners:
Fitting beadboard around fixtures and corners can be challenging. For electrical outlets, use a jigsaw or hole saw to cut an opening that matches the size of the box. Be sure to turn off the power before working with electrical outlets. When fitting around pipes, make a small hole in the beadboard that allows the pipe to pass through, then use a file or sandpaper to smooth the edges. For corners, you can use a coping saw or a miter saw to cut the panels at a 45-degree angle for a neat and seamless fit.
Finish the edges:
Once you have cut and fitted the beadboard panels, it is important to finish the edges properly. You can use trim pieces or molding to cover any exposed edges and provide a clean and polished look. Choose a trim that complements the style of your bathroom and secure it in place using adhesive or nails.
Sand and paint:
After the beadboard is installed, sand any rough edges or imperfections to ensure a smooth and even surface. Then, apply a primer and paint of your choice to protect the beadboard and give it a finished look. Opt for a paint that can withstand the moisture present in bathrooms to prevent peeling or discoloration.
In conclusion, cutting and fitting beadboard in a bathroom requires careful planning and the use of the right tools. Take accurate measurements, make precise cuts, and fit the panels around fixtures and corners with caution. Finish the edges with trim pieces and sand and paint the beadboard for a polished finish. With these techniques and tips, you can achieve a stunning and professional-looking beadboard installation in your bathroom.
Creating Accessible Bathrooms: Ensuring Adequate Clear Floor Space for Individuals with Disabilities
You may want to see also
![]()
How do you finish and seal beadboard in a bathroom to protect it from moisture and damage?
Beadboard is a popular choice for bathroom walls due to its timeless and classic look. However, since the bathroom is a high-moisture area, it is important to properly finish and seal the beadboard to protect it from moisture and damage. In this article, we will discuss the steps you can take to ensure the longevity and durability of your beadboard in the bathroom.
Choose the Right Material:
When selecting beadboard for your bathroom, it is essential to choose a material that is resistant to moisture. Look for beadboard made from PVC or moisture-resistant MDF (medium-density fiberboard). These materials are less prone to warping and swelling when exposed to high humidity.
Prepare the Surface:
Before installing the beadboard, make sure the bathroom walls are clean, smooth, and dry. Remove any existing wallpaper, paint, or other contaminants. Fill any cracks or holes with a suitable filler and sand the surface to ensure it is even and free from imperfections.
Priming:
Applying a primer to the beadboard before installation is crucial to enhance its moisture resistance. Use a high-quality oil-based or latex primer that is specifically formulated for bathroom use. Apply the primer evenly using a brush or roller and let it dry completely before proceeding to the next step.
Installation:
Carefully install the beadboard on the primed bathroom walls, following the manufacturer's instructions. Make sure to leave a small gap between each panel to allow for expansion and contraction due to temperature and humidity changes. Use adhesive or nails to secure the beadboard in place.
Caulking:
After the beadboard is installed, the next step is to caulk the joints and edges to prevent moisture from seeping behind the panels. Use a waterproof silicone caulk that matches the color of your beadboard. Apply a thin bead of caulk along the seams and neatly smooth it out with a caulk smoother or your finger. Wipe away any excess caulk with a damp cloth.
Painting:
To further protect and enhance the appearance of your beadboard, apply a coat of paint. Choose a high-quality, moisture-resistant paint that is specially formulated for bathrooms. It is recommended to apply at least two coats of paint, allowing each coat to dry completely before applying the next.
Sealing:
To provide an extra layer of protection against moisture, it is advisable to apply a sealer over the painted surface. Look for a clear, water-based polyurethane sealer that is suitable for bathrooms. Apply the sealer using a brush or roller, making sure to cover the entire surface evenly. Allow the sealer to dry as per the manufacturer's instructions.
Ongoing Maintenance:
Even with proper finishing and sealing, it is essential to regularly maintain your beadboard to ensure its longevity. Wipe down the beadboard regularly with a damp cloth to remove any moisture or dirt. Avoid using harsh chemicals or abrasive cleaners as they can damage the finish. Promptly repair any chips or dents by sanding and repainting the affected area.
In conclusion, finishing and sealing beadboard in a bathroom is crucial to protect it from moisture and damage. By choosing the right material, properly preparing the surface, priming, caulking, painting, and sealing, you can ensure the durability and longevity of your beadboard in the moisture-prone environment of a bathroom. With regular maintenance, your bathroom beadboard will continue to look beautiful and withstand the test of time.
Revive Your Bathroom Tiles: A Step-by-Step Guide to Sanding
You may want to see also
Frequently asked questions
Before installing beadboard in your bathroom, you need to prepare the walls properly. Start by removing any existing wallpaper or paint and ensure that the walls are clean and dry. Repair any damaged areas and fill in any holes or cracks. Sand the surface of the walls to create a smooth and even base for the beadboard.
To install beadboard in your bathroom, you will need several tools and materials. These include a measuring tape, level, pencil, adhesive or construction adhesive, a caulking gun, a miter saw or circular saw for cutting the beadboard, a nail gun or hammer and nails for attaching the beadboard, and a finishing nail set for countersinking the nailheads. Additionally, you will need the beadboard itself, which can be purchased in pre-cut panels or as individual planks.
To install beadboard in your bathroom, first, measure and mark the height of your desired paneling on the walls. Cut the beadboard panels or planks to the appropriate length using a miter saw or circular saw. Apply adhesive to the back of the beadboard and press it firmly against the wall. Use a level to ensure that the beadboard is straight and plumb. Secure the beadboard to the wall by nailing it in place with a nail gun or hammer and nails. Use a nail set to countersink the nailheads. Repeat this process until all of the beadboard is installed.
To finish the edges of the beadboard in your bathroom, you can use trim pieces to create a clean and polished look. Measure and cut the trim to fit the edges of the beadboard panels or planks. Attach the trim using adhesive or nails. You can also use caulk to fill in any gaps between the beadboard and the trim or between the beadboard panels themselves. Finally, you may choose to paint or stain the beadboard and trim to match your bathroom's decor.