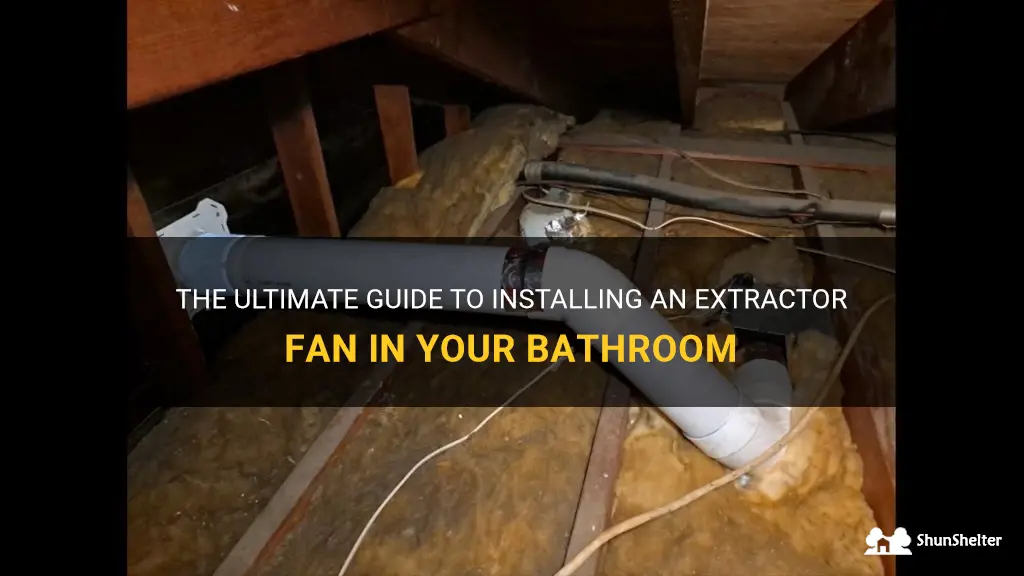
Are you tired of dealing with the steamy aftermath of a hot shower, or the unpleasant odors that linger in your bathroom? Installing an extractor fan can be the perfect solution! Not only will it help eliminate excess moisture and keep your bathroom fresh, but it can also contribute to overall improved air quality. If you're ready to take the plunge and install an extractor fan in your bathroom, we're here to guide you through the process step by step. Get ready to transform your bathroom into a clean and inviting space with this simple installation.
| Characteristics | Values |
|---|---|
| Fan Type | Wall or Window |
| Noise Level | Low or Silent |
| Airflow Capacity | Cubic Feet per Minute (CFM) |
| Size | Inch diameter |
| Power Consumption | Watts |
| Timer | Adjustable |
| Humidity Sensor | Yes or No |
| Backdraft Shutter | Yes or No |
| Installation Location | Ceiling, Wall, or Window |
| Included Accessories | Mounting hardware, Duct, Grille |
| Warranty | Duration (e.g. years) |
| Energy Efficiency | Energy Star rated |
| Remote Control | Yes or No |
| Speed Settings | Variable or Fixed |
| Material | Plastic or Metal |
What You'll Learn
- What tools and materials are needed to install an extractor fan in a bathroom?
- What are the steps involved in installing an extractor fan in a bathroom?
- Are there any specific electrical requirements or regulations for installing a bathroom extractor fan?
- Can the extractor fan be vented directly outside or does it need to be connected to a ventilation duct?
- Are there any maintenance or cleaning tasks that need to be done regularly after installing a bathroom extractor fan?
![]()
What tools and materials are needed to install an extractor fan in a bathroom?

Installing an extractor fan in a bathroom can greatly improve air circulation and remove excess moisture, which is essential for preventing mold and mildew growth. This guide will outline the tools and materials needed to successfully install an extractor fan in a bathroom.
Before starting the installation process, it is important to gather all the necessary tools and materials. Here is a list of items you will need:
- Extractor Fan Unit: The first item you will need is an extractor fan unit. Make sure to choose a fan with a suitable airflow rating for your bathroom size. It is also important to consider the noise level of the fan to ensure it doesn't create unnecessary disturbance.
- Drill: A drill will be needed to create holes in the wall or ceiling for mounting the fan unit and running the necessary electrical wiring.
- Screwdriver: A screwdriver will be needed to secure the fan unit in place after it is mounted.
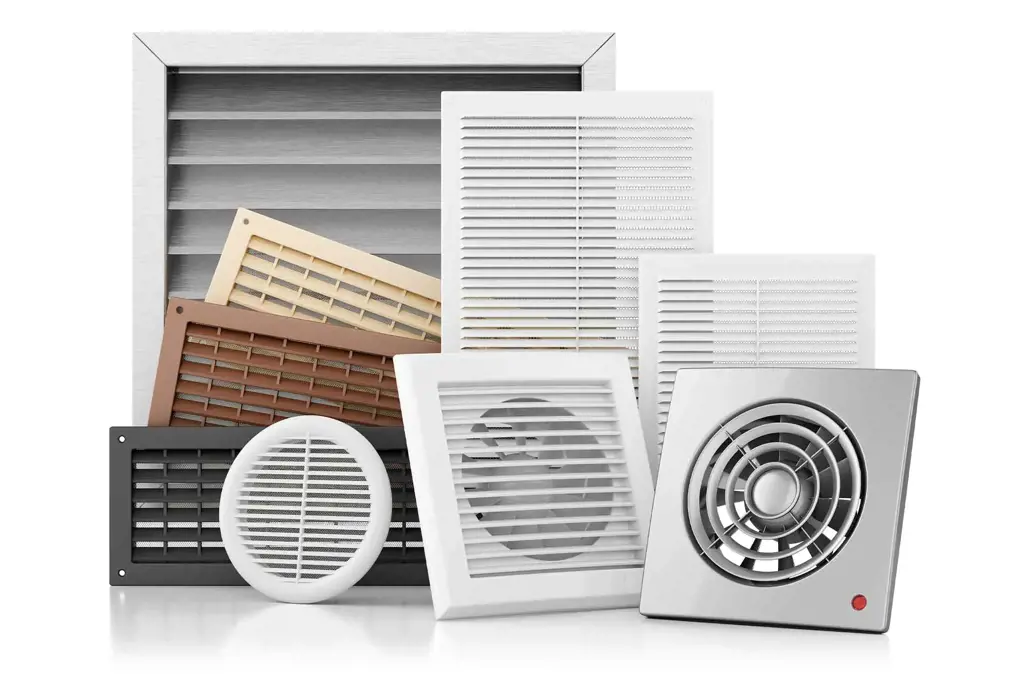
- Ducting and Vent Cover: Ducting is required to connect the fan unit to an external vent. Choose a ducting size that matches the fan outlet size. A vent cover is necessary to prevent the entry of birds, insects, and debris from outside.
- Electrical Wiring: You may need electrical wiring to connect the fan unit to the power supply. It is recommended to hire a qualified electrician to handle any electrical work to ensure safety and compliance with local regulations.
- Mounting Brackets: Mounting brackets will be necessary to secure the fan unit in place.
- Spirit Level: A spirit level will help ensure the fan unit is mounted straight and level.
- Pencil: Use a pencil to mark the locations for drilling holes and installing the fan unit.
- Measuring Tape: A measuring tape will be useful for taking accurate measurements, such as the distance between the fan unit and the external vent.
- Safety Equipment: It is important to use appropriate safety equipment, such as safety goggles and gloves, while working with power tools and electrical wiring.
Now that you have gathered all the necessary tools and materials, you can begin the installation process. Here is a step-by-step guide on how to install an extractor fan in a bathroom:
- Determine the ideal location for the fan unit. It should be positioned where it can effectively extract air from the bathroom and vent it outside.
- Use a measuring tape to take accurate measurements for the hole locations and the distance between the fan unit and the external vent.
- Mark the hole locations on the wall or ceiling using a pencil. Make sure to align the marks with the mounting brackets of the fan unit.
- Use a drill to create the necessary holes for mounting the fan unit and running the electrical wiring. Be cautious of any potential wiring or plumbing behind the wall or ceiling.
- Secure the fan unit in place using the mounting brackets and screws provided. Use a spirit level to ensure the unit is mounted straight and level.
- Connect the ducting to the fan unit and run it to the external vent location. Secure the ducting with hose clamps or duct tape to ensure a tight fit.
- Install the vent cover on the exterior wall or roof to prevent the entry of birds, insects, and debris.
- If the fan unit requires electrical wiring, consult a qualified electrician to safely connect the unit to the power supply.
- Test the fan unit by turning it on and checking for proper airflow. Make any necessary adjustments or repairs.
- Finally, clean up the work area and ensure everything is in order before completing the installation.
Remember to always follow the manufacturer's instructions and consult professionals when needed. By gathering the right tools and materials and carefully following the installation steps, you can successfully install an extractor fan in your bathroom to improve air circulation and maintain a healthy environment.
Unveiling Kim's Bathroom Organization Secrets: Where Everything Has Its Place
You may want to see also
![]()
What are the steps involved in installing an extractor fan in a bathroom?
Installing an extractor fan in a bathroom is an important step in maintaining good ventilation and preventing the buildup of moisture and odors. Whether you are remodeling your bathroom or simply upgrading the existing fan, it's a relatively straightforward process that can be completed with a few tools and some basic knowledge. In this article, we will walk you through the steps involved in installing an extractor fan in a bathroom.
Step 1: Determine the fan size and location
The first step is to determine the appropriate size of the extractor fan for your bathroom. The fan should have a capacity to extract the air in your bathroom at least eight times per hour. Measure the size of your bathroom and consult the manufacturer's guidelines to select the right fan size.
Next, choose the location for the fan. It's generally recommended to install it near the shower or bathtub area, as this is where most of the moisture and odors originate. Additionally, ensure that the chosen location allows for easy access to the wiring and ventilation ductwork.
Step 2: Cut the hole and install the fan housing
Using a jigsaw or a similar cutting tool, carefully cut a hole in the ceiling or wall at the chosen location. Make sure to follow the manufacturer's guidelines for the size of the hole. Once the hole is cut, insert the fan housing into the hole and secure it in place using screws or mounting brackets provided with the fan.
Step 3: Connect the wiring
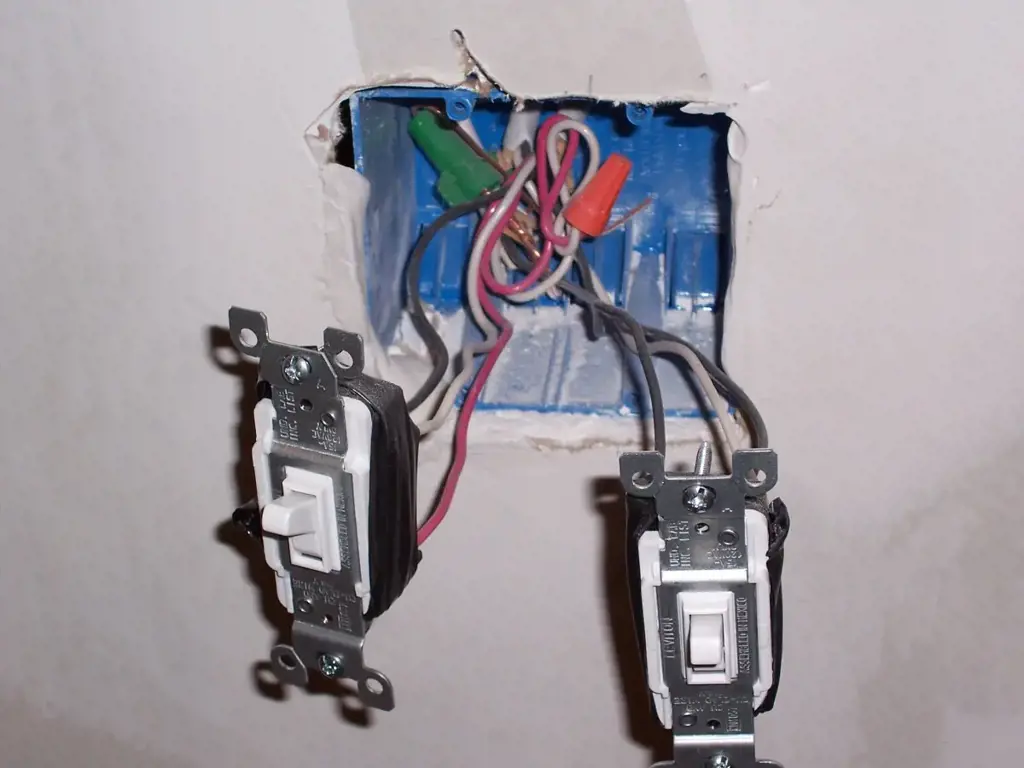
Before connecting the wiring, ensure that the power to the bathroom is turned off at the circuit breaker. Remove the cover of the electrical junction box and connect the fan's wiring to the existing electrical supply. Follow the manufacturer's instructions for connecting the wires, as different models may have slightly different wiring configurations. Once the wiring is securely connected, replace the cover of the junction box.
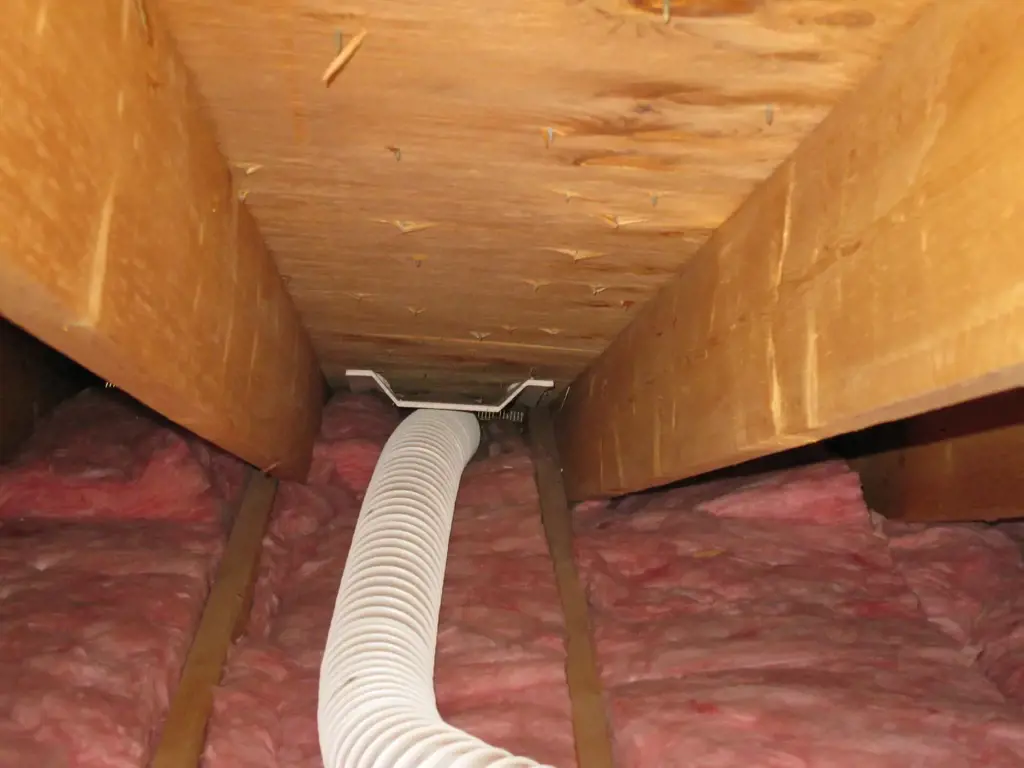
Step 4: Install the ductwork
Most extractor fans require ductwork to remove the extracted air from the bathroom to the outside. Attach the ductwork to the fan housing using appropriate connectors and secure it in place using duct tape or clamps. Ensure that the ductwork runs outside the building and is properly insulated to prevent condensation and heat loss.
Step 5: Install the fan cover and test the fan
Attach the fan cover to the housing according to the manufacturer's instructions. Once the fan is securely covered, turn on the power to the bathroom at the circuit breaker and test the fan by turning it on. Make sure that it's running smoothly and extracting air effectively. Additionally, check for any leaks or gaps in the ductwork that may need to be sealed.
In conclusion, installing an extractor fan in a bathroom is a relatively simple process that can greatly improve the ventilation and air quality in your bathroom. By following the steps outlined above and consulting the manufacturer's guidelines, you can ensure a successful installation that will provide you with a more comfortable and healthier bathroom environment.
Is Purgo the Right Choice for Your Bathroom? Exploring Pros and Cons
You may want to see also
![]()
Are there any specific electrical requirements or regulations for installing a bathroom extractor fan?
Installing a bathroom extractor fan is an essential step in improving the ventilation of the space and reducing moisture levels. However, there are specific electrical requirements and regulations that need to be followed to ensure a safe installation. In this article, we will discuss these requirements and regulations in detail.
- Safety Considerations: Before installing a bathroom extractor fan, it is important to consider safety measures. Make sure to turn off the power supply to the bathroom circuit at the main electrical panel to avoid any accidents. It is also recommended to use a residual current device (RCD) to provide additional protection against electric shock.
- Location: The location of the bathroom extractor fan is critical to its performance. It should be installed in the ceiling or wall, near the source of moisture, typically above the shower or bathtub. This allows the fan to effectively remove the moist air and prevent it from causing damage to the walls or ceilings.
- Power Supply: The bathroom extractor fan should be connected to a dedicated circuit to ensure that it doesn't overload other electrical circuits in the house. It is recommended to use a 3-amp fused connection unit (FCU) or a 3-amp double-pole isolating switch for the fan's power supply. This switch should be easily accessible and located outside the bathroom.
- Wiring: The wiring for the bathroom extractor fan should be done according to the current Electrical Wiring Regulations (BS 7671). It is essential to use the correct size and type of cable, usually a 1.0mm or 1.5mm twin and earth cable with an additional earth wire. The wiring should be protected by a conduit or trunking to prevent any damage.
- Ventilation Duct: The bathroom extractor fan should be connected to a ventilation duct that leads to the outside of the building. The duct should have a minimum diameter of 100mm to ensure proper air flow. It is important to avoid sharp bends in the duct, as they can restrict the air movement and reduce the fan's efficiency.
- Fan Ratings: When selecting a bathroom extractor fan, it is crucial to consider its performance ratings. Look for a fan with a sufficient extraction rate to match the size of your bathroom. The extraction rate is measured in liters per second (l/s) or cubic meters per hour (m³/h). A higher extraction rate is recommended for larger bathrooms or bathrooms with high humidity levels.
- IP Rating: The IP (Ingress Protection) rating of the bathroom extractor fan is also a key consideration. The IP rating determines the level of protection the fan has against solid objects and water ingress. For bathrooms, it is recommended to use a fan with an IP rating of at least IPX4, which provides protection against splashing water.
- Building Regulations: It is important to comply with the relevant building regulations when installing a bathroom extractor fan. In the UK, for example, the Building Regulations Approved Document F covers the ventilation requirements for dwellings. It specifies the minimum ventilation rates and performance standards that must be met.
In conclusion, when installing a bathroom extractor fan, it is crucial to adhere to specific electrical requirements and regulations to ensure a safe and effective installation. These requirements include considering safety measures, selecting the right location, following proper wiring practices, using adequate power supply, connecting to a ventilation duct, and considering the fan's performance and IP rating. Following these guidelines will help improve the ventilation in your bathroom and maintain a healthy living environment.
A Step-by-Step Guide on Installing a Bathroom TV
You may want to see also
![]()
Can the extractor fan be vented directly outside or does it need to be connected to a ventilation duct?
Extractor fans are an essential component of ventilation systems in many buildings. They help remove stale air, humidity, and odors from a space, ensuring a healthy and comfortable indoor environment. When it comes to venting an extractor fan, there are two options: venting directly outside or connecting it to a ventilation duct.
Direct venting involves installing the extractor fan with a duct that extends through an external wall or roof. This method is commonly used in bathrooms and kitchens, where the fan is typically mounted on the ceiling or wall near a window or external opening. The duct allows the extracted air to be expelled directly outside, preventing it from recirculating back into the space.
The advantages of directly venting an extractor fan are numerous. First and foremost, it provides the most efficient and effective method of removing pollutants from the building. By venting outside, the fan can expel the extracted air and any associated contaminants, such as cooking fumes or bathroom odors, directly to the exterior. This prevents the air from spreading throughout the building and potentially affecting other rooms or occupants.
Another benefit of direct venting is the prevention of moisture buildup. Bathrooms and kitchens are particularly prone to high humidity levels, which can lead to mold growth and structural damage over time. By venting the extractor fan outside, the moist air is expelled, reducing the risk of moisture-related issues and improving overall air quality.
While direct venting is the ideal option in terms of performance and air quality, it may not always be feasible due to building constraints or design limitations. In such cases, connecting the extractor fan to a ventilation duct becomes necessary.
A ventilation duct is a pathway for the extracted air to travel through before being expelled outside. The duct can be installed within the walls, ceilings, or floors of a building, directing the air to a suitable exterior location. This method allows for more flexibility in terms of fan placement but may result in slightly reduced efficiency compared to direct venting.
When connecting an extractor fan to a ventilation duct, it is important to consider the design and layout of the ductwork. Proper sizing and positioning of the duct are crucial to ensure optimal airflow and prevent excess pressure buildup, which can decrease the fan's performance and increase noise levels.
In summary, while direct venting is the preferred method of venting an extractor fan, connecting it to a ventilation duct can be a suitable alternative when direct venting is not possible. Both methods serve the purpose of removing stale air and maintaining a healthy indoor environment, but direct venting offers better performance, air quality, and moisture control advantages. Ultimately, the choice between the two methods depends on the specific needs and constraints of the building.
Step-by-Step Guide to Installing a Single Knob Bathroom Faucet
You may want to see also
![]()
Are there any maintenance or cleaning tasks that need to be done regularly after installing a bathroom extractor fan?
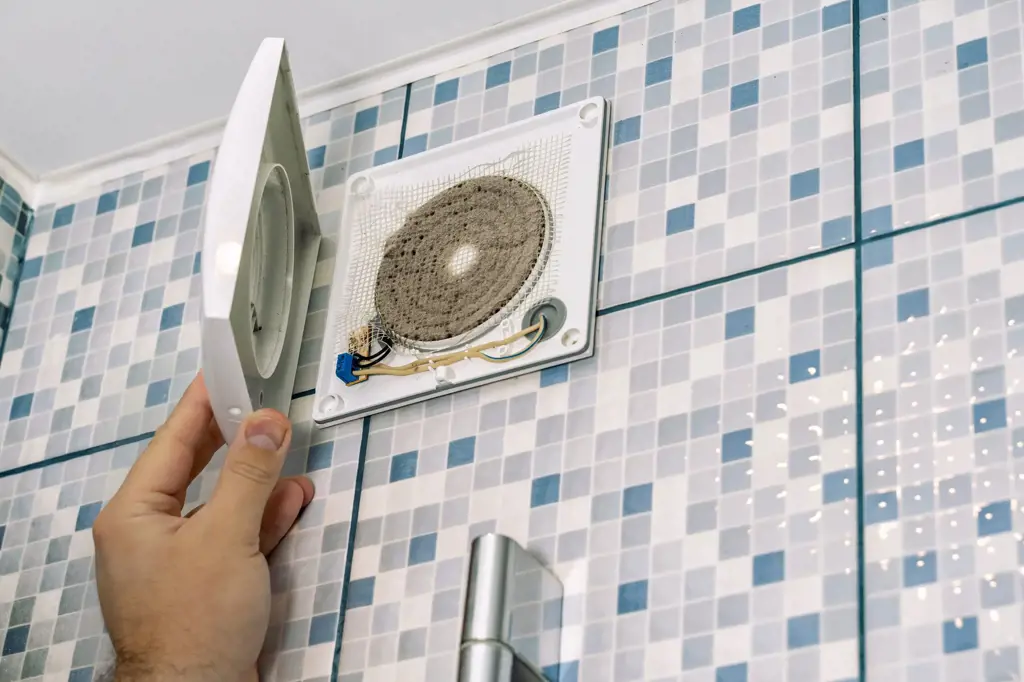
After installing a bathroom extractor fan, it is important to perform regular maintenance and cleaning tasks to ensure its proper functioning and longevity. Neglecting these tasks can lead to a decrease in the fan's efficiency and may even cause it to malfunction.
One of the most crucial maintenance tasks to perform regularly is cleaning the fan's vent cover or grille. Over time, dirt, dust, and other debris can accumulate on the vent cover, obstructing the airflow and reducing the fan's performance. To clean the cover, you can simply remove it and wash it with warm soapy water. Once it is clean and dry, you can then reattach it to the fan.
In addition to cleaning the vent cover, it is also important to clean the fan blades or impeller. These components can accumulate dust and dirt, which can affect their performance and efficiency. To clean the blades, first, ensure that the fan's power is turned off. Then, gently remove the cover that protects the blades and use a soft brush or cloth to remove any debris. You can also use a vacuum cleaner to suck up any loose dirt or dust. Make sure to be gentle when cleaning the blades to avoid causing any damage.
Another maintenance task to consider is checking and cleaning the ductwork. Over time, the ducts can accumulate dust, lint, and even mold. These obstructions can hinder the proper flow of air and reduce the fan's effectiveness. To clean the ductwork, you can use a vacuum cleaner with a brush attachment. Run the vacuum through the ducts to remove any accumulated debris. If you notice any signs of mold, it is important to address it promptly by cleaning the affected area with a mold-killing solution.
Apart from regular cleaning, it is also important to check the fan's motor and lubricate it if necessary. The motor is the heart of the fan, and it needs to be well-maintained to ensure optimal performance. Check the motor for any signs of wear or damage and lubricate it according to the manufacturer's instructions.
Additionally, it is a good practice to check the fan's vent opening on the exterior of the building. Ensure that there are no obstructions such as leaves, bird nests, or debris blocking the opening. If there are any obstructions, remove them carefully to allow proper airflow.
In conclusion, regular maintenance and cleaning tasks are essential to keep a bathroom extractor fan working efficiently. These tasks include cleaning the vent cover and fan blades, checking and cleaning the ductwork, inspecting and lubricating the motor, and ensuring the vent opening is clear. By performing these tasks regularly, you can extend the lifespan of your fan and maintain good air quality in your bathroom.
The Pros and Cons of Using Thermofoil in a Bathroom
You may want to see also
Frequently asked questions
Installing an extractor fan in your bathroom is a fairly simple process. First, you will need to choose the right location for the fan. It is best to install it on an exterior wall or ceiling to allow for proper ventilation. Next, you will need to cut a hole in the wall or ceiling for the fan to fit into. Make sure to measure and mark the location accurately before cutting. Once the hole is cut, you can mount the fan using the provided brackets or screws. Finally, connect the fan to a power source and test it to ensure it is working properly.
To install an extractor fan in your bathroom, you will need a few basic tools. These include a drill with a hole saw attachment for making the hole, a screwdriver for mounting the fan, wire strippers for connecting the fan to the power source, and a voltage tester to ensure the power is off before beginning the installation. You may also need a ladder or step stool if you are installing the fan on a high ceiling.
While it is possible to install an extractor fan in your bathroom yourself, it is recommended to hire a professional if you are not experienced with electrical work. Installing the fan improperly can lead to safety hazards and could potentially damage your home's electrical system. A licensed electrician will have the necessary skills and knowledge to install the fan correctly and safely.
It is highly recommended to vent your extractor fan directly outside. Venting the fan outside allows the moisture and odors from the bathroom to be removed from your home, rather than being circulated back into the air. If venting outside is not possible, you can use a ductless or recirculating fan, but these may not be as effective in removing moisture and odors from the bathroom.