Are you tired of staring at dull, unfinished basement walls? If so, installing wood paneling can provide a budget-friendly and stylish solution. Wood paneling not only adds warmth and texture to your space, but it also helps to insulate and dampen sound. Whether you're looking to create a cozy retreat or a comfortable entertainment area, this guide will walk you through the steps of installing wood paneling on your basement walls. Get ready to transform your basement into a welcoming haven that you and your family will love spending time in.
| Characteristics | Values |
|---|---|
| Material | Wood paneling |
| Tools | Hammer, screws, saw, level, measuring tape |
| Preparation | Clean the basement walls, remove any existing trim or molding |
| Insulation | Install insulation between the wall studs |
| Framing | Build a wooden frame on the walls |
| Paneling Installation | Start from the bottom and work your way up, use a level to ensure straightness, cut panels to fit with a saw |
| Nailing | Use a hammer or nail gun to secure the panels to the wooden frame |
| Finishing | Fill any gaps or holes with wood filler, sand the panels for a smooth finish |
| Painting/Staining | Apply paint or stain to the wood panels |
| Additional Decor | Install trim or molding around the edges for a finished look |
What You'll Learn
- What steps should I take to prepare the basement walls before installing wood paneling?
- What type of wood paneling is best for basement walls?
- Should I apply a moisture barrier before installing the wood paneling?
- How should I secure the wood paneling to the basement walls?
- Are there any special considerations for installing wood paneling on concrete basement walls compared to drywall?
![]()
What steps should I take to prepare the basement walls before installing wood paneling?
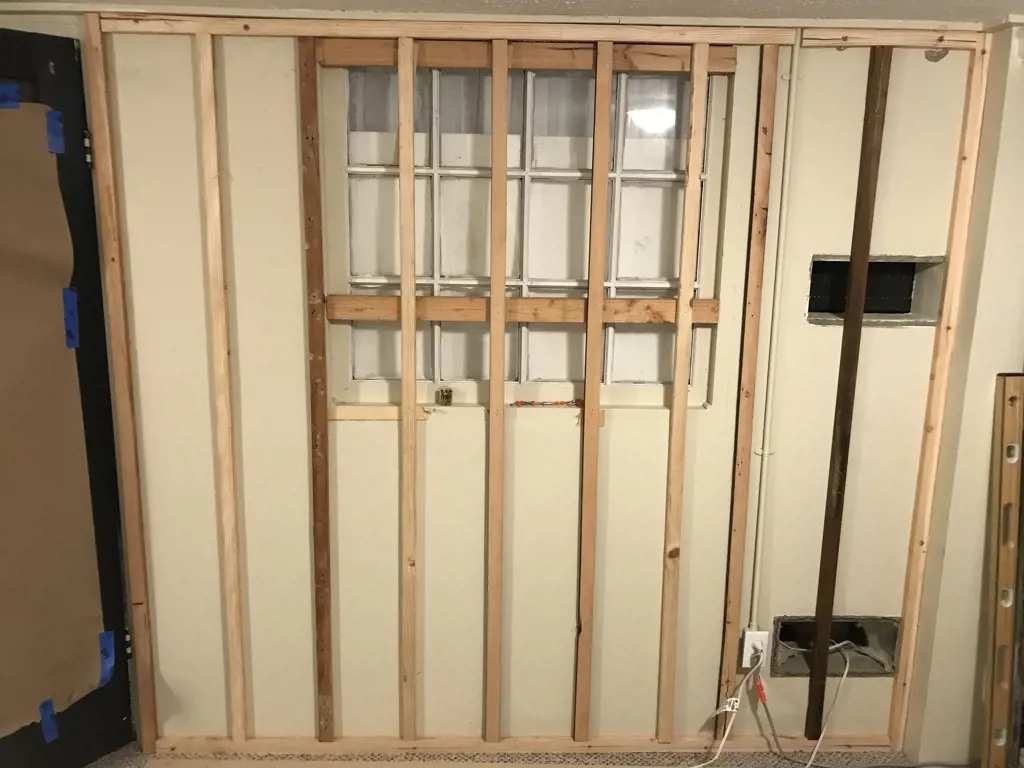
Renovating a basement can be a great way to expand your living space and add value to your home. Many homeowners choose to install wood paneling on their basement walls to create a warm and inviting atmosphere. However, before you dive into the installation process, it is important to properly prepare your basement walls to ensure a successful and long-lasting installation. Here are the steps you should take to prepare your basement walls before installing wood paneling.
- Inspect and Repair any Damage: Before you start the installation process, thoroughly inspect your basement walls for any cracks, leaks, or other signs of damage. It is important to fix these issues before installing wood paneling to prevent further damage and ensure a solid foundation for the panels. Patch any cracks or holes with a suitable patching compound and make sure to address any water leaks or moisture issues.
- Clean the Walls: It is essential to clean the basement walls thoroughly before installing wood paneling. Remove any dirt, dust, or debris using a broom or vacuum cleaner. Use a mild detergent or a specialized cleaner to remove any grease or stains from the walls. Let the walls dry completely before moving on to the next step.
- Remove any Existing Wall Finishes: If your basement walls are already finished with drywall or other materials, you will need to remove them before installing wood paneling. Use a pry bar and a hammer to carefully remove the existing wall finishes. Be cautious not to damage the underlying structure or insulation while doing this.
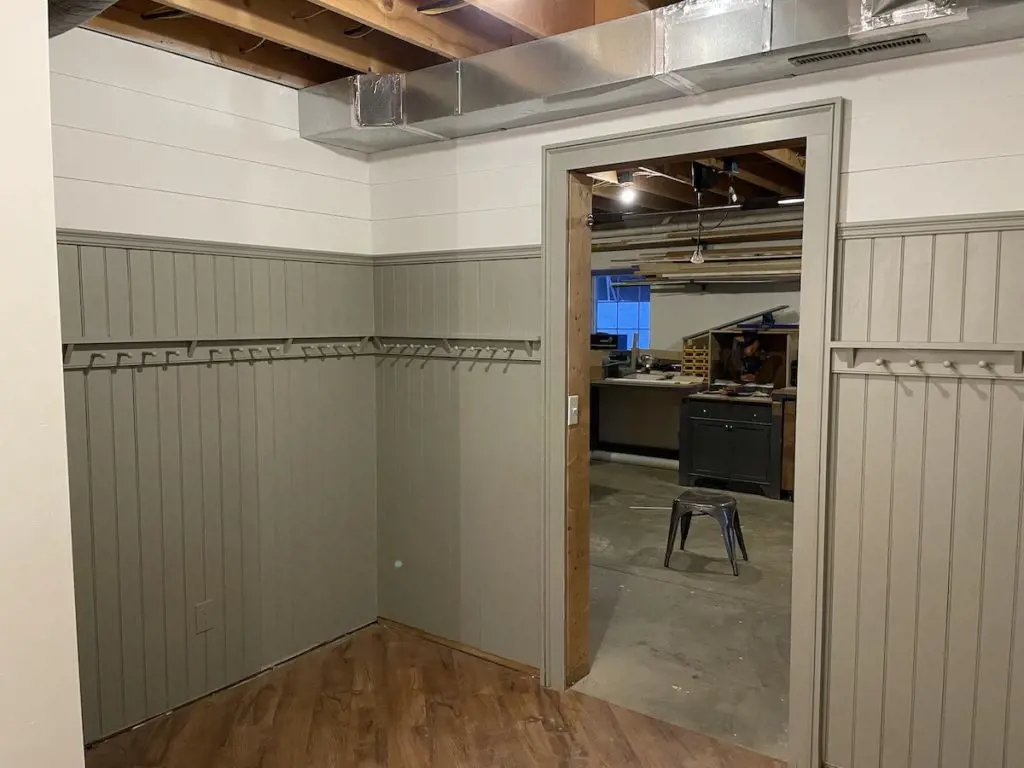
- Install a Vapor Barrier: Basements are prone to moisture and humidity, which can cause damage to wood paneling. To protect your wood paneling from moisture, it is recommended to install a vapor barrier. A vapor barrier is a plastic sheeting that acts as a barrier between the wall and the wood paneling, preventing moisture from seeping through. Install the vapor barrier according to the manufacturer's instructions, making sure to seal all seams and edges properly.
- Apply a Primer: To ensure good adhesion and a smooth finish, it is advisable to apply a primer to the basement walls before installing wood paneling. Choose a primer that is specifically designed for use on masonry or concrete surfaces. Apply the primer evenly using a roller or brush, and let it dry according to the manufacturer's instructions.
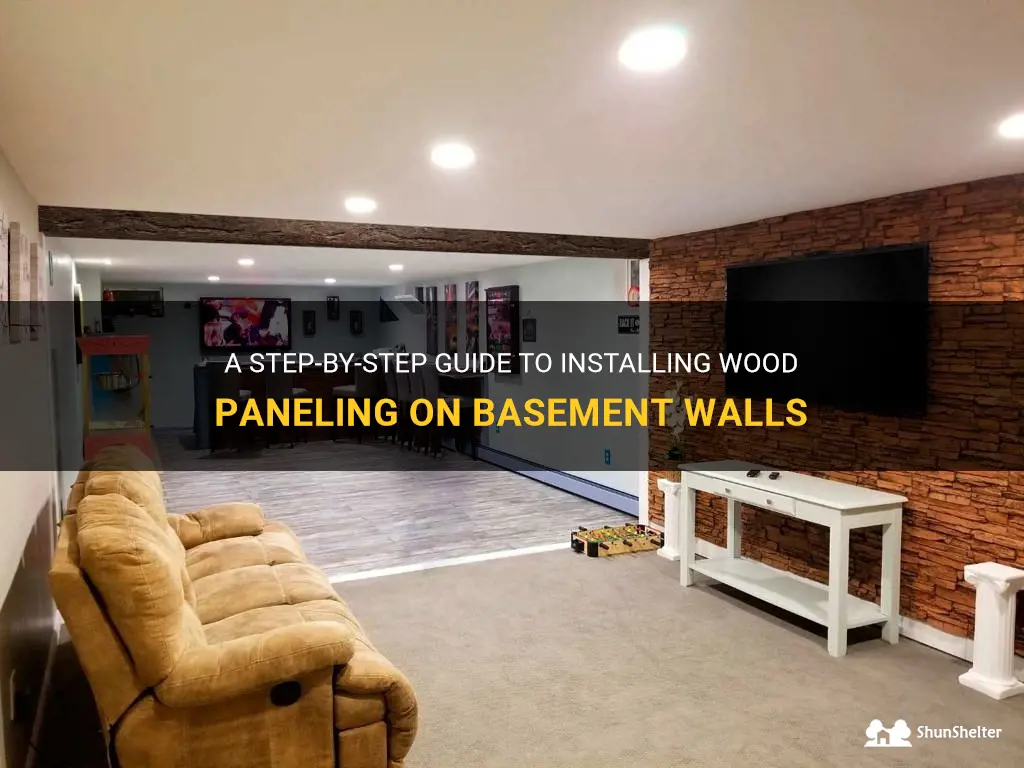
- Measure and Cut the Wood Paneling: Once the walls are prepped and ready, it is time to measure and cut the wood paneling to fit your basement walls. Use a tape measure to measure the height and width of the walls, and transfer these measurements to the wood paneling. Use a circular saw or a jigsaw to cut the panels to the correct size. It is advisable to leave a small gap between the panels and the floor to allow for expansion.
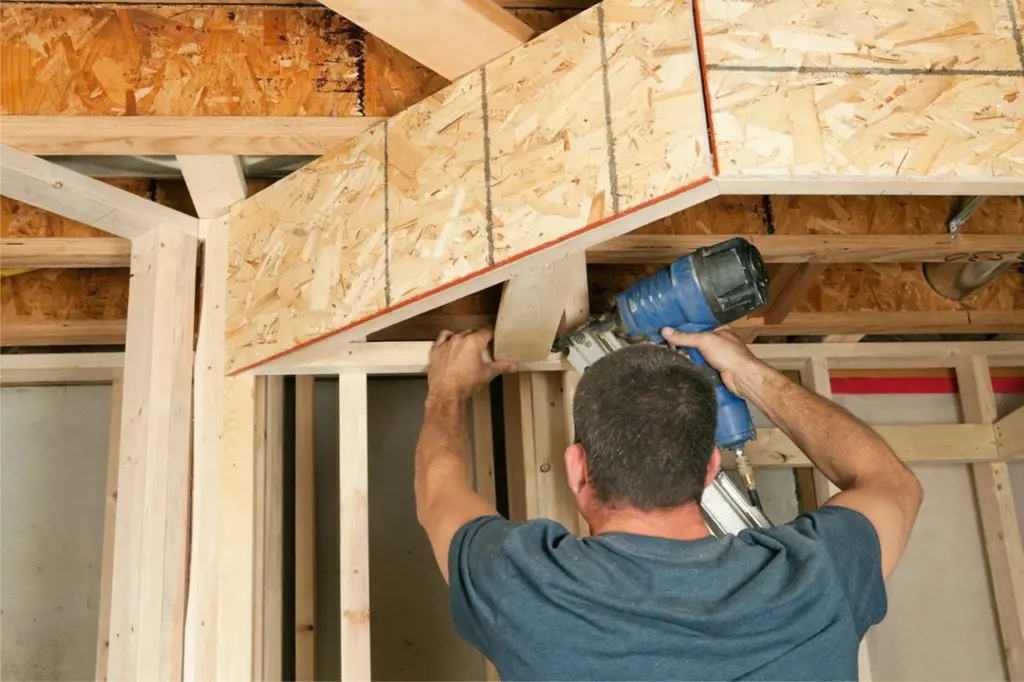
- Install the Wood Paneling: Finally, it is time to install the wood paneling on your basement walls. Start by applying construction adhesive to the back of the first panel and press it firmly against the wall. Use a level to ensure that the panel is plumb and make any necessary adjustments. Continue installing the panels, making sure to stagger the seams for a more natural look. Use finishing nails or a nail gun to secure the panels to the wall. Repeat this process until all the walls are covered with wood paneling.
Preparing your basement walls properly before installing wood paneling is crucial for a successful and long-lasting installation. By following these steps, you can ensure that your wood paneling will not only look great but also stand the test of time. Enjoy your newly transformed basement space!
The Cost of Epoxy Basement Wall Crack Repair: Everything You Need to Know
You may want to see also
![]()
What type of wood paneling is best for basement walls?
When it comes to finishing basement walls, using wood paneling can be a great choice due to its ability to add warmth and character to the space. However, not all types of wood paneling are suitable for basement walls, as they need to be able to withstand the unique conditions found in below-grade spaces. In this article, we will discuss the best type of wood paneling for basement walls, taking into account factors such as moisture resistance, durability, and aesthetics.
Moisture Resistance:
Basements are notorious for being damp and prone to moisture issues, so it is crucial to choose wood paneling that can withstand these conditions. One of the best options for basement walls is moisture-resistant medium-density fiberboard (MDF). MDF is an engineered wood product that is made by compressing wood fibers with resin under high pressure. This process creates a dense material that is less likely to warp or swell when exposed to moisture. Additionally, MDF can be finished with a waterproof sealant or painted to provide an extra layer of protection against moisture.
Durability:
Basement walls are subject to more wear and tear than walls in other parts of the house, as they may be susceptible to various factors such as humidity, temperature fluctuations, and potential water damage. Therefore, it is important to choose wood paneling that is durable and can withstand these conditions. One option is to use solid wood paneling, such as cedar or pine, which is known for its durability and resistance to decay. Another option is to use vinyl or PVC paneling, which is not only durable but also resistant to water and mold.
Aesthetics:
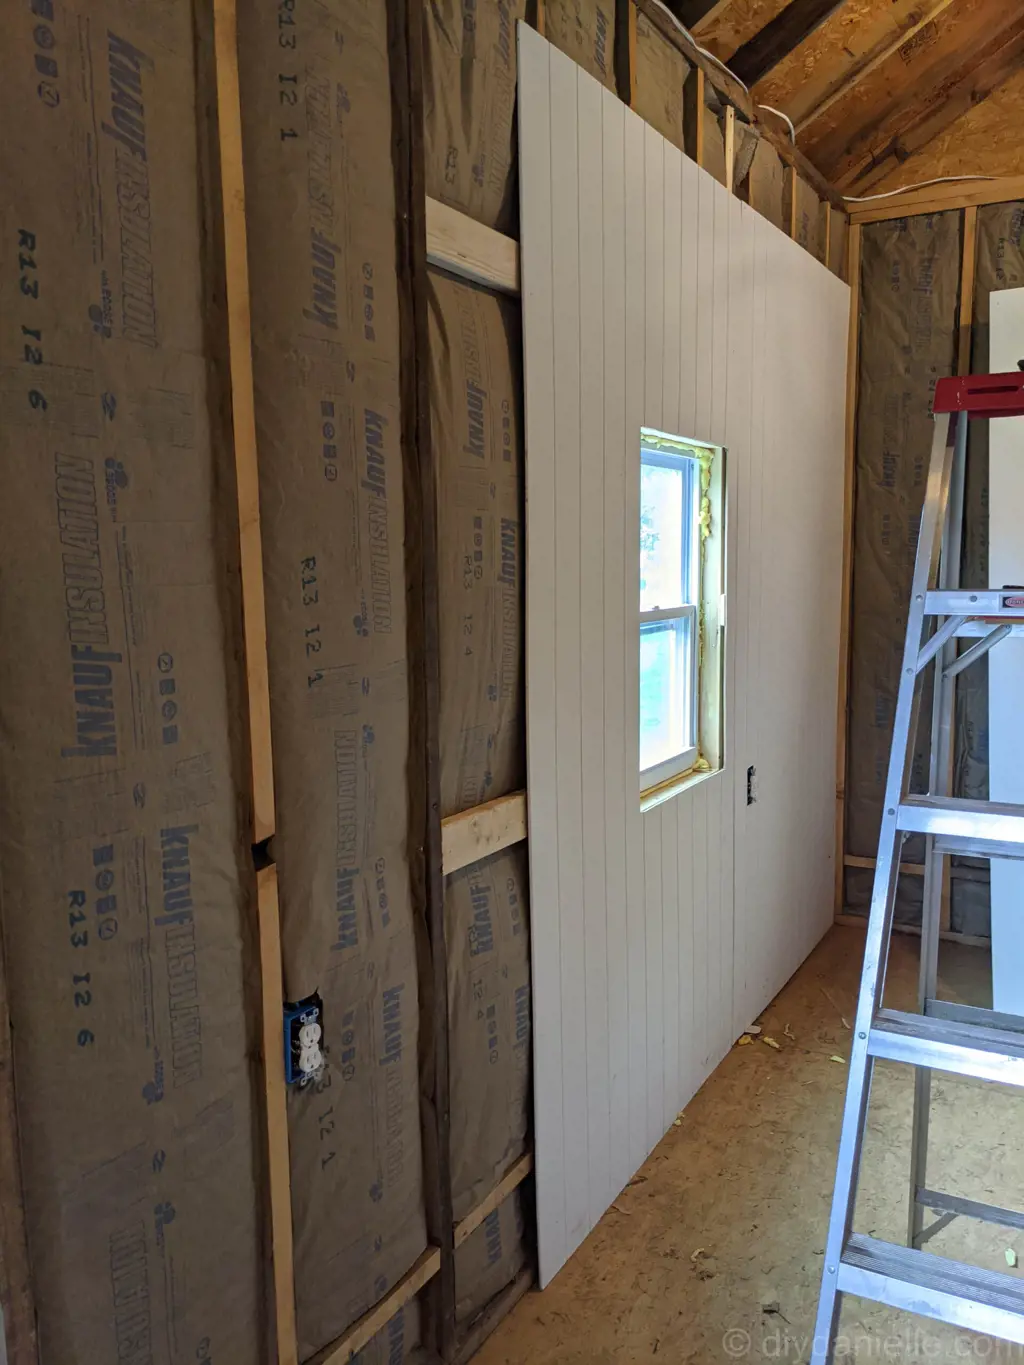
While functionality is important, it is equally essential to choose wood paneling that enhances the overall aesthetics of the basement. The choice of wood species, color, and style can greatly impact the ambiance of the space. For a rustic or traditional look, consider using tongue and groove cedar paneling, which adds warmth and natural beauty to the walls. If you prefer a more modern or contemporary aesthetic, go for sleek and smooth paneling made of materials like MDF or veneered plywood. Additionally, consider using lighter-colored paneling to make the basement feel more spacious and inviting.
In summary, the best type of wood paneling for basement walls is moisture-resistant MDF, solid wood such as cedar or pine, or vinyl/PVC paneling. These options are all capable of withstanding the unique conditions found in below-grade spaces, providing durability, moisture resistance, and aesthetic appeal. Remember to choose a paneling option that suits your personal style and complements the overall design of your basement.
Exploring Whether or Not You Can Safely Cover a French Drain in Your Basement
You may want to see also
![]()
Should I apply a moisture barrier before installing the wood paneling?
Should I apply a moisture barrier before installing wood paneling?
Wood paneling is a popular choice for walls and ceilings in both residential and commercial settings. It adds warmth and texture to a space, creating a cozy and inviting atmosphere. However, before you dive into your wood paneling project, it's important to consider whether or not you should apply a moisture barrier.
A moisture barrier, also known as a vapor barrier, is a material that is designed to prevent moisture from seeping through walls and causing damage. Moisture can come from the surrounding environment, such as humidity or water leaks, and it can also come from inside the building, such as condensation or moisture vapor transmission.
Here are a few key factors to consider when deciding whether or not to apply a moisture barrier before installing wood paneling:
- Location: If you're installing wood paneling in a damp or high-humidity area, such as a basement or bathroom, it's highly recommended to apply a moisture barrier. These areas are more prone to moisture-related problems, such as mold and mildew growth, and a moisture barrier can help prevent these issues.
- Climate: The climate of your region can also play a role in determining whether or not a moisture barrier is necessary. If you live in an area with a high moisture content, such as coastal regions or areas with a high water table, applying a moisture barrier is a good preventive measure.
- Substrate: The material that the wood paneling is being installed on can also influence the need for a moisture barrier. If the substrate is prone to moisture penetration, such as concrete or masonry, a moisture barrier can help protect the wood paneling from potential moisture damage.
- Installation method: The method used to install the wood paneling can also affect the need for a moisture barrier. If the paneling is being directly glued or attached to the substrate, without any air gap, a moisture barrier is highly recommended. This is because it prevents moisture from seeping through the substrate and reaching the wood paneling.
Applying a moisture barrier before installing wood paneling is a relatively simple process. Here are the steps to follow:
- Clean the substrate: Make sure the surface is clean, dry, and free from any debris that could interfere with the bonding of the moisture barrier.
- Choose the right barrier: There are different types of moisture barriers available, such as plastic sheeting, asphalt felt, or specialized moisture barrier paints. Choose the one that suits your needs and the requirements of your project.
- Install the barrier: Follow the manufacturer's instructions for installing the moisture barrier. This may involve rolling out the plastic sheeting or applying the barrier paint in a specific manner.
- Seal the seams: If you're using a plastic sheeting moisture barrier, make sure to overlap the seams and use tape or adhesive to create a watertight seal. This will ensure that no moisture can penetrate the barrier.
- Proceed with wood paneling installation: Once the moisture barrier is installed and sealed, you can proceed with the wood paneling installation. Follow the manufacturer's instructions for adhesive or attachment methods, and make sure to leave a small air gap between the paneling and the barrier to promote air circulation.
By taking the time to apply a moisture barrier before installing wood paneling, you can help protect your investment and prevent potential moisture-related problems. Remember to consider factors such as location, climate, substrate, and installation method to determine if a moisture barrier is necessary for your specific project.
Creating a Sturdy Floating Wall for Your Basement: A Step-by-Step Guide
You may want to see also
![]()
How should I secure the wood paneling to the basement walls?
When it comes to finishing the walls of a basement, wood paneling is a popular choice due to its aesthetic appeal and durability. However, proper installation and securing of the wood paneling is essential to ensure a long-lasting and secure finish. In this article, we will discuss the steps and methods you can use to secure wood paneling to your basement walls effectively.
- Prepare the walls: Before you start securing the wood paneling, it is crucial to prepare the walls properly. Ensure that the walls are clean and free from any dirt, dust, or moisture. Repair any cracks or damage on the walls and allow them to dry completely. If there is any existing paint or wallpaper, consider removing it for better adherence of the paneling.
- Measure and cut the wood paneling: Take precise measurements of the walls and cut the wood paneling accordingly. It is recommended to add a small gap at the bottom to allow for any expansion and contraction of the wood due to changes in humidity.
- Apply adhesive: Apply a construction adhesive to the back of the wood paneling using a caulk gun. Choose an adhesive that is specifically designed for bonding wood to concrete or masonry surfaces. Apply the adhesive in a zigzag pattern or in dots across the back of the paneling to ensure a strong bond.
- Press the paneling onto the wall: Carefully press the wood paneling onto the prepared wall, starting from one corner. Apply even pressure across the entire surface of the paneling to ensure that it adheres properly to the wall. Use a level to make sure the paneling is straight and plumb as you go.
- Secure with nails or screws: To provide additional support and hold the wood paneling in place, you can use nails or screws. It is recommended to use finishing nails or screws that are long enough to penetrate the wood paneling and into the wall at least 1 inch. Space the nails or screws approximately every 16 inches along the edges and at the center of each panel.
- Countersink and fill the nail or screw holes: After securing the wood paneling with nails or screws, use a countersink bit to create a recessed hole over each nail or screw head. This will allow you to fill the holes with wood filler or putty, ensuring a smooth and seamless finish. Sand the filled holes lightly once the filler has dried.
- Finish the wood paneling: Once the wood paneling is securely attached to the walls, you can proceed with finishing touches such as sanding, staining, or painting. Choose a finish that complements the overall aesthetics of your basement and protects the wood from moisture or damage.
In conclusion, securing wood paneling to basement walls requires careful preparation, precise measurement, proper adhesive application, and securing with nails or screws. Following these steps will help ensure a secure and attractive finish for your basement walls. Remember to choose high-quality materials and take your time to achieve the best results.
Exploring the Legality and Practicality of Having a Pistol Lane in Your Basement in Pennsylvania
You may want to see also
![]()
Are there any special considerations for installing wood paneling on concrete basement walls compared to drywall?
Installing wood paneling on concrete basement walls can be a great way to add warmth and texture to your space. However, there are some special considerations to keep in mind when undertaking this project compared to installing it on drywall. In this article, we will discuss the steps involved in installing wood paneling on concrete basement walls, the tools and materials needed, and some tips to ensure a successful installation.
Step 1: Prepare the Walls
Before you begin installing the wood paneling, it's important to ensure that the concrete walls are clean and properly prepared. Start by removing any existing paint or wallpaper from the walls. You may need to use a chemical paint stripper or a wallpaper removal solution for this step. Once the walls are clean, inspect them for any cracks or uneven surfaces. If necessary, use a patching compound to fill any holes or cracks and sand down any rough spots.
Step 2: Moisture Barrier
Concrete basement walls can be prone to moisture, so it's important to install a moisture barrier before applying the wood paneling. This will help prevent any moisture from seeping into the wood and causing damage. A common option for a moisture barrier is a layer of plastic sheeting or a vapor barrier paint. These materials create a barrier between the concrete and the wood paneling, keeping it dry and protected.
Step 3: Install Furring Strips
To ensure a secure installation of the wood paneling, it's recommended to install furring strips on the concrete walls. Furring strips are thin strips of wood that create a gap between the concrete and the wood paneling, allowing air circulation and reducing the risk of moisture buildup. Use a hammer drill to attach the furring strips to the concrete walls using concrete screws or masonry anchors. Make sure the furring strips are level and evenly spaced.
Step 4: Measure and Cut the Wood Paneling
Measure the height and width of each wall and cut the wood paneling to fit accordingly. Use a circular saw or a table saw to make clean and accurate cuts. It's crucial to leave a small gap between the bottom of the wood paneling and the floor to allow for expansion and contraction.
Step 5: Attach the Wood Paneling
Once the wood paneling is cut to size, it's time to attach it to the furring strips. Apply a construction adhesive to the back of the wood paneling and press it firmly against the wall. Use finishing nails to secure the paneling in place, making sure to countersink the nails. Repeat this process for each piece of wood paneling until the entire wall is covered.
Step 6: Finishing Touches
After the wood paneling is installed, you can add any finishing touches to complete the look. This may include filling any nail holes or gaps with wood putty and sanding it smooth. You can also stain or paint the wood paneling to match your desired aesthetic. Be sure to use a finishing product that is suitable for wood in a potentially damp environment.
In conclusion, installing wood paneling on concrete basement walls requires some extra steps in comparison to drywall. It's important to properly prepare the walls, install a moisture barrier, attach furring strips, measure and cut the wood paneling, and secure it to the walls. By following these steps and taking the necessary precautions, you can successfully install wood paneling in your basement and enjoy a warm and inviting space for years to come.
Exploring Unlikely Possibilities: How Did a Baby Snack End Up in a Finished Basement?
You may want to see also
Frequently asked questions
To install wood paneling on basement walls, you will need a measuring tape, level, saw, drill, hammer, nails or screws, adhesive if desired, and a helper to assist with holding and positioning the paneling.
Before installing wood paneling, make sure the basement walls are clean and free of any dirt or debris. If there are any existing finishes or paint on the walls, remove them by sanding or using a chemical stripping agent. Ensure that the walls are primed and dry before proceeding with paneling installation.
The best method for installing wood paneling on basement walls is to start by measuring and cutting the panels to fit the wall dimensions. Use a level to ensure the panels are straight and even. Attach the panels to the walls using nails or screws, making sure to secure them at the studs. If desired, you can also use adhesive in addition to nails or screws for added stability.
When installing wood paneling in a basement, it is important to take precautions to prevent moisture-related issues. Ensure that the basement is properly waterproofed and insulated to avoid water leakage or condensation. Consider using moisture-resistant or treated wood paneling to mitigate the risk of mold or mildew growth. Additionally, leave a small gap between the bottom of the paneling and the floor to allow for airflow and prevent moisture buildup.