Are you looking to add stability and strength to your basement walls? Mortaring is a tried and true method of ensuring the longevity and durability of your basement walls. Whether you are building a new home or renovating an existing one, properly mortaring your basement walls can provide a solid foundation for your entire structure. In this guide, we will take you step-by-step through the process of mortaring your basement walls, giving you the knowledge and confidence to tackle this project on your own. So, grab your tools and let's get started on transforming your basement into a secure and inviting space.
| Characteristics | Values |
|---|---|
| Materials | Cement, sand, water, mortar mix |
| Tools | Trowel, mortar board, mortar mixer, safety goggles |
| Preparation | Clean the wall surface, remove any loose or damaged material, dampen the surface |
| Mixing | Combine mortar mix with water in a mortar mixer or wheelbarrow, mix until it has a consistency similar to peanut butter |
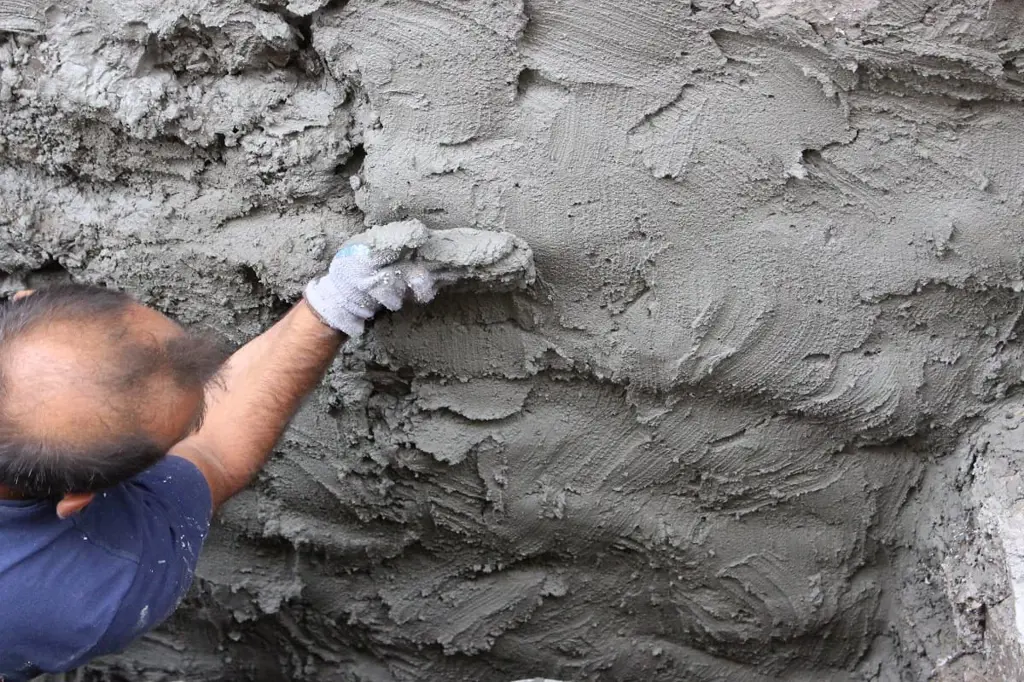
| Application | Use a trowel to scoop up mortar from the board and apply it to the wall surface in a thick layer, smooth the mortar with the trowel |
| Building up | Continue applying layers of mortar until desired thickness is achieved, stack the mortar joints in a staggered pattern to increase strength |
| Curing | Allow the mortar to cure for at least 24 to 48 hours, keeping it damp by spraying it with water occasionally |
| Finishing | Brush or sponge the surface to create a smooth finish, remove any excess mortar from the joints, let it dry completely before proceeding with further construction |
| Safety | Wear safety goggles to protect your eyes from flying debris, work in a well-ventilated area to avoid inhaling dust and fumes |
| Care | Take care not to overmix the mortar, as this can weaken its strength, clean tools and equipment thoroughly after use to prevent the mortar from hardening and clogging them |
What You'll Learn
- What materials are needed to mortar basement walls?
- What is the process for preparing the basement walls before mortar application?
- How do you mix the mortar for basement walls?
- What techniques should be used when applying mortar to basement walls?
- Are there any specific safety precautions to consider when mortar basement walls?
![]()
What materials are needed to mortar basement walls?
When it comes to mortaring basement walls, there are a few essential materials that you will need to ensure a proper and long-lasting job. Mortaring basement walls is an important step in basement construction or renovation, as it provides a secure and water-resistant barrier that helps to support the structure of the basement.
Here are some of the materials that you will need to mortar basement walls:
- Cement: Cement is the main ingredient in mortar and provides the strength and durability needed to hold the bricks or blocks together. Portland cement is commonly used for mortar applications.
- Sand: Sand is mixed with the cement to create the mortar. It is important to use the right type and grade of sand for mortar, as it affects the consistency and workability of the mixture.
- Water: Water is needed to mix the cement and sand together to form the mortar. It is important to add the correct amount of water, as too much or too little can affect the strength and workability of the mortar.
- Trowel: A trowel is a handheld tool that is used to spread and shape the mortar. It is essential for applying the mortar to the basement walls and ensuring a smooth and even surface.
- Mortar mixer: A mortar mixer is a machine that is used to mix the cement, sand, and water together. It ensures a consistent and well-mixed mortar that is ready to be applied to the basement walls.
- Mortar board: A mortar board is a flat board that is used to hold and mix the mortar. It provides a stable surface for mixing the cement and sand together.
- Mortar bag or pointing trowel: A mortar bag or pointing trowel is used to fill the joints between the bricks or blocks with mortar. It helps to ensure a clean and finished look and provides additional strength to the structure.
- Safety equipment: It is important to wear safety equipment such as gloves and goggles while working with mortar. Cement can be caustic to the skin, and goggles protect the eyes from any splashes.
Now that you have an idea of the materials needed, here is a step-by-step guide on how to mortar basement walls:
- Prepare the surface: Clean the basement walls thoroughly to remove any dirt, dust, or loose debris. This will ensure that the mortar adheres properly to the surface.
- Mix the mortar: In a mortar mixer or on a mortar board, mix the cement and sand together according to the manufacturer's instructions. Add the water gradually while mixing until you achieve a thick and workable consistency.
- Apply the mortar: Using the trowel, scoop up some mortar and apply it to the basement wall. Spread it evenly and firmly, ensuring that it fills the joints between the bricks or blocks.
- Butter the bricks or blocks: Apply mortar to the sides of the bricks or blocks before placing them on the wall. This will create a stronger bond and provide additional stability.
- Lay the bricks or blocks: Place the bricks or blocks on top of the mortar bed, pressing them firmly into place. Use a level to ensure that they are straight and plumb.
- Fill the joints: Using a mortar bag or pointing trowel, fill the joints between the bricks or blocks with mortar. Scrape off any excess mortar and ensure that the joints are filled completely.
- Clean up: Use a brush or sponge to clean any excess mortar from the bricks or blocks before it dries.
- Allow the mortar to cure: Let the mortar cure for a minimum of 24 hours before applying any additional loads or finishing the basement.
In conclusion, mortaring basement walls requires a few essential materials such as cement, sand, water, trowel, mortar mixer, mortar board, mortar bag or pointing trowel, and safety equipment. By following the steps mentioned above, you can ensure a proper and long-lasting mortar job for your basement walls.
Installing a Basement French Drain: Is Winter the Right Time?
You may want to see also
![]()
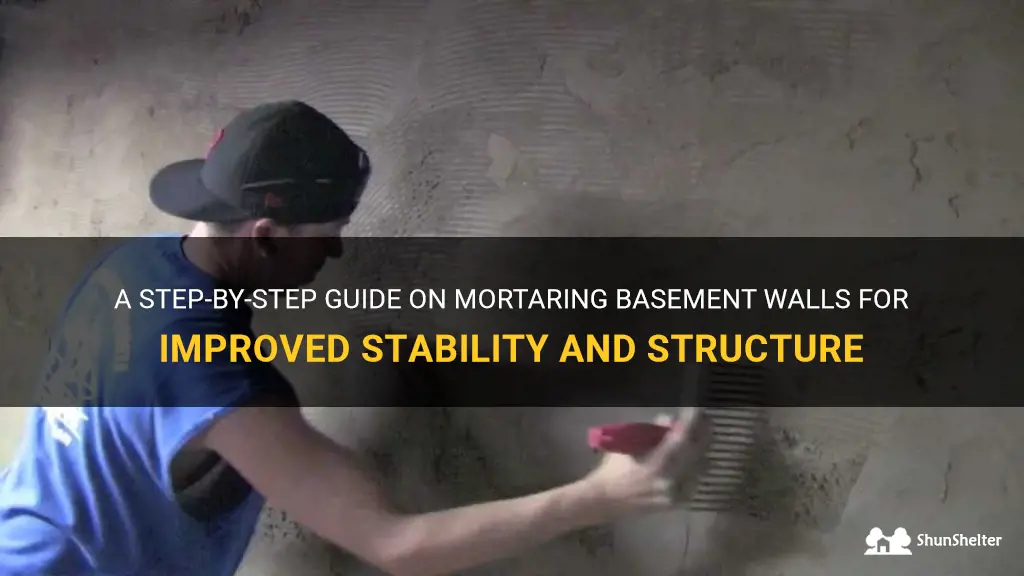
What is the process for preparing the basement walls before mortar application?
When it comes to preparing basement walls before applying mortar, there are several important steps to follow. Proper preparation is crucial for ensuring the longevity and stability of the mortar application. In this article, we will outline the process for preparing basement walls before mortar application, using scientific knowledge, experience, step-by-step instructions, and examples.
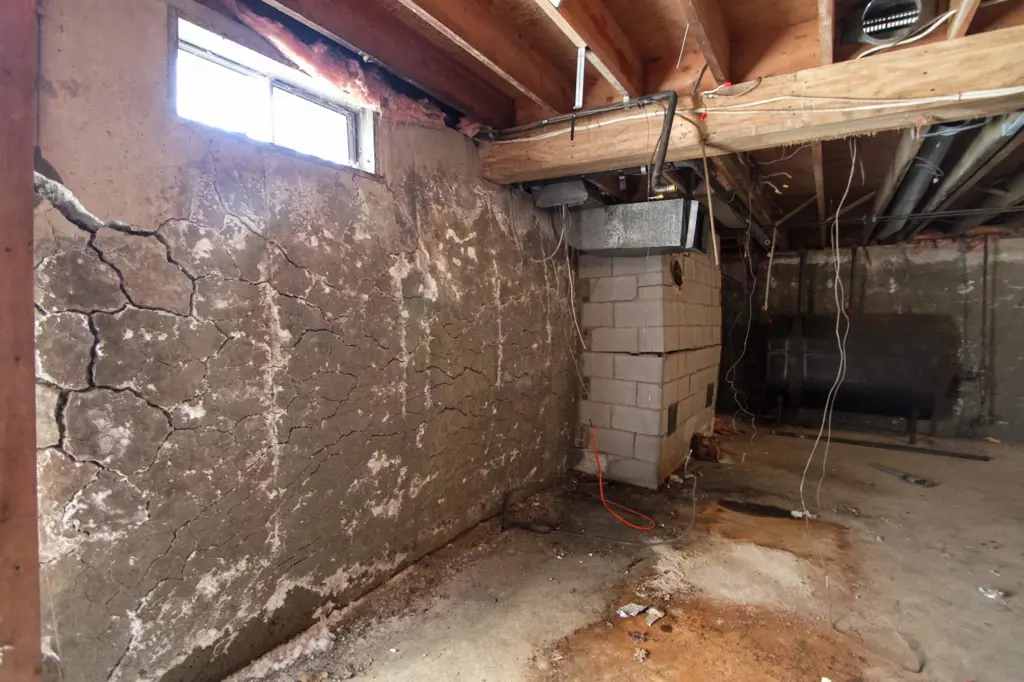
Assess the Condition of the Walls:
The first step is to assess the condition of the basement walls. Look for any signs of moisture, cracks, or damage. Moisture can be a sign of water intrusion, which needs to be addressed before any mortar application. Cracks and damage need to be repaired to ensure a solid foundation for the mortar.
Clean the Walls:
Before applying mortar, the walls need to be thoroughly cleaned. Remove any dirt, dust, or debris from the surfaces using a stiff brush or a pressure washer. This will ensure proper adhesion of the mortar.
Repair Cracks and Damage:
If there are any cracks or damage on the walls, they need to be repaired before applying mortar. Depending on the severity of the damage, different repair methods may be required. Simple cracks can be filled with epoxy or polyurethane-based fillers. Larger cracks or holes may require more extensive repair work, such as patching with concrete or applying a mortar mix.
Seal Any Moisture Sources:
If there are any sources of moisture in the basement, such as leaks or condensation, they need to be sealed before applying mortar. This may involve fixing any plumbing leaks, improving drainage around the foundation, or installing a vapor barrier on the walls.
Apply a Bonding Agent:
To enhance the adhesion of the mortar to the walls, it is recommended to apply a bonding agent. This can be a liquid bonding agent that is applied with a brush or a roller. The bonding agent helps the mortar adhere to the surface and prevents it from cracking or delaminating.
Mix the Mortar:
Next, prepare the mortar mix according to the manufacturer's instructions. The mortar mix should have the right consistency for easy application onto the walls. Typically, mortar consists of sand, cement, and water, but the proportions may vary depending on the specific product you are using.
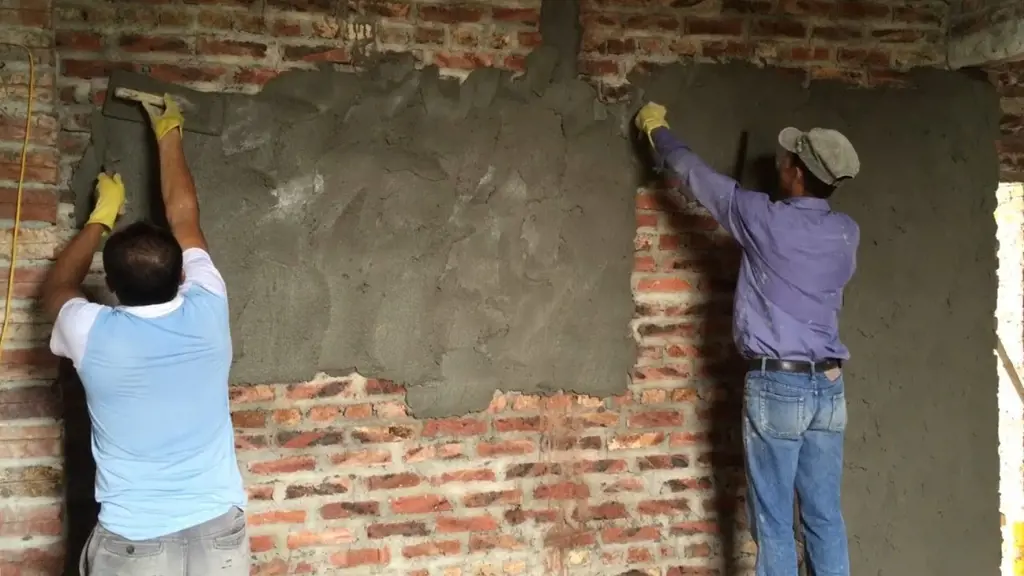
Apply the Mortar:
Using a trowel or a pointing tool, apply the mortar onto the prepared basement walls. Start from the bottom and work your way up to ensure even coverage. Make sure to press the mortar firmly onto the walls to eliminate any air pockets and create a strong bond.
Smooth and Finish:
After applying the mortar, you can smooth and finish the surface using a trowel or a finishing tool. This will give the walls a clean and professional appearance. Pay attention to any corners or edges that may require additional smoothing.
Cure the Mortar:
Lastly, allow the mortar to cure according to the manufacturer's instructions. Curing time may vary depending on the type of mortar used. During the curing process, it is important to keep the walls protected from excessive moisture or temperature changes.
In conclusion, preparing basement walls before mortar application requires careful assessment, cleaning, repair, sealing, bonding, mixing, and application. Following these steps will ensure a strong and durable mortar application that will enhance the stability and functionality of your basement walls.
Can You Sue the Previous Homeowner for a Water Leak in the Basement?
You may want to see also
![]()
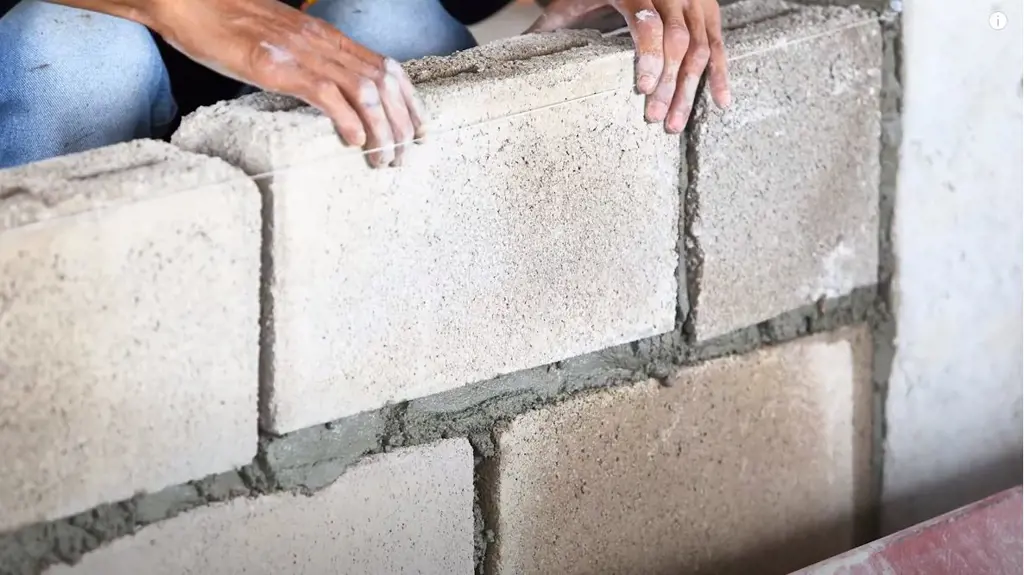
How do you mix the mortar for basement walls?
Mixing mortar for basement walls is a crucial step in the process of building a sturdy and durable structure. Mortar acts as a bonding agent that holds the bricks or blocks together, providing stability and strength to the walls. It is essential to mix mortar properly to ensure a uniform consistency and optimal performance.
Here is a step-by-step guide on how to mix mortar for basement walls:
- Gather the necessary materials: To mix mortar, you will need cement, sand, and water. The ratio of these ingredients depends on the type of mortar you are using. For general-purpose mortar, a common ratio is 1 part cement, 3 parts sand, and enough water to achieve a workable consistency. However, it is always best to refer to the manufacturer's instructions for the specific mortar mix you are using.
- Measure the ingredients: Use a shovel or a bucket to measure the desired amount of cement and sand. Ensure accurate measurements to maintain the integrity of the mortar mix. Use a ratio calculator or a measuring tool to achieve precise measurements.
- Mix the dry ingredients: In a clean and sturdy mixing container, combine the measured amounts of cement and sand. Using a shovel or a hoe, thoroughly mix the dry ingredients until they are evenly distributed. This step ensures that the cement and sand are well-blended before adding water.
- Add water: Gradually add water to the dry mix while stirring continuously. It is essential to add the water gradually to achieve the desired consistency. Avoid adding too much water at once, as it can result in a runny or weak mortar mix. Keep stirring until the water is fully incorporated into the mixture.
- Check the consistency: The consistency of the mortar is crucial for its performance. The mortar should have a soft and sticky texture that can hold its shape when formed into a ball. It should not be too dry or too wet. If the mix is too dry, add small amounts of water and remix until the desired consistency is achieved. If it is too wet, add a bit more cement and sand to balance it out.
- Let the mortar rest: After mixing, let the mortar rest for a few minutes. This resting period allows the ingredients to bond together more effectively and improves the workability of the mortar. During this time, avoid adding additional water or stirring the mix.
- Use the mortar: Once the mortar has rested, it is ready to be used for building the basement walls. Apply the mortar to the bricks or blocks using a trowel, ensuring an even and consistent coverage. Press the bricks or blocks firmly into place, allowing the mortar to bond them together. Repeat the process until the basement walls are complete.
It is important to note that the proper mixing of mortar is essential for a strong and durable structure. Using the correct ratios and ensuring a consistent and workable consistency will result in a well-built basement that can withstand the test of time.
In conclusion, mixing mortar for basement walls involves combining cement, sand, and water to achieve a uniform consistency. Following the proper steps and using accurate measurements will ensure that the mortar mix is of high quality. By using the right mortar, you can build basement walls that are sturdy, durable, and provide exceptional support for your construction project.
Tips for Finishing Basement Walls with a Vapor Barrier
You may want to see also
![]()
What techniques should be used when applying mortar to basement walls?
When it comes to applying mortar to basement walls, it is important to use the proper techniques to ensure a strong and durable bond. Mortar is a mixture of cement, sand, and water that is used to bind building materials together. It is commonly used in construction projects, including the application of cement to basement walls. In this article, we will discuss the techniques that should be used when applying mortar to basement walls.
Step 1: Preparation
Before applying mortar, it is important to properly prepare the basement walls. This involves cleaning the walls of any dirt, debris, or loose material. It may also be necessary to dampen the walls with water before applying the mortar. This can improve adhesion and prevent the mortar from drying too quickly.
Step 2: Mixing the Mortar
The next step is to mix the mortar. The ratio of cement to sand will vary depending on the specific type of mortar being used. Follow the manufacturer's instructions for the proper mix ratio. The mortar should have a consistency that allows it to be easily spread but is not too watery or too dry.
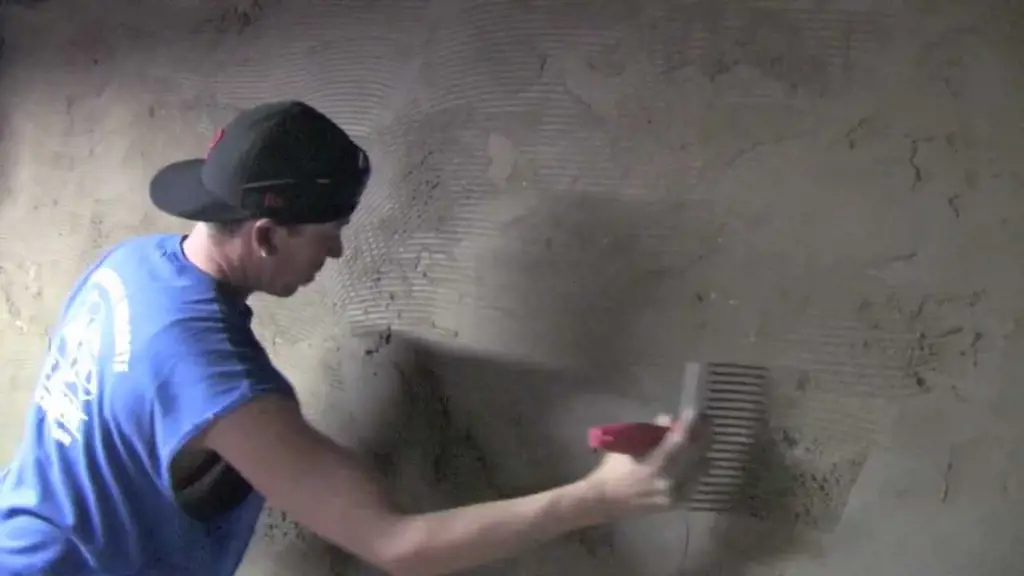
Step 3: Applying the Mortar
To apply the mortar to the basement walls, use a trowel. Begin by scooping up a small amount of mortar onto the trowel. Hold the trowel at a slight angle and apply the mortar to the wall in a thin, even layer. Press the mortar firmly onto the wall, ensuring good contact with the surface.
Step 4: Working in Sections
When applying mortar to basement walls, it is best to work in small sections. This allows for better control and ensures that the mortar does not dry before it can be properly applied. Start at the bottom of the wall and work your way up, smoothing out the mortar as you go. If necessary, use a mortar jointer or a pointing trowel to shape the mortar joints.
Step 5: Curing the Mortar
After applying the mortar to the basement walls, it is important to allow it to cure properly. This involves keeping the mortar damp for a period of time, typically at least 24 to 48 hours. This can be done by misting the mortar with water or covering it with a damp cloth. Curing the mortar allows it to fully harden and bond to the walls.
In conclusion, when applying mortar to basement walls, it is important to follow the proper techniques to ensure a strong and durable bond. This includes properly preparing the walls, mixing the mortar to the correct consistency, applying the mortar in small sections, and allowing it to cure properly. By following these steps, you can ensure that your basement walls are properly sealed and protected for years to come.
The Step-by-Step Guide to Building a Wall in Your Basement
You may want to see also
![]()
Are there any specific safety precautions to consider when mortar basement walls?
Mortar is a common material used in the construction of basement walls. It provides strength and stability to the structure, but it is essential to take certain safety precautions when working with mortar. This article will discuss some key safety measures to consider when mortar basement walls, including protecting your skin, wearing appropriate safety gear, and following proper procedures.
- Protect your skin: Mortar is a mixture of cement, sand, and water, which can be harsh on the skin. When working with mortar, it is crucial to protect your skin from direct contact. Wear long sleeves, pants, and gloves to prevent any skin irritation or burns. If mortar comes into contact with your skin, immediately rinse it off with water. Avoid prolonged exposure to wet mortar, as it can cause chemical burns.
- Wear appropriate safety gear: Besides protecting your skin, it is essential to wear other safety gear to prevent any injuries. This includes safety glasses or goggles to protect your eyes from flying debris or splashes of wet mortar. Additionally, wear a dust mask to avoid inhaling any hazardous dust particles that may be released when mixing or applying mortar. Finally, wear sturdy work boots to protect your feet from falling objects or accidental contact with sharp materials.
- Follow proper procedures: Working with mortar requires following specific procedures to ensure safety. Before starting any work, always read and follow the manufacturer's instructions for the specific type of mortar being used. Make sure you have a clean and well-ventilated work area, as the fumes from mortar can be harmful if inhaled in large quantities. When mixing mortar, use the correct proportions of cement, sand, and water as specified in the manufacturer's instructions. Improperly mixed mortar could compromise the structural integrity of the basement walls.
- Use proper lifting techniques: Mortar bags can be heavy, so it is essential to use proper lifting techniques to avoid straining your back or causing any other injuries. Bend your knees and lift with your legs, not your back. Ask for assistance if needed, especially when lifting heavy bags of mortar.
- Keep the work area clean and organized: A cluttered and messy work area can be hazardous. Thoroughly clean up any spilled mortar or debris to prevent slips, trips, and falls. Keep your work area well-organized to ensure easy access to all tools and materials. This will help minimize accidents and injuries.
In conclusion, when mortar basement walls, it is crucial to prioritize safety. Protecting your skin, wearing appropriate safety gear, following proper procedures, using proper lifting techniques, and keeping the work area clean and organized are all essential safety precautions. By taking these precautions, you can ensure a safe and successful mortar project.
Building a Basement in San Diego: What You Need to Know
You may want to see also
Frequently asked questions
Before applying mortar to your basement walls, it is important to thoroughly clean them. Remove any dirt, dust, or loose debris using a wire brush or scraper. You may also need to use a cleaning solution to remove any stains or stubborn dirt. Additionally, make sure that the walls are dry before applying mortar to ensure proper adhesion.
When choosing a mortar for basement walls, it is important to use a type that is suitable for below-grade applications. Look for a mortar that is specifically labeled for use in wet or damp environments, as well as one that is rated for below-grade use. These types of mortar are designed to withstand the moisture and potential water infiltration commonly found in basements.
To apply mortar to basement walls, start by mixing the mortar according to the manufacturer's instructions. Use a trowel to spread a thin layer of mortar onto the wall, making sure to cover the entire surface. Then, use a notched trowel to create ridges or grooves in the mortar. This helps to improve the adhesion between the mortar and the wall. Finally, press the mortar firmly against the wall with a masonry brush or the back of the trowel to ensure good contact.
Depending on the specific conditions and requirements of your basement walls, you may need to add certain additives to the mortar. For example, if you are dealing with a highly moisture-prone area, you may want to add a waterproofing agent to the mortar mix. This will help to prevent water infiltration and potential damage to the mortar over time. Always refer to the manufacturer's instructions and consult with a professional if you are unsure about which additives to use.
The drying time for mortar on basement walls can vary depending on factors such as temperature, humidity, and the specific type of mortar used. In general, mortar takes anywhere from 24 to 48 hours to fully dry. However, it is important to note that this is just the initial drying time. The mortar will continue to cure and strengthen over the course of several weeks. It is recommended to avoid any excessive moisture or pressure on the walls during this curing period to ensure the best results.