
Installing a new kitchen faucet may seem like a daunting task, but with the right tools and a little know-how, it can be a breeze. Whether you're replacing an old faucet or upgrading to a more stylish model, there are a few essential items you'll need to ensure a smooth installation. From basic tools like a wrench and pliers to specialized items like Teflon tape and a basin wrench, this guide will walk you through everything you need to know to install a kitchen faucet with ease. So, get ready to take your kitchen to the next level and give yourself the convenience and style you deserve with a brand new faucet installation!
| Characteristics | Values |
|---|---|
| Faucet type | Single handle, double handle, pull-down |
| Mounting type | Deck mount, wall mount |
| Number of holes | 1-hole, 2-hole, 3-hole, 4-hole |
| Finish | Chrome, stainless steel, brushed nickel |
| Spout height | Low, medium, high |
| Spout reach | Standard, extended |
| Handle style | Lever, knob, cross |
| Flow rate | 1.5 GPM, 2.2 GPM, 2.5 GPM |
| Installation method | DIY, professional installation |
| Warranty | Varies by manufacturer |
| Additional features | Pull-out spray, touchless operation, soap dispenser |
What You'll Learn
![]()
Choosing the Right Kitchen Faucet
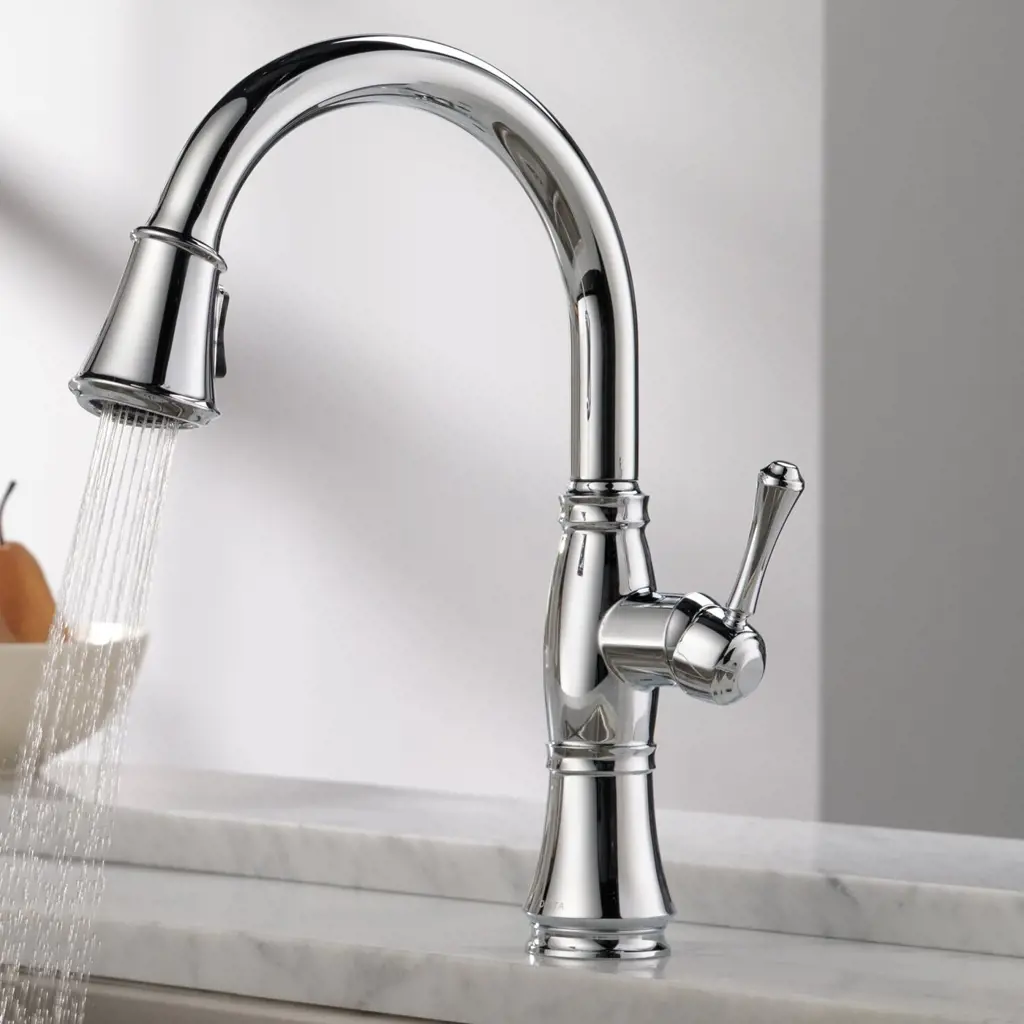
When it comes to selecting a kitchen faucet, the design and finish can make a big difference in the overall look and feel of your kitchen. With so many options available, it can be overwhelming to decide which design and finish is right for you. Here are some factors to consider when making your decision:
- Style: The style of your kitchen faucet should complement the overall design and decor of your kitchen. Whether you have a modern, traditional, or transitional kitchen, there are countless faucet designs to choose from. Consider the shape, curves, and lines of the faucet to ensure it matches the style you desire.
- Finish: The finish of your kitchen faucet can greatly enhance its appearance and durability. Popular finishes include chrome, stainless steel, brushed nickel, oil-rubbed bronze, and matte black. Choose a finish that coordinates well with your kitchen appliances and fixtures for a cohesive look.
- Maintenance: Consider the maintenance requirements of different finishes. Some finishes, such as chrome, are easy to clean and resistant to water spots and fingerprints. Others, like matte black, may require more regular cleaning to maintain their appearance. Choose a finish that aligns with your cleaning preferences and lifestyle.
- Durability: Look for faucets made from high-quality materials that offer durability and longevity. Brass and stainless steel are often recommended for their resistance to corrosion and wear.
In addition to the design and finish, it's important to consider the features of a kitchen faucet. Here are some key features to keep in mind when selecting the right faucet for your kitchen:
- Spout Height and Reach: The spout height and reach will determine how comfortably you can use the faucet. Consider the size of your sink and the tasks you commonly perform in the kitchen. A higher spout can accommodate taller pots and pans, while a longer reach can make it easier to access different areas of your sink.
- Swivel Capability: A faucet with a swivel spout allows you to move the faucet from side to side, giving you more flexibility and convenience when using the sink. This feature can be particularly useful if you have a double-bowl or multi-function sink.
- Sprayer Options: Many kitchen faucets come with a separate sprayer attachment or a pull-down or pull-out sprayer built into the faucet itself. Consider your cleaning and washing needs to determine which option is best for you. Pull-down or pull-out sprayers offer more flexibility and reach, while separate sprayers can be detached for precision cleaning.
- Water Flow Options: Look for faucets with different water flow options, such as aerated stream and powerful spray. The ability to switch between these options can make various tasks, such as rinsing vegetables or filling pots, more efficient.
One important decision you'll need to make when choosing a kitchen faucet is whether to go with a single handle or a double handle design. Each option has its advantages, so consider your personal preferences and needs before making a decision.
- Single Handle Faucets: Single handle faucets are the most common choice for modern kitchens. They offer convenience and ease of use, allowing you to control both the water temperature and flow with one hand. Single handle faucets are also space-efficient, making them a great option for smaller sinks or countertops.
- Double Handle Faucets: Double handle faucets feature separate handles for hot and cold water. They offer a more traditional look and allow for precise temperature control. Double handle faucets can be a good choice if you have a larger sink or prefer a classic aesthetic.
When selecting a kitchen faucet, you'll also need to decide whether a pull-down or pull-out sprayer is the right choice for you. Both options have their pros and cons, so consider your specific needs and preferences.
- Pull-Down Sprayers: Pull-down sprayers are attached to the faucet as a secondary spout. They can be pulled down into the sink and offer flexibility and ease of use. Pull-down sprayers are great for filling large pots and pans, and they often come with different spray modes for various cleaning tasks.
- Pull-Out Sprayers: Pull-out sprayers are also attached to the faucet but have a longer hose that can be pulled out and used in different areas of the sink. They are well-suited for smaller sinks and can be used for tasks that require more precision, such as rinsing dishes or washing vegetables.
Another popular option to consider when choosing a kitchen faucet is whether to go with a touchless or touch-activated model. These innovative faucets offer added convenience and hygiene benefits.
- Touchless Faucets: Touchless faucets use motion-sensor technology to turn the water on and off, allowing you to activate the faucet without touching it. This feature can be especially helpful when your hands are dirty or when you have limited mobility. Touchless faucets help reduce the spread of germs and can be a great addition to a busy kitchen.
- Touch-Activated Faucets: Touch-activated faucets require a simple touch, such as a tap on the spout or handle, to activate the water flow. This feature can be useful when you have your hands full or need to quickly turn on the faucet. Touch-activated faucets combine the convenience of touchless technology with simple touch controls.
If you're concerned about the quality of your water, you may want to consider a kitchen faucet with built-in filtering options. These faucets feature a filtration system that removes impurities and improves the taste and smell of your water.
- Built-in Filters: Some kitchen faucets come with built-in filtration systems that can effectively purify your water right at the tap. These systems typically include replaceable filters that need to be regularly changed to maintain optimal performance. Consider the type of filtration technology used and the cost and availability of replacement filters when choosing a faucet with built-in filters.
- Compatibility with External Filters: Alternatively, you can opt for a kitchen faucet that is compatible with external water filters. These filters can be installed under your sink or at the point of entry and provide comprehensive water filtration for the entire house. Check the compatibility between the faucet and the external filters you are considering to ensure a seamless installation.
Before making a final decision on a kitchen faucet, it's essential to ensure that it will be compatible with your existing plumbing setup. Here are some factors to consider when checking compatibility:
- Mounting Holes: Measure the distance between the mounting holes on your sink or countertop to ensure that the faucet you choose will fit. Most standard faucets require three mounting holes, but some single-handle faucets can be installed in a single hole.
- Deck Thickness: Consider the thickness of your sink or countertop when selecting a kitchen faucet. Some faucets may require additional installation components or extensions to accommodate thicker surfaces.
- Plumbing Connections: Ensure that the faucet's plumbing connections align with your existing plumbing. Check the size and type of connections required and compare them to your current water supply lines.
- Water Pressure: Verify that the faucet you select is suitable for the water pressure in your home. Low-pressure faucets may not provide adequate flow, while high-pressure faucets can lead to splashing and waste water.
By taking into account the design and finish, faucet features, handle options, sprayer types, touchless capabilities, filtering options, and plumbing compatibility, you can choose the perfect kitchen faucet for your needs and style. Remember to always prioritize functionality, durability, and ease of use when making your decision.
Troubleshooting Tips for a Moen Kitchen 2 Handle Faucet That Won't Open
You may want to see also
![]()
Gathering the Necessary Tools and Materials
Essential Tools:
- Adjustable Wrench: An adjustable wrench is a versatile tool that can be used to tighten or loosen nuts and bolts. It is essential for removing the old faucet and installing the new one.
- Basin Wrench: A basin wrench is a specialized tool that is used for reaching into tight spaces, such as under the sink, to loosen or tighten nuts. It is particularly useful for working on the water supply lines and the faucet connections.
- Plumbers Tape: Plumbers tape, also known as Teflon tape, is a thin white tape that is wrapped around the threads of pipes and fittings to create a watertight seal. It is essential for preventing leaks at the connections.
- Screwdriver: A screwdriver is used for removing and installing screws. You may need it to remove the screws that hold the old faucet in place or to install the new faucet.
- Bucket or Container for Water: It is important to have a bucket or container available to catch any water that may spill during the removal or installation process. This will help to minimize mess and make clean-up easier.
Additional Materials:
- Faucet: The faucet itself is, of course, a crucial component for any plumbing project. Make sure you have the new faucet on hand, along with any included parts and instructions.
- Supply Lines: Supply lines are the flexible hoses that connect the faucet to the water supply valves. Ensure you have the appropriate length and type of supply lines for your installation.
- Plumbers Putty or Silicone Sealant: Plumbers putty or silicone sealant is used to create a waterproof seal around the base of the faucet. This helps to prevent water from seeping between the sink and the faucet.
- Mounting Hardware: Depending on the type of faucet you are installing, you may need mounting hardware, such as nuts, bolts, and washers, to secure the faucet to the sink. Make sure you have the correct hardware for your specific faucet.
- Optional Escutcheon Plate: An escutcheon plate is a decorative cover that can be used to conceal any gaps between the faucet and the sink. If your new faucet includes an escutcheon plate and you would like to use it, make sure you have it available.
By gathering all of the necessary tools and materials before you begin your plumbing project, you will save time and ensure a smoother installation or repair process. Take the time to double-check that you have everything you need, and if necessary, make a trip to the hardware store to restock. Having the right tools and materials will set you up for success and help you achieve professional-looking results.
Creative DIY: Crafting a Kitchen Island Using Paper for a Budget-Friendly Upgrade
You may want to see also
![]()
Removing the Old Faucet
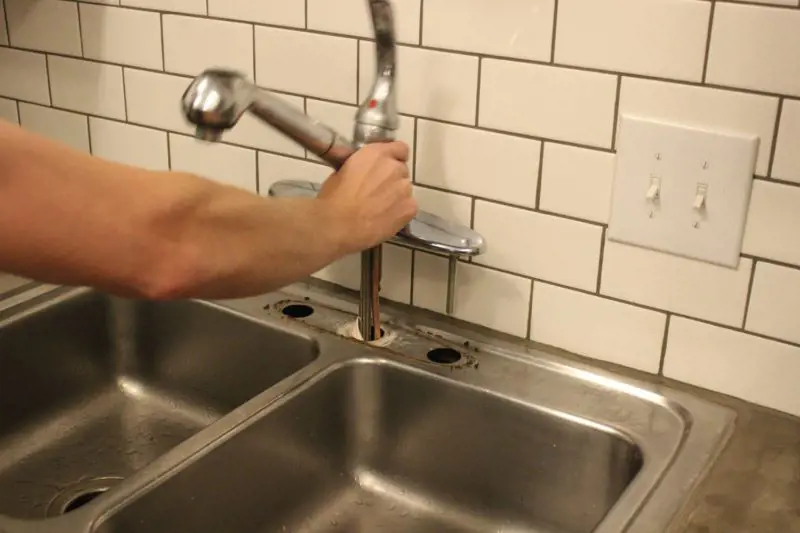
When it comes time to upgrade or replace your old faucet, it's important to know how to properly remove the existing one. The process involves several steps, including shutting off the water supply, disconnecting the water lines, loosening and removing the faucet, and removing any existing caulk or sealant. In this guide, we'll walk you through each of these steps to ensure a smooth and successful removal process.
Shutting off the Water Supply:
Before you begin any work on removing the old faucet, it's crucial to shut off the water supply. This prevents any accidental leaks or water damage during the process. Locate the shut-off valves under the sink and turn them clockwise to close them. To be extra safe, turn on the faucet to release any remaining water and ensure the supply is completely shut off.
Disconnecting the Water Lines:
Once the water supply is shut off, you can proceed to disconnect the water lines. Grab a pair of adjustable pliers and loosen the nuts connecting the water lines to the faucet. Carefully remove the nuts and set them aside. If the nuts are too tight or stuck, you may need to use a wrench or penetrating oil to help loosen them. Once the nuts are removed, gently pull the water lines away from the faucet.
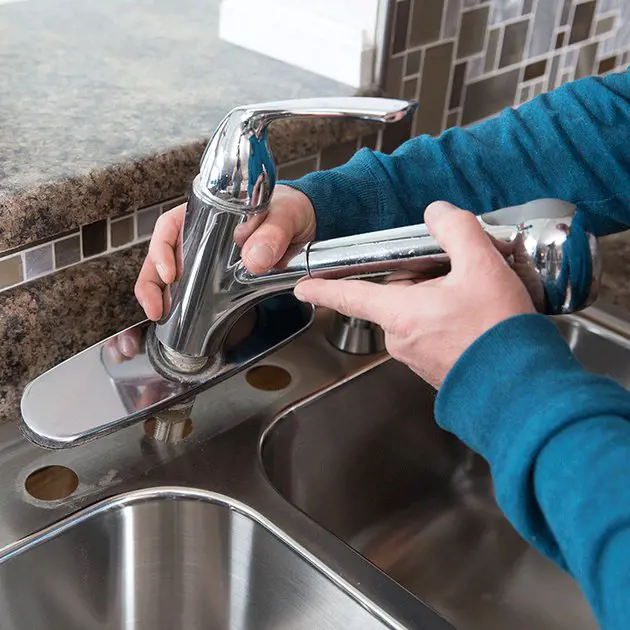
Loosening and Removing the Faucet:
With the water lines disconnected, it's time to loosen and remove the faucet itself. Depending on the type of faucet you have, this step may vary slightly. In general, you'll need a wrench or pliers to loosen the nuts or screws securing the faucet to the sink or countertop. Turn the nuts or screws counterclockwise to loosen them, and then carefully lift the faucet off the sink or countertop. Be gentle to avoid damaging the surrounding surface.
Removing any Existing Caulk or Sealant:
After removing the faucet, it's important to remove any existing caulk or sealant that was used to secure it. This will ensure a clean and smooth surface for installing the new faucet. Use a putty knife or scraper to carefully scrape away the old caulk or sealant. Be diligent in removing all traces of the old material, as any leftover residue can interfere with the installation of the new faucet.
By following these steps and taking the necessary precautions, you can easily remove the old faucet in preparation for installing a new one. Remember to always shut off the water supply before starting any work, and take your time to avoid damaging the surrounding surfaces. With patience and careful attention to detail, you'll have your old faucet removed in no time, ready to make way for an upgraded and improved plumbing fixture.
The Ultimate Guide to Moving a Kitchen Island with a Granite Countertop
You may want to see also
![]()
Installing the New Faucet
Before you can install a new faucet, it is important to properly prepare the sink or countertop for installation. This includes aligning the faucet holes, applying plumbers putty or silicone sealant, and ensuring the faucet is securely mounted. In this guide, we will walk you through each step of the installation process, so you can enjoy a secure and leak-free faucet in no time.
Aligning the Faucet Holes
Start by placing the faucet base on the sink or countertop, ensuring that it is centered and aligned with the mounting holes. Check the manufacturer's instructions to determine the proper spacing for your specific faucet model. Use a pencil or marker to mark the location of the holes on the surface.
Using the appropriate drill bit size (as specified by the manufacturer), carefully drill pilot holes at the marked locations. Take caution to not apply excessive force, as this can damage the sink or countertop material. Once the pilot holes are in place, use a larger drill bit to widen the holes to the proper size for your faucet.
Applying Plumbers Putty or Silicone Sealant
Next, apply a thin layer of plumbers putty or silicone sealant to the underside of the faucet base. This will help create a watertight seal between the faucet and the sink or countertop. Gently press the base onto the surface, aligning it with the drilled holes.
Mounting the Faucet
After ensuring the faucet is properly aligned, insert the mounting bolts or screws into the holes from below the sink or countertop. Depending on your specific faucet model, you may need to use a screwdriver or a wrench to secure the bolts or screws in place. Tighten them until the faucet feels firmly secured.
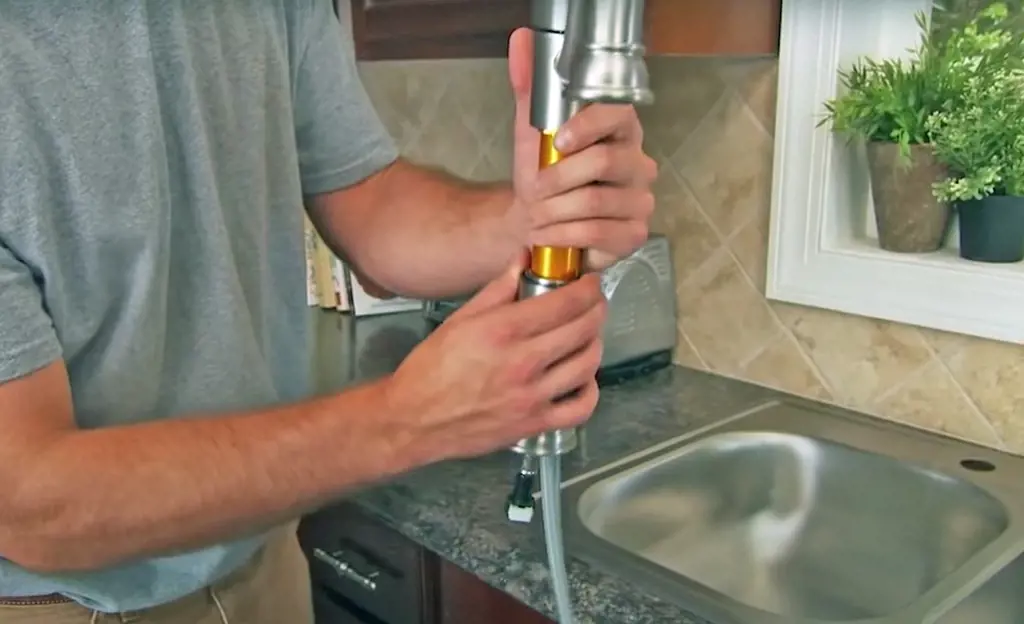
Inserting the Faucet through the Mounting Holes
Once the faucet is mounted, insert the faucet body through the mounting holes from above the sink or countertop. Make sure the faucet is properly aligned, and the spout is facing forward. If your faucet has adjustable handles, orient them in the desired position.
Securing the Faucet from Below the Sink
Underneath the sink or countertop, locate the washers or nuts provided with your faucet. Place the washers or nuts onto the mounting bolts or screws and hand-tighten them. Use a wrench to further tighten them until the faucet feels securely fastened. Take care not to overtighten, as this can damage the faucet or the sink.
Attaching the Water Lines
Connect the water supply lines to the corresponding hot and cold water valves underneath the sink. Use adjustable pliers or a wrench to tighten the connections, ensuring they are leak-free.
Checking for Leaks and Proper Operation
Before using your new faucet, turn on the water supply valves and check for any leaks around the connections and the base of the faucet. If you notice any leaks, tighten the connections further or apply plumber's tape to the threads.
Once you have verified that the connections are leak-free, turn on the faucet and check for proper operation. Make sure the water comes out evenly from both the hot and cold settings, and that the handle(s) operate smoothly.
In conclusion, by following these steps, you can successfully install a new faucet in your sink or countertop. Remember to always consult the manufacturer's instructions for any specific steps or requirements for your faucet model. With a properly installed faucet, you can enjoy a functional and aesthetically pleasing addition to your kitchen or bathroom.
Ensuring Compatibility: Exploring the Fit Between Kitchen Faucets and Water Supply Lines
You may want to see also
Frequently asked questions
To install a kitchen faucet, you will need a few tools. These may include an adjustable wrench, pliers, a screwdriver, plumber's tape, and a bucket or towel to catch any water that may leak during the installation process.
Installing a kitchen faucet does not typically require any special skills. However, basic knowledge of plumbing and some DIY experience may be helpful. It is important to carefully follow the instructions provided with the faucet and refer to any additional resources or videos that may be available to ensure a successful installation.
The time it takes to install a kitchen faucet can vary depending on the individual's experience and skill level, as well as the specific faucet being installed. On average, the installation process can typically be completed within 1-2 hours. However, additional time may be required if any complications or unforeseen issues arise during the installation. It is always recommended to set aside enough time to complete the installation without feeling rushed.