
When it comes to installing a new kitchen faucet, one of the crucial factors to consider is the size of the hole you need to drill for the installation. This may seem like a simple task, but choosing the wrong size could lead to a lot of frustration and potentially costly mistakes. So, let's dive into the world of kitchen faucet hole sizes and explore everything you need to know to ensure a smooth and successful installation.
| Characteristics | Values |
|---|---|
| Diameter of the hole | 1 3/8" |
| Depth of the hole | 1/2" |
| Distance between holes (center) | 4" |
| Type of drill bit required | Forstner |
| Material of the kitchen faucet | Stainless Steel |
| Finish of the kitchen faucet | Chrome |
| Number of holes required | 1 hole |
| Additional accessories needed | None |
What You'll Learn
![]()
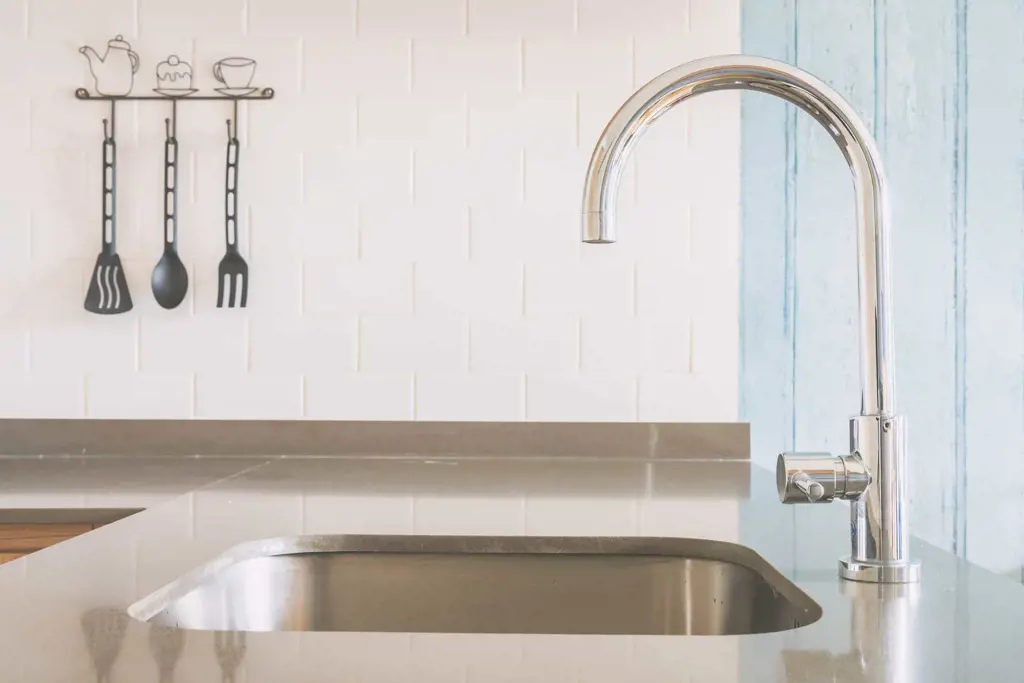
Size considerations for drilling a hole for a wood kitchen faucet
Measuring the faucet size:
When it comes to drilling a hole for a wood kitchen faucet, one of the first considerations is accurately measuring the faucet size. This is crucial in order to ensure a perfect fit and prevent any potential issues during the installation process. To measure the faucet size, you will need a few basic tools such as a tape measure and a pencil.
Start by measuring the width of the faucet base. This is the part that will be inserted through the hole in the wood. Place your tape measure at one end of the base and extend it to the other end, noting down the measurement. This will give you the width measurement, which is important for determining the appropriate hole size.
Next, measure the length of the faucet base by placing your tape measure at the back of the faucet and extending it to the front. Again, note down this measurement as it will be used in determining the appropriate hole size.
Determining the appropriate hole size for the faucet:
Once you have measured the faucet size, it's time to determine the appropriate hole size for drilling. This is a critical step to ensure a secure fit and prevent any potential leaks or wobbling.
To determine the appropriate hole size, it's important to consider the overall size of the faucet as well as any additional components that may come with it. For example, if you have a single-handle faucet, you will need to accommodate the handle as well.
Start by adding a safety margin to the measurements you took earlier. This will ensure that the hole is slightly larger than the faucet, allowing for easy installation. A good rule of thumb is to add at least 1/4 inch to both the width and length measurements.
Once you have the adjusted measurements, choose a drill bit that matches the size. For example, if the adjusted width measurement is 2 inches, you will need a 2-inch drill bit. It's important to use a high-quality drill bit that is suitable for drilling through wood.
Before drilling the hole, it's a good idea to mark the center point using a pencil based on your adjusted measurements. This will guide you and ensure that the hole is drilled in the right place.
Finally, use a steady and controlled motion to drill the hole. Make sure to keep the drill perpendicular to the wood surface and avoid applying excessive force that may cause splintering or damage to the wood. Take your time and use a gentle, steady pressure until the hole is drilled completely.
By accurately measuring the faucet size and determining the appropriate hole size, you can ensure a seamless installation that will provide a secure and reliable connection for your wood kitchen faucet. Don't rush through this process as it can greatly affect the overall functionality and appearance of your faucet.
How to Properly Tighten a Kitchen Faucet in a Deep Sink
You may want to see also
![]()
Tools and materials needed for drilling the hole
Drilling a hole may seem like a simple task, but it requires the right tools and materials to ensure a successful outcome. One of the essential tools you need is a drill with various bit sizes. This will allow you to choose the appropriate size for your specific project.
The bit size you choose will depend on the diameter of the hole you want to drill. For example, if you need a small hole for a screw, you can use a 1/8-inch bit. On the other hand, if you're drilling a larger hole for a pipe, you'll need a bit with a larger diameter.
When selecting the right bit for your project, it's also important to consider the material you are drilling into. Different materials, such as wood, metal, or concrete, require different types of bits. Ensure that you have the appropriate bit for the material you're working with to prevent any damage or inefficiency.
Another tool you'll need is a tape measure or ruler to accurately measure the location and size of the hole. This will ensure that you drill in the right spot and achieve the desired size. Take precise measurements and mark the spot with a pencil or marker, so you have a clear reference point during the drilling process.
Next, you'll need a pencil or marker to mark the drilling spot. This is essential for ensuring accuracy, especially if you're drilling multiple holes. Marking the spot will help you maintain a consistent distance between holes and avoid any unwanted mistakes.
Once you have all the necessary tools and materials, it's time to start drilling. Begin by inserting the appropriate bit into the drill, making sure it is securely in place. Then, position the drill over the marked spot and apply gentle pressure to start the drilling process.
As you drill, it's important to use a steady and controlled motion. Avoid applying excessive force, as this can lead to the bit getting stuck or breaking. Instead, let the drill do the work for you, allowing the bit to cut through the material gradually. This will ensure a clean and precise hole.
Remember to periodically remove the bit from the hole to clear any debris or dust that may accumulate. This will prevent the bit from getting clogged and ensure optimal drilling performance. You can use a shop vacuum or a blowout bulb to clean out the hole.
Once you have successfully drilled the hole, check its size and depth to ensure it meets your requirements. If necessary, you can use a file or sandpaper to smooth out any rough edges or adjust the size of the hole.
In conclusion, drilling a hole requires the right tools and materials. Make sure you have a drill with various bit sizes, a tape measure or ruler, and a pencil or marker. Follow the proper drilling techniques and use a steady, controlled motion to achieve accurate and clean holes. With the right tools and careful execution, you'll be able to drill holes for various projects with ease.
The Ultimate Guide to Unclog a Delta Spray Kitchen Faucet
You may want to see also
![]()
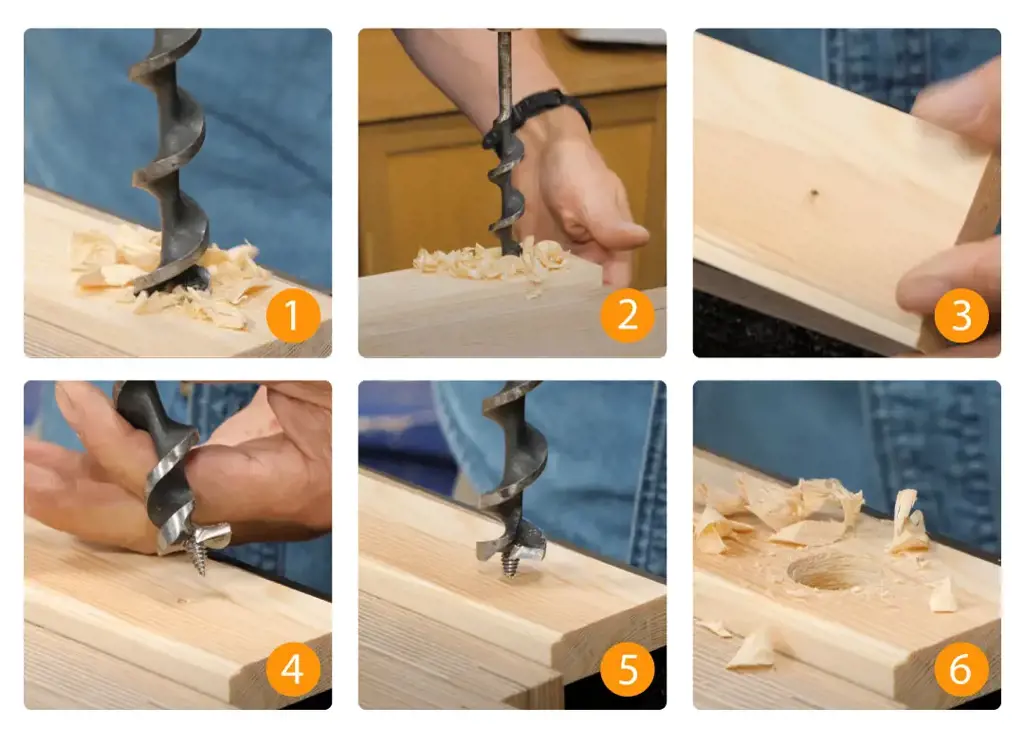
Step-by-step guide for drilling the hole
A Step-by-step Guide for Drilling the Hole
Drilling a hole in wood may seem like a simple task, but it requires proper technique and attention to detail to ensure the desired outcome. In this step-by-step guide, we will walk you through the process of drilling a hole in wood, from marking the desired location to removing any wood debris. Let's get started!
Marking the desired location on the wood surface:
Before you begin drilling, it is crucial to mark the exact location where you want the hole. Use a pencil or a marking tool to make a clear and visible mark on the wood surface. Take your time in getting the positioning right as any inaccuracies could affect the final result.
Selecting the appropriate drill bit size:
Choosing the right drill bit size is crucial for the success of your project. The size of the hole you want to drill will determine the size of the drill bit you need. Measure the diameter of the object you want to insert into the hole and select a drill bit that matches that size. If you are uncertain about the right size, it is better to opt for a slightly smaller drill bit and gradually enlarge the hole if needed.
Preparing the drill and securing the wood:
Ensure that your drill is appropriately set up and ready for use. Insert the selected drill bit securely into the chuck of the drill and tighten it with a chuck key, if necessary. Place the wood securely on a stable surface, such as a workbench or sawhorses, to prevent it from wobbling or moving during the drilling process.
Drilling the hole in the wood:
Hold the drill firmly with both hands and position the drill bit tip on the marked location. Apply gentle forward pressure and activate the drill at a slow speed. Maintain a steady and controlled motion as the drill bit advances into the wood. Be cautious not to push too hard, as excessive force can cause the drill bit to slip or damage the wood. Continue drilling until the desired depth has been reached.
Removing any wood debris:
Once the hole has been drilled, it is essential to remove any wood debris to ensure a clean and smooth finish. Blow or brush away any sawdust or wood chips that may have accumulated around the hole. You can use compressed air, a soft brush, or even a vacuum cleaner to clear away the debris effectively.
Remember to take breaks if needed, especially if you are drilling multiple holes or working on a large project. It's important to work at your own pace and prioritize your safety.
By following this step-by-step guide for drilling a hole in wood, you can achieve precise and professional results. Remember to always use appropriate safety equipment, such as safety goggles or gloves, and follow all safety guidelines provided by the drill manufacturer. Happy drilling!
Exploring the Uses and Benefits of the Moen Kitchen Faucet Hose Kit 150259
You may want to see also
![]()
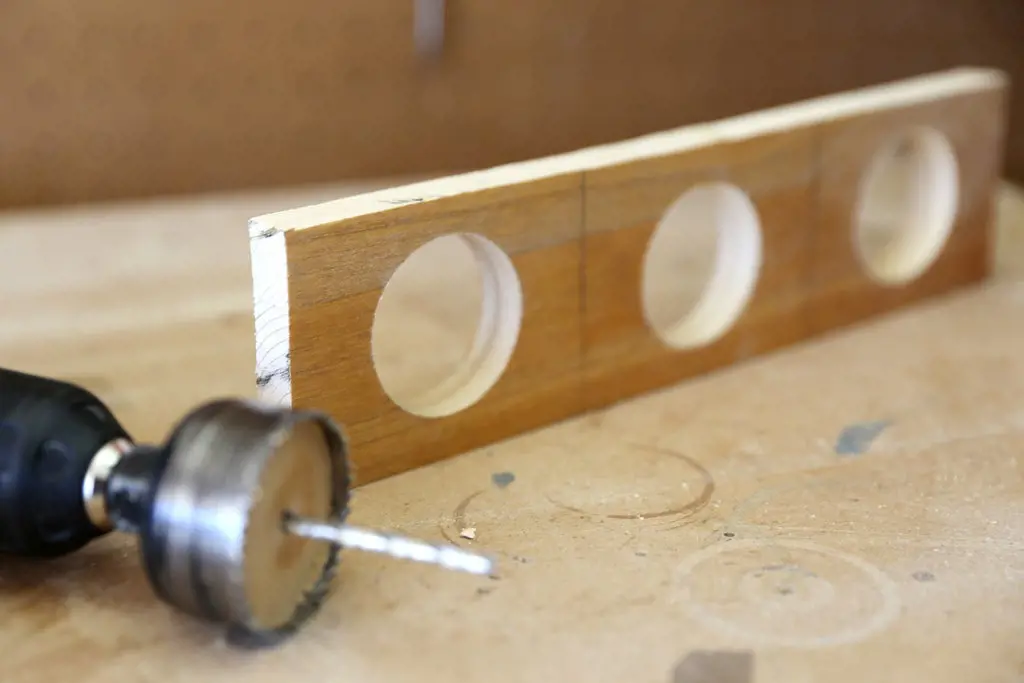
Testing and adjusting the hole size, if necessary
One crucial aspect of installing a faucet is ensuring that it fits perfectly in the hole you have prepared. The size of the hole can vary depending on the type and model of the faucet you are installing. To ensure a proper fit, it is important to thoroughly check the fit of the faucet in the hole, make necessary adjustments if the hole is too small or too large, and consider redrilling or filling the hole if needed.
Checking the Fit of the Faucet in the Hole:
Before making any adjustments, start by simply placing the faucet into the hole you have prepared. Check if the faucet fits snugly into the hole. Ideally, the faucet should sit securely in the hole without any wobbling or gaps.
Take into consideration the size and shape of the hole, as well as the dimensions of the faucet. If the faucet fits perfectly in the hole, you can move on to further installation steps. However, if there are any issues with the fit, you may need to make adjustments to ensure a proper installation.
Making Adjustments if the Hole is Too Small or Too Large:
If the faucet does not fit into the hole or if there are significant gaps around the edges, you will need to make some adjustments. If the hole is too small, you have a couple of options available.
One option is to enlarge the hole using a drill. Start by using a smaller drill bit and gradually work your way up to the desired size. Take caution when enlarging the hole to avoid damaging surrounding materials or making the hole too large.
In some cases, the issue may be that the hole is too large for the faucet. If that is the case, you can use a retrofit plate or an escutcheon plate to cover up any gaps. These plates are designed to fit over the hole and cover any excess space, providing a seamless and secure installation.
Redrilling or Filling the Hole, If Needed:
In rare instances, you may find that the hole size is completely incompatible with the faucet you are installing. In these situations, you may need to consider redrilling or filling the hole to ensure a proper fit.
If you need to redrill the hole, be sure to measure accurately and mark the new location before drilling. Use appropriate tools and techniques to create a clean and precise hole that matches the requirements of your faucet.
On the other hand, if the hole is too large, filling it may be a suitable solution. There are different filling options available, such as using epoxy or putty designed for repairing holes. Follow the instructions provided by the manufacturer and fill the hole accordingly. Once the filling is dry and hardened, you can proceed with installing the faucet securely.
Remember, it is crucial to ensure a proper fit of the faucet in the hole to prevent any leakage or instability. Take your time to check the fit, make necessary adjustments, and consider redrilling or filling the hole if needed. By doing so, you will ensure a successful installation and enjoy a properly functioning faucet in your space.
How to Use Caulking for Your Kitchen Faucet: A Step-By-Step Guide
You may want to see also
Frequently asked questions
For a standard wood kitchen faucet, you will typically need to drill a hole with a diameter of 1 3/8 inches. This is the most common size for a standard kitchen faucet and will accommodate the majority of available models.
In some cases, you may be able to use a larger hole for your wood kitchen faucet. However, it is important to check the specifications of your specific faucet model to ensure compatibility. Some faucets may require an adapter or larger base plate to cover the larger hole, so it is important to verify the requirements before drilling.
Using a smaller hole for your wood kitchen faucet is generally not recommended. Most faucets are designed to fit a specific hole size, and using a smaller hole may result in an improper fit or leaky installation. It is best to adhere to the manufacturer's recommended hole size for your specific faucet model.
Yes, there are standard sizes for wood kitchen faucet holes. The most common standard size is 1 3/8 inches in diameter, but there are also some faucets that require a 1 1/2-inch diameter hole. It is always a good idea to check the specifications provided by the faucet manufacturer to ensure you drill the correct size hole for your specific model.
Yes, you can use a hole saw to drill the hole for your wood kitchen faucet. Hole saws are a commonly used tool for cutting larger diameter holes in wood. Just make sure to use a hole saw that is the appropriate size for your faucet's hole requirements and follow proper safety precautions when using power tools.