
Installing a kitchen faucet is not just a practical task but also an opportunity to enhance the overall aesthetic and functionality of your kitchen. The right faucet can make a bold statement or seamlessly blend into your kitchen's design. Whether you're renovating your kitchen or simply looking to upgrade your current faucet, it's essential to consider the best possible location for installation. By strategically selecting the placement of your kitchen faucet, you can maximize convenience, optimize workflow, and add a touch of elegance to your culinary space.
| Characteristics | Values |
|---|---|
| Mounting Style | Deck Mount, Wall Mount |
| Faucet Type | Single Handle, Double Handle, Pull-Out, Pull-Down, Touchless |
| Spout Height | Low, Medium, High |
| Spout Reach | Short, Medium, Long |
| Number of Holes | 1, 2, 3, 4 |
| Handle Style | Lever, Cross, Knob |
| Finish | Chrome, Stainless Steel, Brass, Nickel, Matte Black |
| Water Flow | Standard Flow, High Flow |
| Installation Method | DIY, Professional |
| Additional Features | Soap Dispenser, Filter, Water Saving, Temperature Indicator, Sprayer Included, Magnetic Docking |
What You'll Learn
![]()
Determine the Ideal Placement for Your Kitchen Faucet
When it comes to designing your kitchen, one of the key decisions you'll need to make is the placement of your faucet. The location of your kitchen faucet can greatly affect the functionality and aesthetics of your space, so it's important to give it careful thought.
There are some general guidelines that can help you determine the ideal placement for your kitchen faucet. Firstly, it's recommended to center the faucet with the sink. This ensures that the water flow is directly over the drain, minimizing the chances of water spilling onto your countertop. Additionally, it provides a visually balanced look, creating a sense of harmony in your kitchen design.
Another guideline to consider is the height of your faucet. The general rule of thumb is to install the faucet at a height that allows you to comfortably fit pots and pans underneath it. This is particularly important if you have a deep sink or if you frequently cook with large cookware. You'll want to avoid a faucet that is too low, as it can hinder your ability to wash larger items.
When choosing a location for your kitchen faucet, there are several factors to consider. The first factor is the proximity to other fixtures and appliances. You'll want to ensure that there is enough space between your faucet and any adjacent walls or cabinets to allow for easy operation. Similarly, you'll want to avoid placing the faucet too close to a stovetop or oven, as the heat can potentially damage the faucet over time.
Another factor to consider is your personal preference and kitchen workflow. Think about how you typically use your sink and where you tend to stand when doing dishes or preparing food. Placing the faucet in a location that aligns with your natural movements can make your kitchen experience more comfortable and efficient.
Additionally, consider the overall aesthetic of your kitchen. The faucet is often a focal point in the space, so its placement should enhance the overall design. It's important to choose a location that complements the style and finishes of your cabinets, countertops, and other fixtures. For example, if you have a large, statement sink, you may want to place the faucet in a prominent position to draw attention to it.
In conclusion, determining the ideal placement for your kitchen faucet requires careful consideration of several factors. By following general guidelines and considering your personal preferences and kitchen workflow, you can ensure that your faucet is both functional and aesthetically pleasing in your kitchen design.
A Comprehensive Guide to Kitchen Pull Down Faucets Standing at About 12 Inches High
You may want to see also
![]()
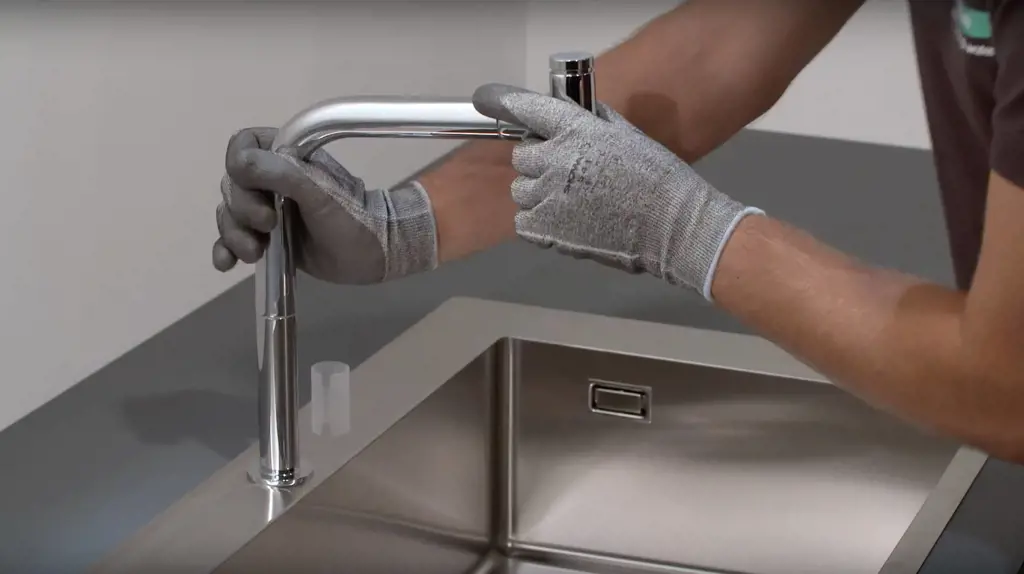
Installing the Kitchen Faucet on the Sink
When it comes to installing a new kitchen faucet on your sink, it may seem like a daunting task. However, with the right tools and step-by-step instructions, you can easily complete the installation process yourself. In this blog post, we will guide you through the process of mounting the faucet on the sink deck and connecting the water supply lines. So let's get started!
Mounting the Faucet on the Sink Deck
- Start by assembling the faucet according to the manufacturer's instructions. This typically involves attaching the handles, spout, and any other components included with the faucet.
- Once the faucet is assembled, place it on the sink deck in the desired location. Make sure the mounting holes on the sink align with the holes on the faucet.
- Use a wrench or a pair of pliers to tighten the mounting nuts underneath the sink. This will secure the faucet in place. Be careful not to overtighten, as this can damage the sink or the faucet.
- Once the faucet is securely mounted, check for any leaks around the base of the faucet. Tighten the mounting nuts further if necessary to eliminate any leaks.
Connecting the Water Supply Lines
- Before connecting the water supply lines, turn off the water supply to the sink. This can usually be done by turning off the main water valve for your house or by shutting off the specific valve for the sink.
- Locate the hot and cold water supply lines under the sink. These are usually marked with red or blue indicators. If not, you can trace the lines from the faucet handles to the underneath of the sink.
- Connect the hot and cold water supply lines to the corresponding ports on the faucet. Typically, this involves screwing the lines onto the threaded fittings on the faucet. Use adjustable wrenches to securely tighten the connections, but avoid overtightening.
- Once the water supply lines are connected, double-check all the connections for any leaks. Turn on the water supply and let the water run for a few minutes to check for any drips or leaks.
- If there are no leaks, you can now test the faucet by turning on the handles and adjusting the water temperature. Make sure the water flows smoothly and there are no unusual noises or vibrations.
With these instructions, you should be able to successfully install your new kitchen faucet on the sink. Just remember to read and follow the manufacturer's instructions that come with your faucet, as they may have specific guidelines for your particular model. And as always, if you feel uncomfortable or unsure about any part of the installation process, it's best to seek professional help. Happy faucet installation!
Tips for Thawing a Kitchen Faucet in Cold Weather
You may want to see also
![]()
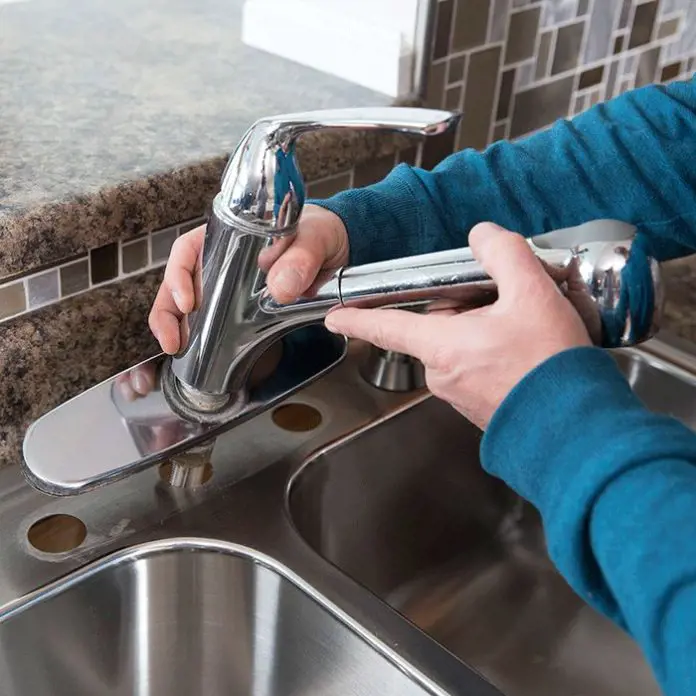
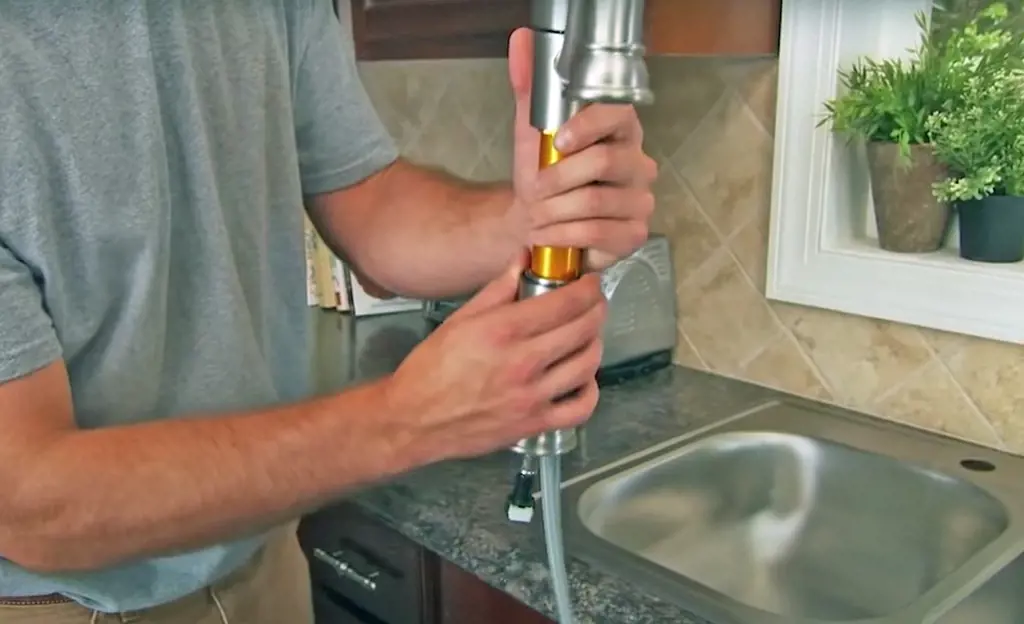
Installing the Kitchen Faucet on the Countertop
When installing a new kitchen faucet, it's important to properly prepare the countertop and securely secure the faucet to ensure it stays in place and functions correctly. Follow these steps to properly install your kitchen faucet on the countertop.
Preparing the Countertop for Faucet Installation:
- Turn off the water supply: Before you begin any plumbing work, it's important to turn off the water supply to avoid any potential leaks or accidents.
- Remove the old faucet: If you're replacing an old faucet, start by removing it. Use a wrench to disconnect the water supply lines from the faucet, and then remove the mounting nuts that secure the faucet to the countertop. Once the old faucet is removed, clean the area thoroughly and ensure there are no debris or sealant left behind.
- Measure and mark the mounting holes: Carefully measure and mark the exact locations where the faucet mounting holes will be drilled on the countertop. These holes should align with the pre-drilled holes on the faucet base or the mounting plate. Use a pencil or a marker to make accurate marks on the countertop.
- Drill the mounting holes: Using a drill and an appropriate-sized drill bit, carefully drill the marked mounting holes on the countertop. Make sure to drill straight and avoid applying excessive force, as this may damage the countertop material.
Securing the Faucet to the Countertop:
- Apply plumber's putty: Take a small amount of plumber's putty and roll it into a rope shape. Place the putty around the bottom of the faucet base or the mounting plate. The putty will help create a watertight seal and prevent any leaks around the faucet.
- Insert the faucet through the mounting holes: Carefully insert the faucet through the drilled mounting holes on the countertop. Ensure that the hot and cold water supply lines are properly aligned and facing the correct direction.
- Secure the faucet: Once the faucet is in place, secure it to the countertop by tightening the mounting nuts from underneath. Use a wrench to tighten the nuts evenly, alternating between them to ensure a secure and stable installation. Avoid overtightening, as this may damage the faucet or the countertop.
- Connect the water supply lines: Once the faucet is securely in place, connect the hot and cold water supply lines to the corresponding water supply valves. Use a wrench to tighten the connections, but again, avoid overtightening.
- Turn on the water supply: Double-check that all connections are secure, and then slowly turn on the water supply valves. Check for any leaks around the faucet base or the water supply connections. If you notice any leaks, tighten the connections further or replace any faulty parts as necessary.
Following these steps will ensure a proper and secure installation of your kitchen faucet on the countertop. Remember to take your time and follow the manufacturer's instructions specific to your faucet model for the best results.
How to Tighten a Danze Kitchen Faucet for Improved Functionality
You may want to see also
![]()
Considerations for Wall-Mounted Kitchen Faucets
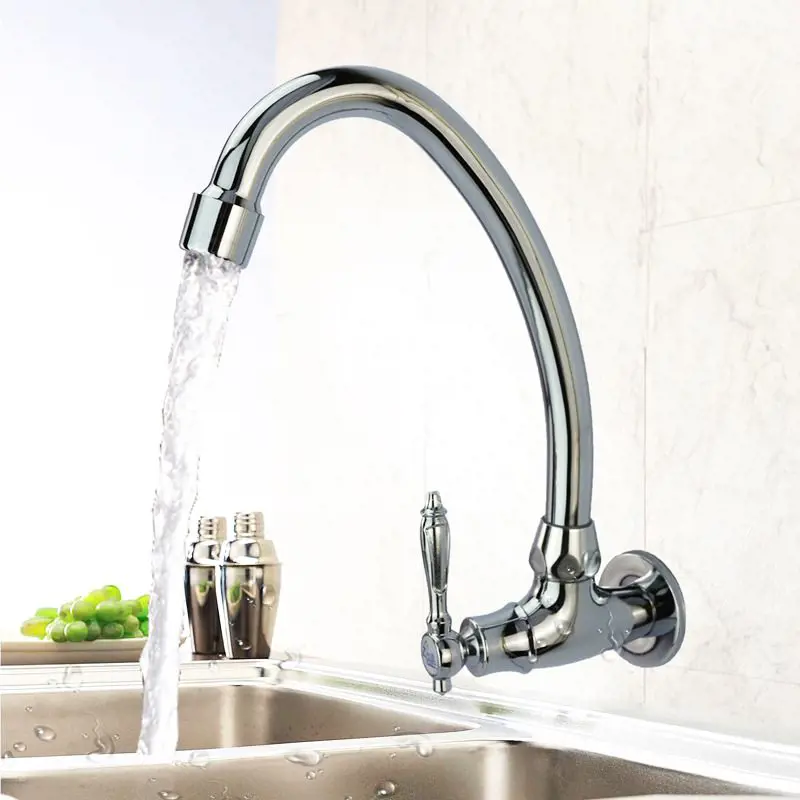
When it comes to wall-mounted kitchen faucets, there are a few important considerations to keep in mind. Two key aspects you'll need to pay attention to are mounting the faucet on the wall and connecting the plumbing to the faucet. In this blog post, we'll delve into these aspects and provide you with a step-by-step guide to ensure a successful installation.
Mounting the Faucet on the Wall:
- Choose the Right Location: Before you start installing your wall-mounted kitchen faucet, carefully choose the location where you want it to be installed. Consider the height of the faucet, the distance from other fixtures or cabinets, and the ease of access. It's essential to position the faucet at a comfortable height for everyday use.
- Locate Studs or Use a Wall Mounting Plate: Once you have determined the ideal location, use a stud finder to locate the studs in the wall. Wall-mounted faucets require proper support, and mounting them directly to the studs ensures stability. If studs are not present in the desired location, you can use a wall mounting plate that can be securely attached to the wall.
- Mark the Mounting Holes: Once you have located the studs or chosen to use a wall mounting plate, mark the mounting holes on the wall. Place the faucet against the wall and use a pencil or marker to mark the exact spots where the mounting holes will go.
- Drill the Mounting Holes: With the mounting hole locations marked, use an appropriate drill bit to create holes in the wall. Make sure the drill bit matches the size of the wall anchors or screws provided with your faucet. If you're using a wall mounting plate, drill corresponding holes in the plate as well.
- Install Wall Anchors or Screws: Insert wall anchors into the drilled holes if required. These anchors provide extra support and help secure the faucet to the wall. Alternatively, you can use screws directly if the wall material is sturdy enough. Be sure to follow the manufacturer's instructions for installing wall anchors or screws correctly.
- Attach the Faucet to the Wall: Once the wall anchors or screws are in place, carefully align the faucet's mounting holes with the holes in the wall or wall mounting plate. Use the provided screws to secure the faucet in place. Make sure the faucet is level and tightly secured to prevent any wobbling or leaks.
Connecting the Plumbing to the Faucet:
- Shut off the Water Supply: Before you begin connecting the plumbing, shut off the water supply to avoid any water leakage. Locate the water shut-off valves under your sink and turn them clockwise until they are fully closed.
- Connect the Water Supply Lines: Most wall-mounted kitchen faucets come with flexible water supply lines that need to be connected to the plumbing. Position the faucet's water supply lines through the mounting hole or wall plate and attach them to the corresponding hot and cold water supply valves under the sink. Tighten the connections using adjustable wrenches. Be sure to follow the manufacturer's instructions for proper installation.
- Check for Leaks: Once the connections are secure, turn on the water supply valves and check for any leaks. It's important to verify that all connections are tightly sealed and that water flows evenly through the faucet.
- Test the Faucet: Finally, turn on the faucet and test the hot and cold water to ensure proper functionality. Check for any leaks or dripping. Adjust the water flow and temperature as desired before completing the installation.
By following these detailed instructions for mounting the faucet on the wall and connecting the plumbing, you can successfully install a wall-mounted kitchen faucet in your home. Remember to always consult the manufacturer's instructions specific to your faucet model for the best results, and if you're unsure or uncomfortable with the installation process, it's always recommended to hire a professional plumber.
Removing a Kitchen Island in a Mobile Home: Your Step-by-Step Guide
You may want to see also
Frequently asked questions
The best place to install a kitchen faucet is directly above the sink. This allows for easy access to water while washing dishes or preparing food. It is also important to consider the height of the faucet, as it should be installed at a height that is comfortable for you to use.
Yes, a kitchen faucet can be installed on a kitchen island, but it requires additional plumbing work. The plumbing lines will need to be run to the island, which may involve cutting into the floor or installing the lines through the cabinets. It is important to consult with a professional plumber to ensure the installation is done properly and meets local building codes.
Yes, a kitchen faucet can be installed on a wall. This is often done in kitchens with farmhouse sinks or if you prefer a more unique and modern look. The wall where the faucet will be installed needs to be structurally sound and able to support the weight of the faucet and water pressure. The plumbing lines will need to be properly installed behind the wall, so it is best to hire a professional plumber for this type of installation.
Yes, a kitchen faucet can be installed in a window, but it requires special considerations. A window-mounted faucet is typically installed on the window frame or ledge, and the plumbing lines are routed through the wall or window frame. It is important to ensure that the window is properly sealed to prevent water leaks. This type of installation may not be feasible for all kitchen layouts, so it is best to consult with a professional plumber to determine if it is possible in your kitchen.